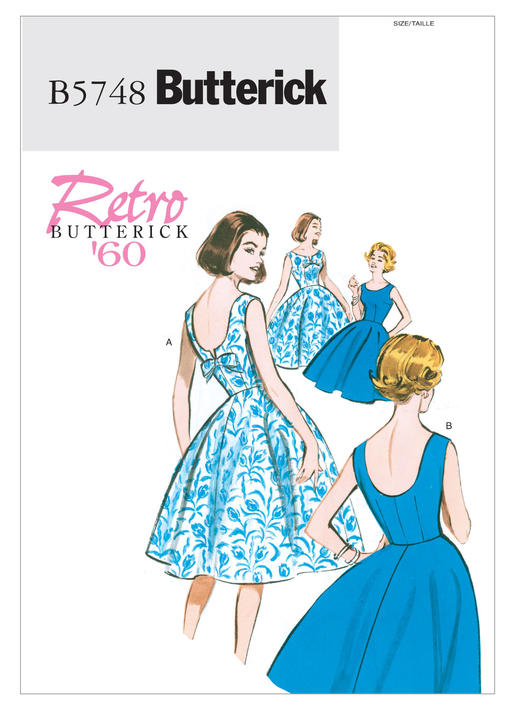
Today’s topic will be my favorite dress pattern of all time– Butterick B5748, a retro ’60s reprint. (I know this isn’t cosplay, but as I prepare to make my 3rd and 4th iterations of this pattern I thought I should write at least a little bit about it!)
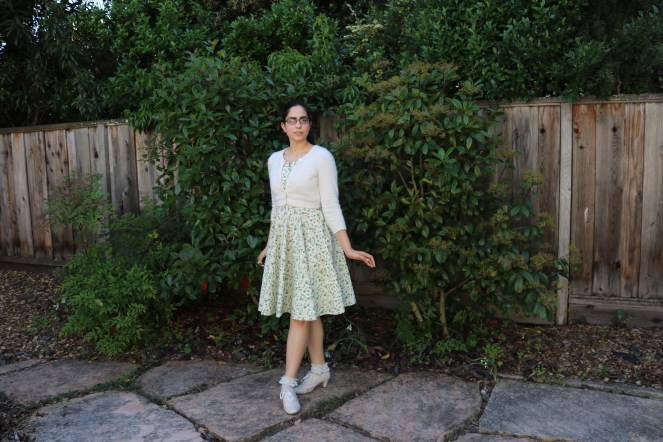
It’s a straightforward pattern, with a darted bodice, basic circle skirt, and option of a notched neckline and bows in the front and back. However, the fit is beautiful– it is the only pattern that has fit me straight out of the package so far!– and the proportions are very flattering. The deep scoop back is particularly attractive, and lends a touch of interest to such a simple dress!
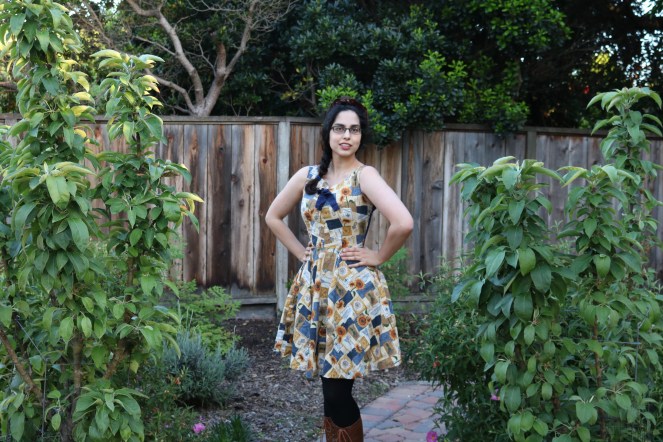
This first version is made of a super pretty quilting cotton from JoAnn, purchased when I worked there. There wasn’t enough on the bolt, so the back of the bodice is solid dark blue, but it ended up looking quite nice anyways! I am wearing it over a corset, since I love the vintage shape it gives me, and if I weren’t a terribly lazy person I would also have made a petticoat to take advantage of the full skirt.
Cardigan: Nordstrom
Corset: Orchard Corset
Tights: Hue
Boots: Modcloth
Beret: Vintage
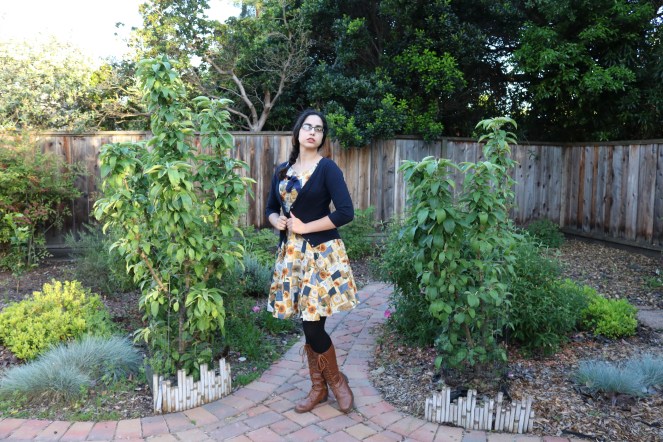
This second look is more appropriate office styling– please forgive my total lack of cosmetics, I shot this after work and I was in such a rush to take advantage of the last vestiges of natural light that I completely skipped the makeup. I only look a little dead.
Blazer: Thrifted
Heels: Modcloth
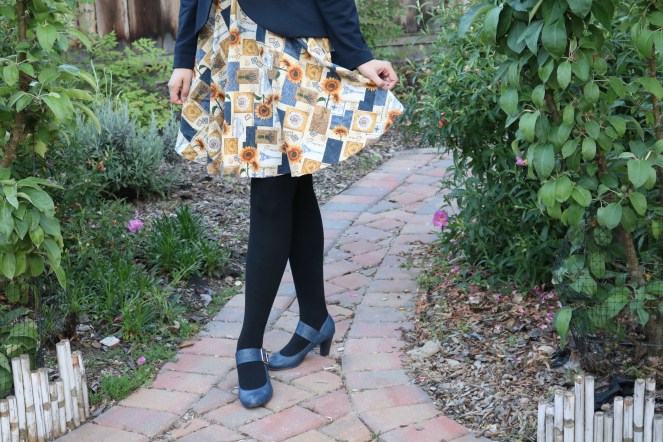
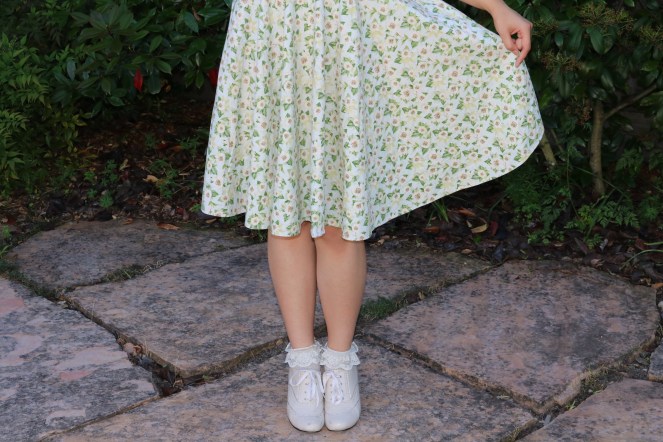
This last look actually features the first dress I ever made from this pattern! It’s really more of a wearable muslin, as I took a lot of shortcuts and the zipper installation is nothing short of absolutely dreadful. It’s also made of quilting cotton– I swear my next version will be something else!– which was about $3/yard. Clearance sections are incredible.
Forgive the poor quality and strange poses… This was my first time attempting a self shoot, I was using a terrible remote with no timer, and I couldn’t figure out how to stop the flash from going off!
This really shows off the deep back! And the slight rash from my itchy wool cardigan…Cardigan: Vintage
Shoes: Modcloth
And a bonus shot I took of my little sister. She came out to see what I was doing since I was shooting right outside her window and making all sorts of weird noises when I couldn’t get the camera to focus. :’D
I hope everyone tries this pattern in the future! It’s simple, lovely, and appropriate for pretty much any occasion depending on the kind of fabric you make it up in.
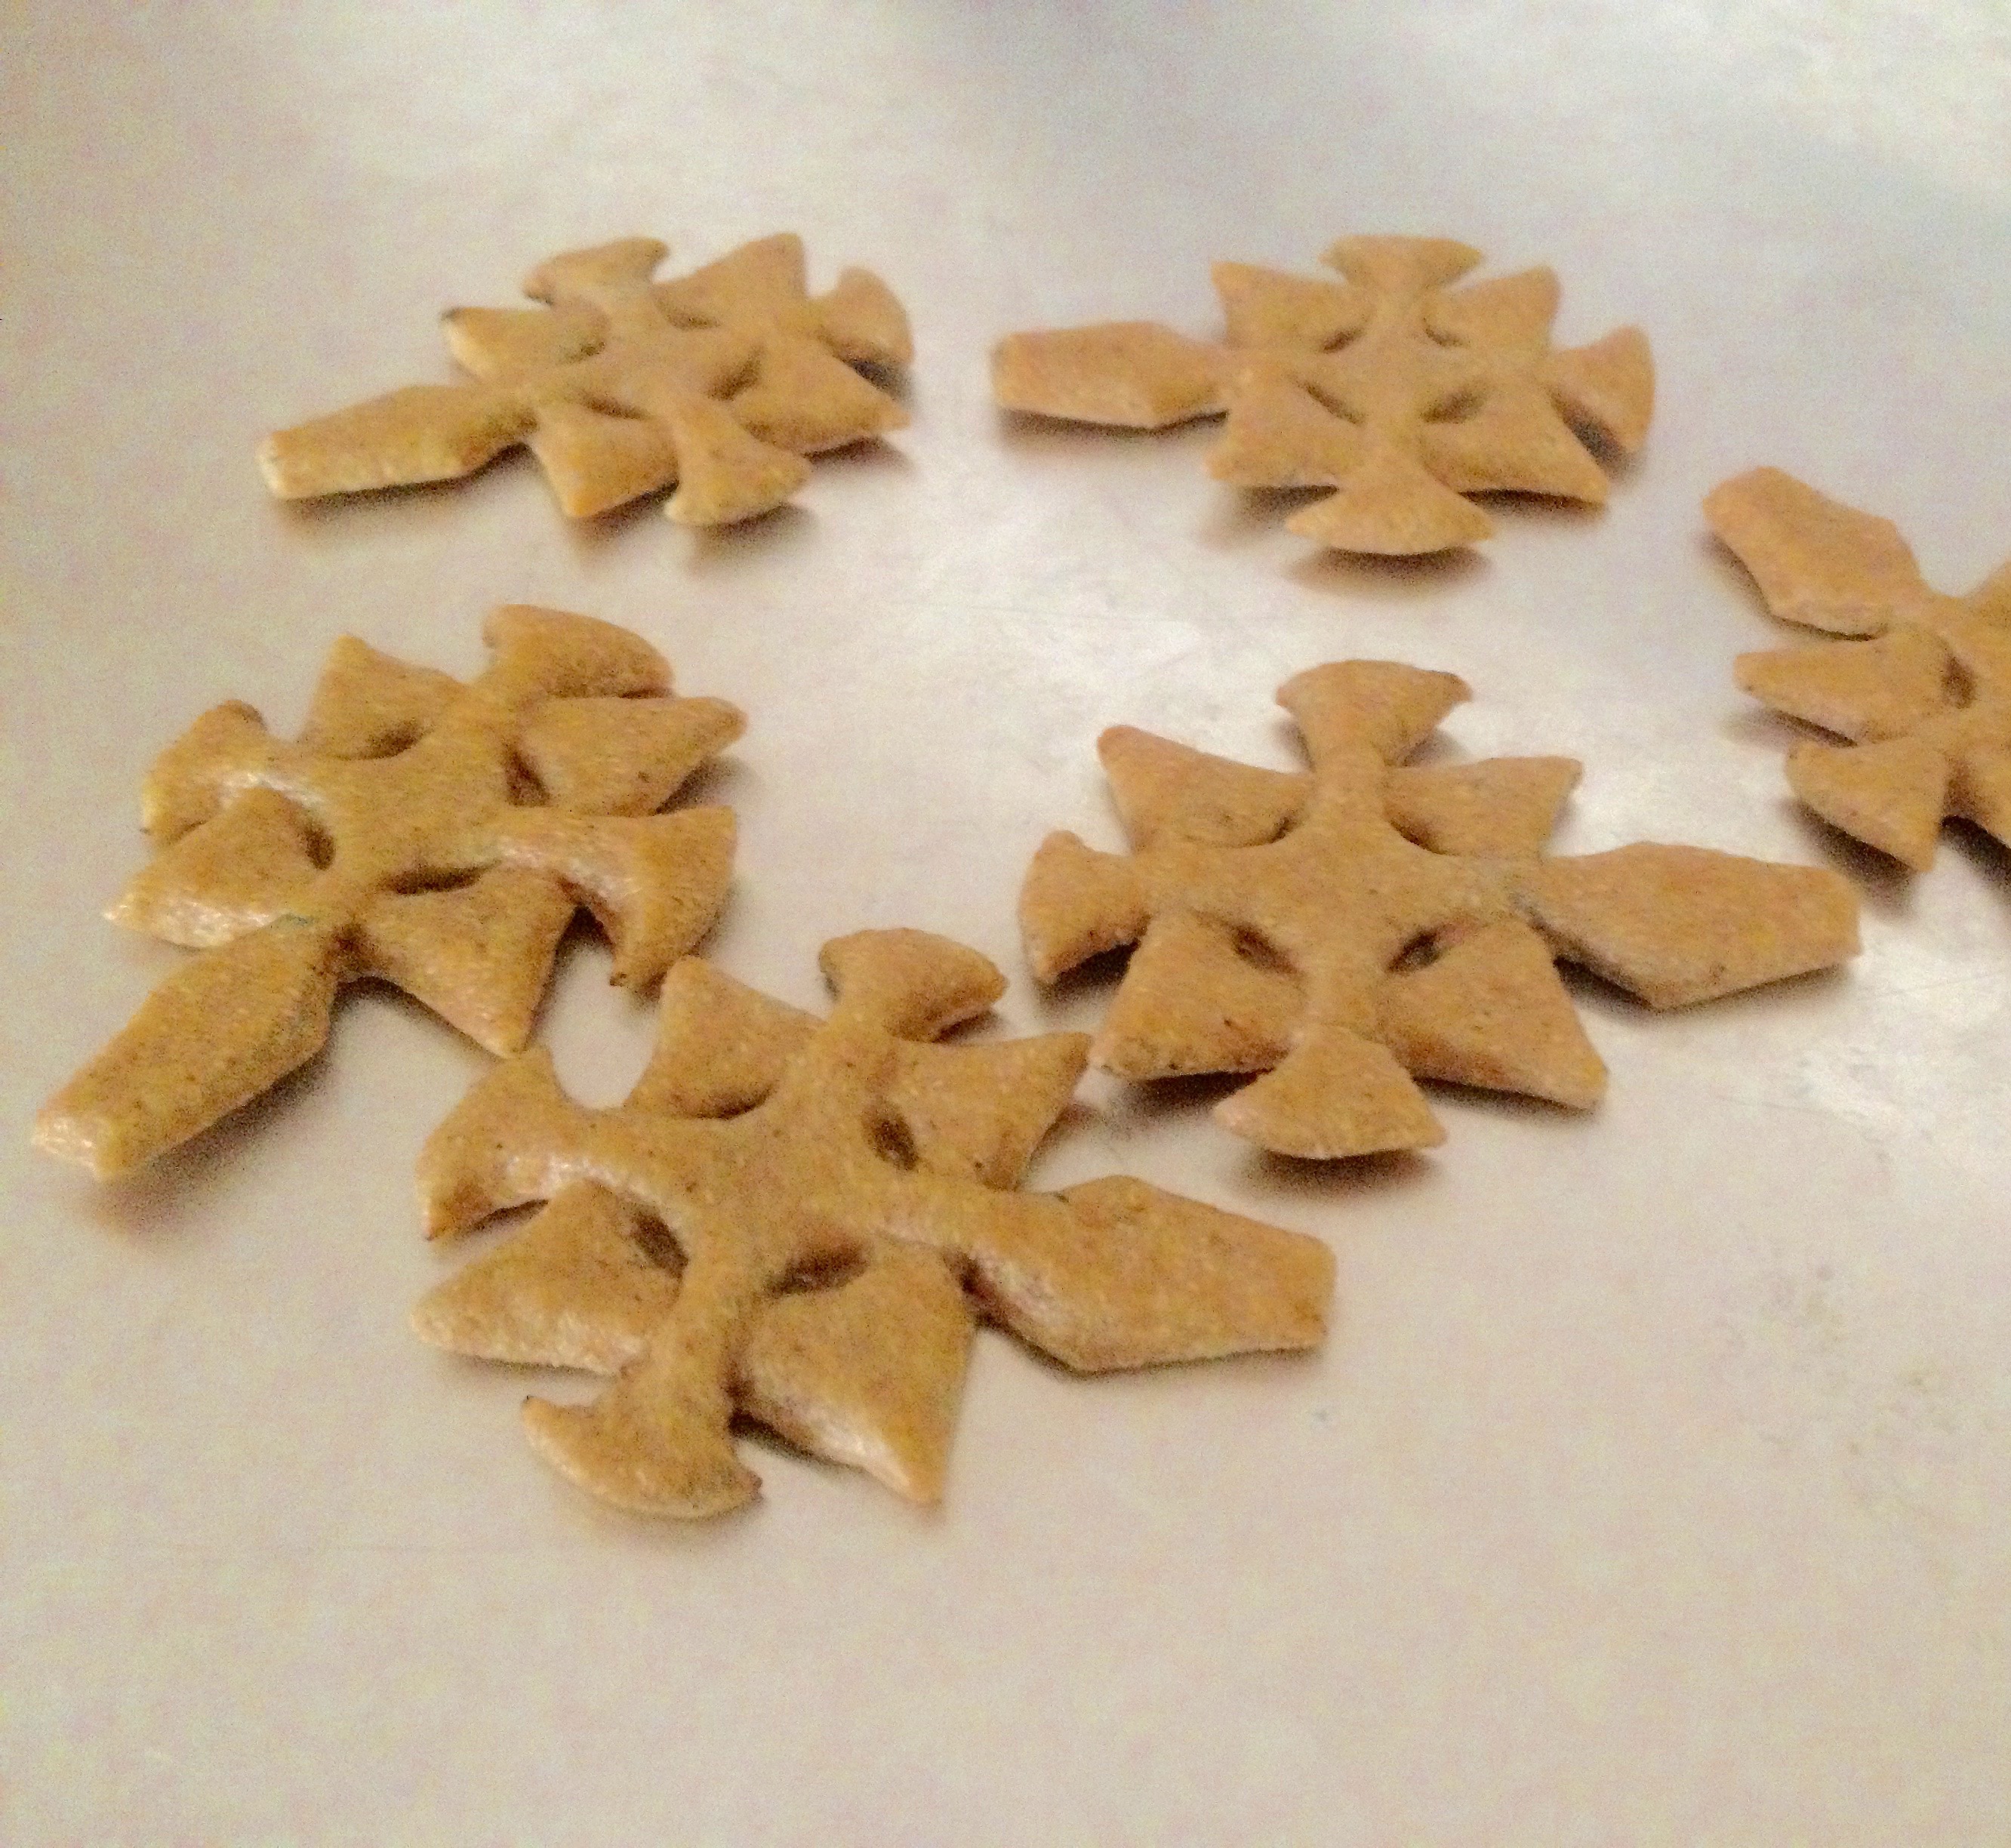
Today I thought I’d write up a quick little Pokemon tag. I’ve been in more of a video game mood than usual, which can perhaps be attributed to the stress of my new 9-5 job. 😛 While eagerly awaiting more news on Pokemon Sun and Moon and Pokemon Go I’ve been replaying Platinum– and catching up on the XY and XYZ series. I’m honestly charmed! Serena is actually a delightful heroine (which is refreshing after the spate of irritating and one-sided sidekicks we’ve been inundated with over the past several years). The Pokemon contest episodes, and Serena’s character arc in general, ended up being one of my favorite parts of the series.
Favorite Pokemon
My taste in Pokemon was once wide and varied. Alas, no more– a specific Pokemon type has stolen my heart! The first one listed is not that type, but its appearance should give you a hint. 😉
Audino
Audino is just so CUTE. I’m an absolute sucker for the pink-and-cream color scheme, and the frilly ears and tiny hands and feet completely sold it for me. I’m not terribly fond of its mega evolution (is that a bizarre mask-jacket combination??) but it’s impossible for me to refuse pastel colors, and the wing-ears and scalloped edges inspire delightful nostalgia for my Cardcaptor Sakura and CLAMP days.
(Side note: I always thought it was pronounced “aud-ee-no”, but apparently it’s “aud-ih-no”!)
Espurr
Frankly, I found Espurr super creepy at first. It reminded me of a grey Kyubey.
Want to sign a contract?
But it was so sad and adorable in the anime that I changed my mind completely! It is now one of my favorites.
Klefki
Klefki is one of those strange Pokemon that looks like something out of a lucid dream and was likely the result of a desperate need to fill new Pokemon quotas. I never got a chance to be truly skeptical, however, as I was introduced to Klefki in the short film “Pikachu, What’s This Key?” in which it was super cute and I fell in love.
The official Pokedex entry says “Klefki loves to collect keys and will confront opponents with a fierce jingle of their collection.”
Swoon.
So cute.
Skitty
One of my first memories of Pokemon was in elementary school, where I played with my best friend’s Skitty figurine. Even though I was too cool for pink (an opinion which has clearly undergone a 180º shift over the last decade) we used it in all of our make-believe games, so I was psyched when I saw it in the anime for the first time! (We watched it on VHS tape. I feel positively archaic.)
That nostalgia, however, is why Skitty is firmly situated among its (mostly pink) cohorts on my dream team.
Slurpuff
Slurpuff is a Pokemon that I felt an instant connection to. Not only is it the Meringue Pokemon– who doesn’t love sugary pastel confections?– it pretty much exclusively subsists upon sweets. And it’s pink! Despite its slightly questionable, clown-like look, I appreciate its overall aesthetic and character enough that were it real I would probably cuddle it forever.
Sylveon
It should come as no surprise that Sylveon occupies the final spot on my ideal team. It’s super cute, sports an adorable pastel pink/blue/white color scheme, and comes with flesh ribbons that caress its trainers arm as they walk together. What a perfect blend of sweet and utterly terrifying!
Favorite Gym Leader
If I could be any fictional character in any universe, I would be Valerie! Not only does she have a strong aesthetic sense, something I also value and try to incorporate into every aspect of my life, but Gym Freaks “also states that she used to be a model and as such can wear incredibly high heels.” Anyone who has encountered me in real life knows that I am a huge fan of heels, and despite being of Amazonian stature don three to four inch heels on a daily basis. Valerie is also a fashion designer who makes lovely, Pokemon-inspired designs, which is obviously super appealing to me!
Favorite City
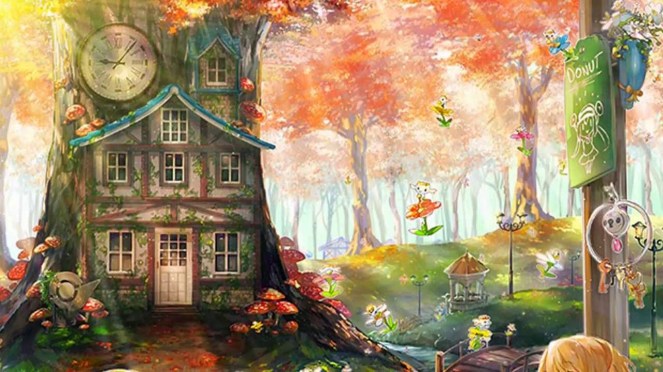
I doubt anyone is surprised that my answer is Laverre City. My predilection for Fairy types is fairly obvious at this point, but I also love all things quaint and charming, and Fairy Central certainly fits the bill! I love enchanted English cottages and whimsical fairylands, and Laverre is the perfect marriage of both. Q v Q
That’s all from me! If anyone would like to do this tag, they are more than welcome– I’d love to see your favorite Pokemon and cities.
Apologies for the long wait– but we’ve finally reached the last post on this costume! If you haven’t already, I suggest checking out part one and part two.
Last time the bodice was left with an unfinished neckline, but I was completely tired of hand sewing and detail work at that point so I switched to working on the skirt.
Caution: Some of the following photos feature the most terrible lighting in the history of ever, since I was working late at night! :’>
I was in quite a hurry at this point, since the NorCal gathering was fast approaching, so the process of making this skirt was a bit… organic. I was able to utilize the width of this fabric, since it was 120″ wide, so I just cut straight across to form several large rectangles. Two of them was pleated for the front and back, and the rest were subsequently cut diagonally across to form wedge shapes– these were my gores, which are very important for achieving the fashionable thrown back 1860s silhouette! The straight edges are stitched to the front panel of the skirt and the long diagonal edge to the back panels.
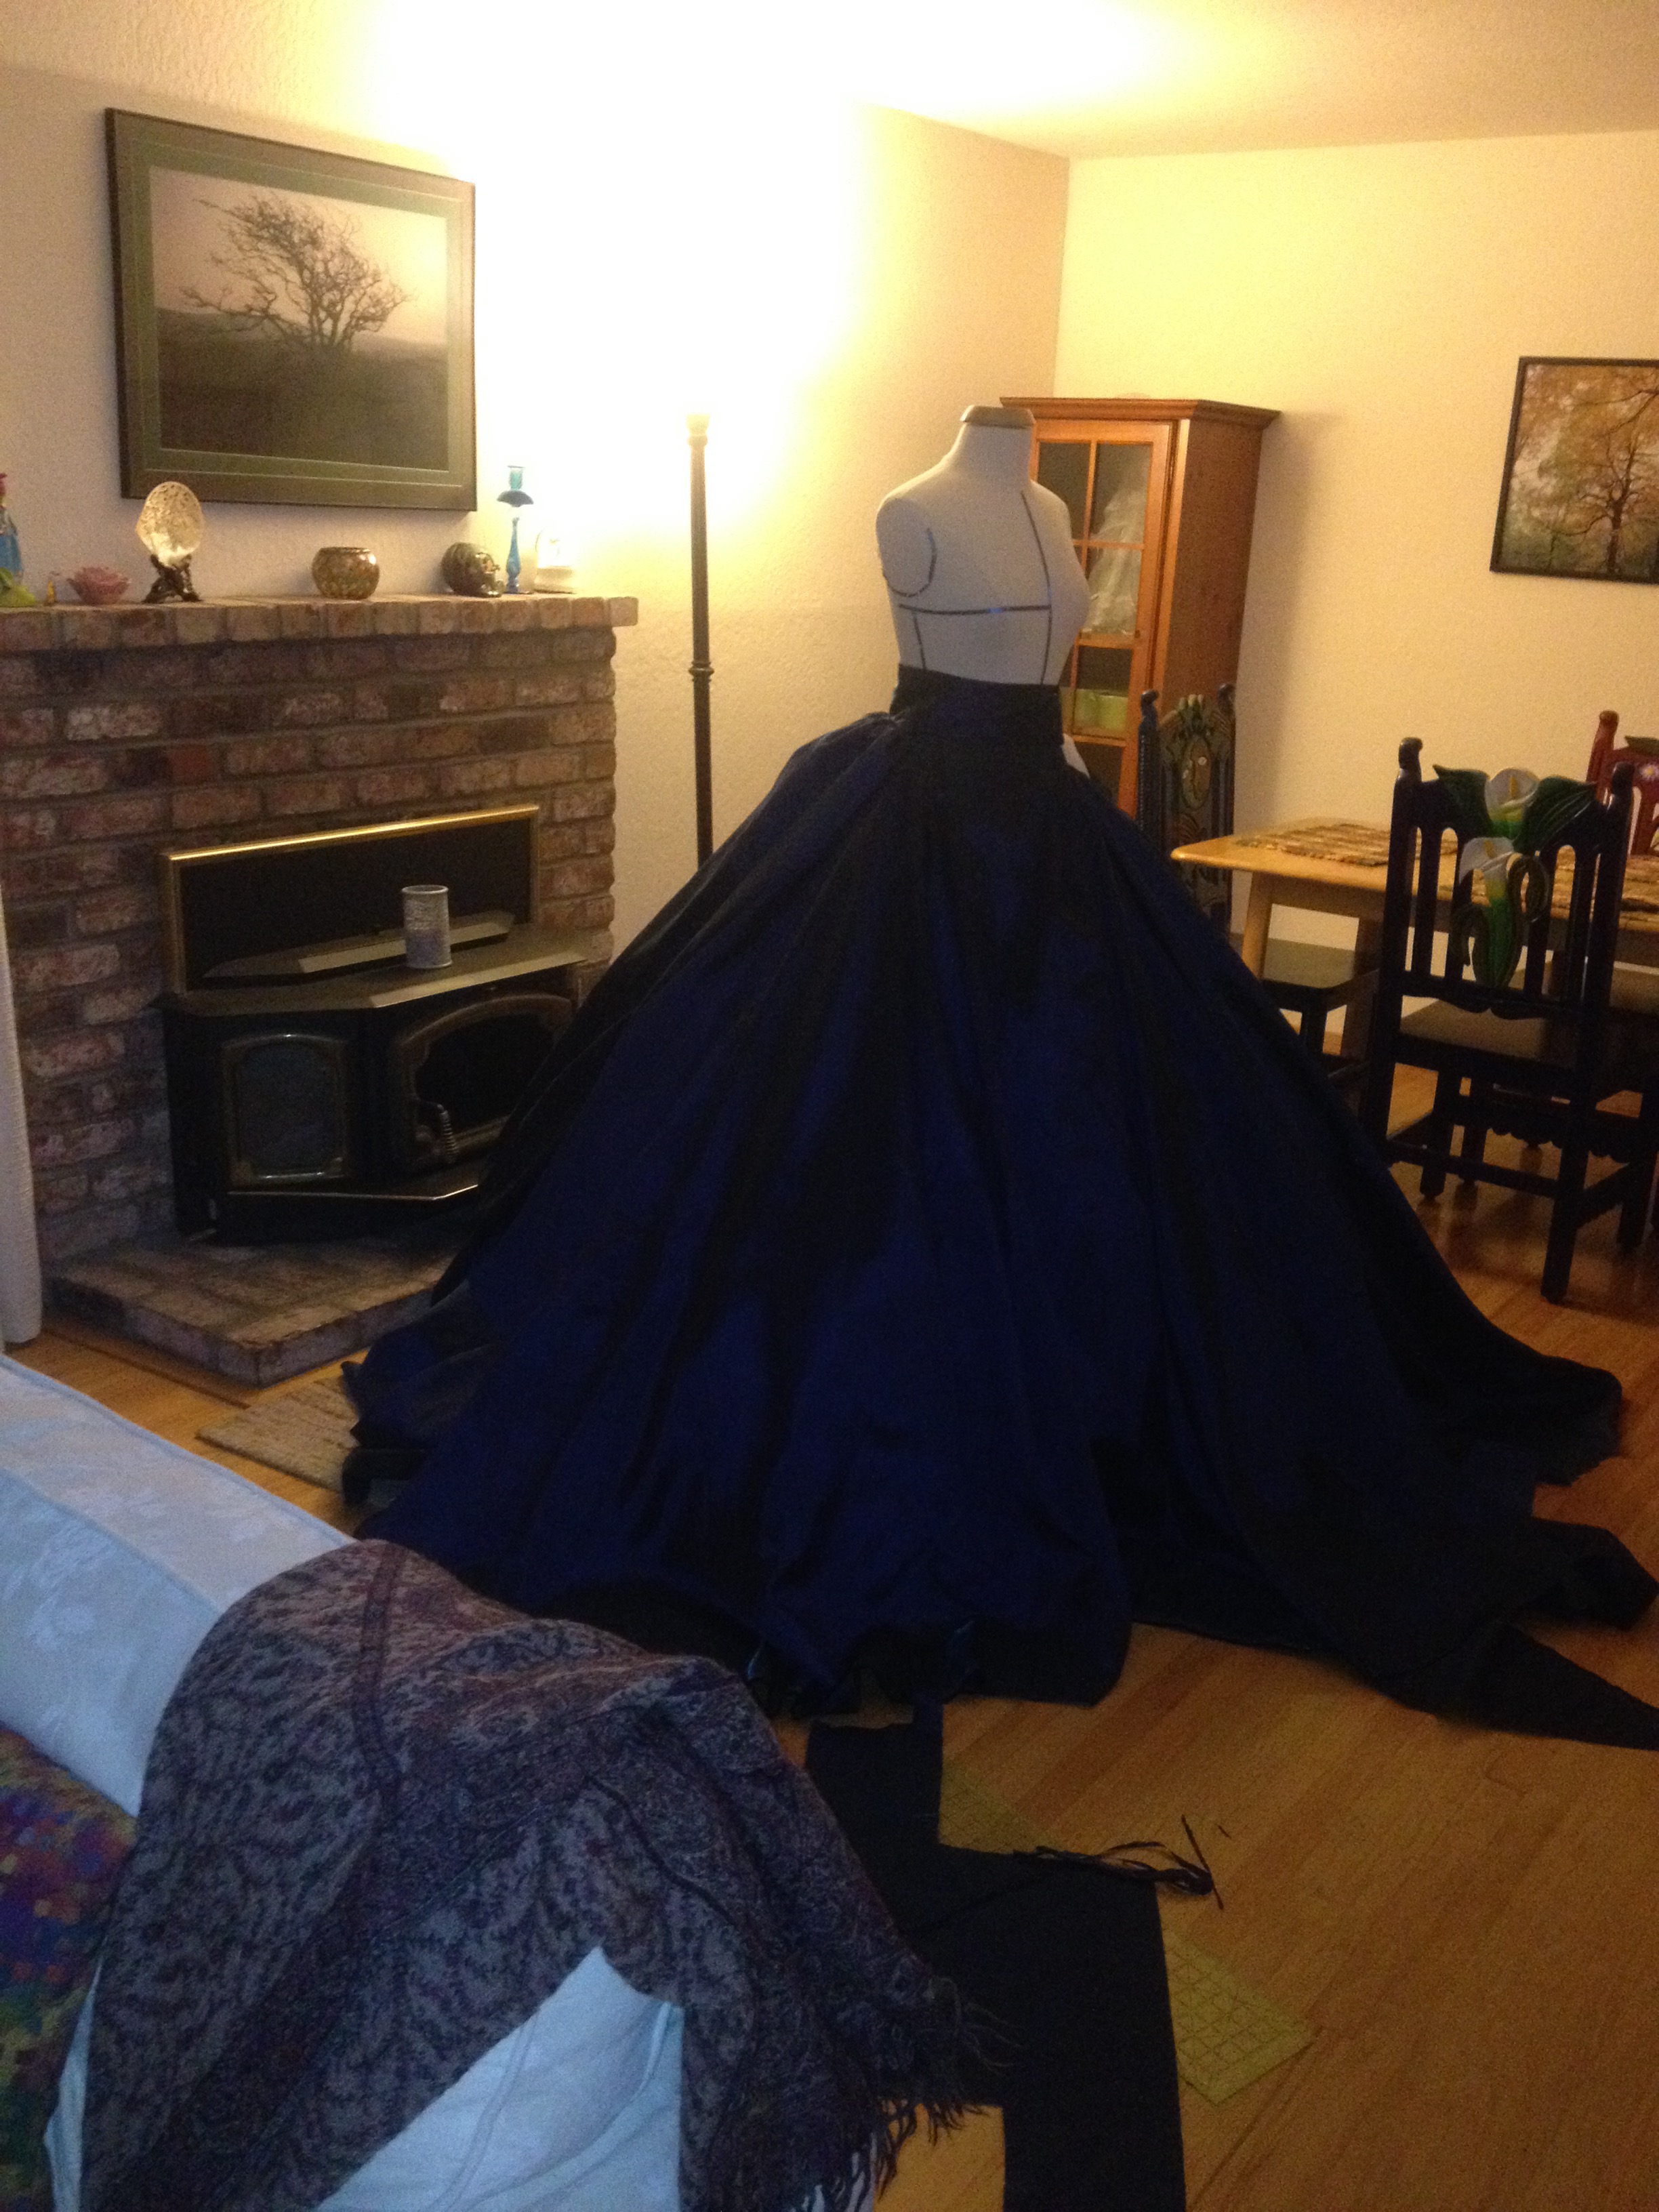
I roughly pinned everything together and pleated it onto my dress form. I really liked the way it was taking shape, so I didn’t bother to think about things like hemming (!!!). Or finishing interior seams, though I did try to utilize the selvedge.
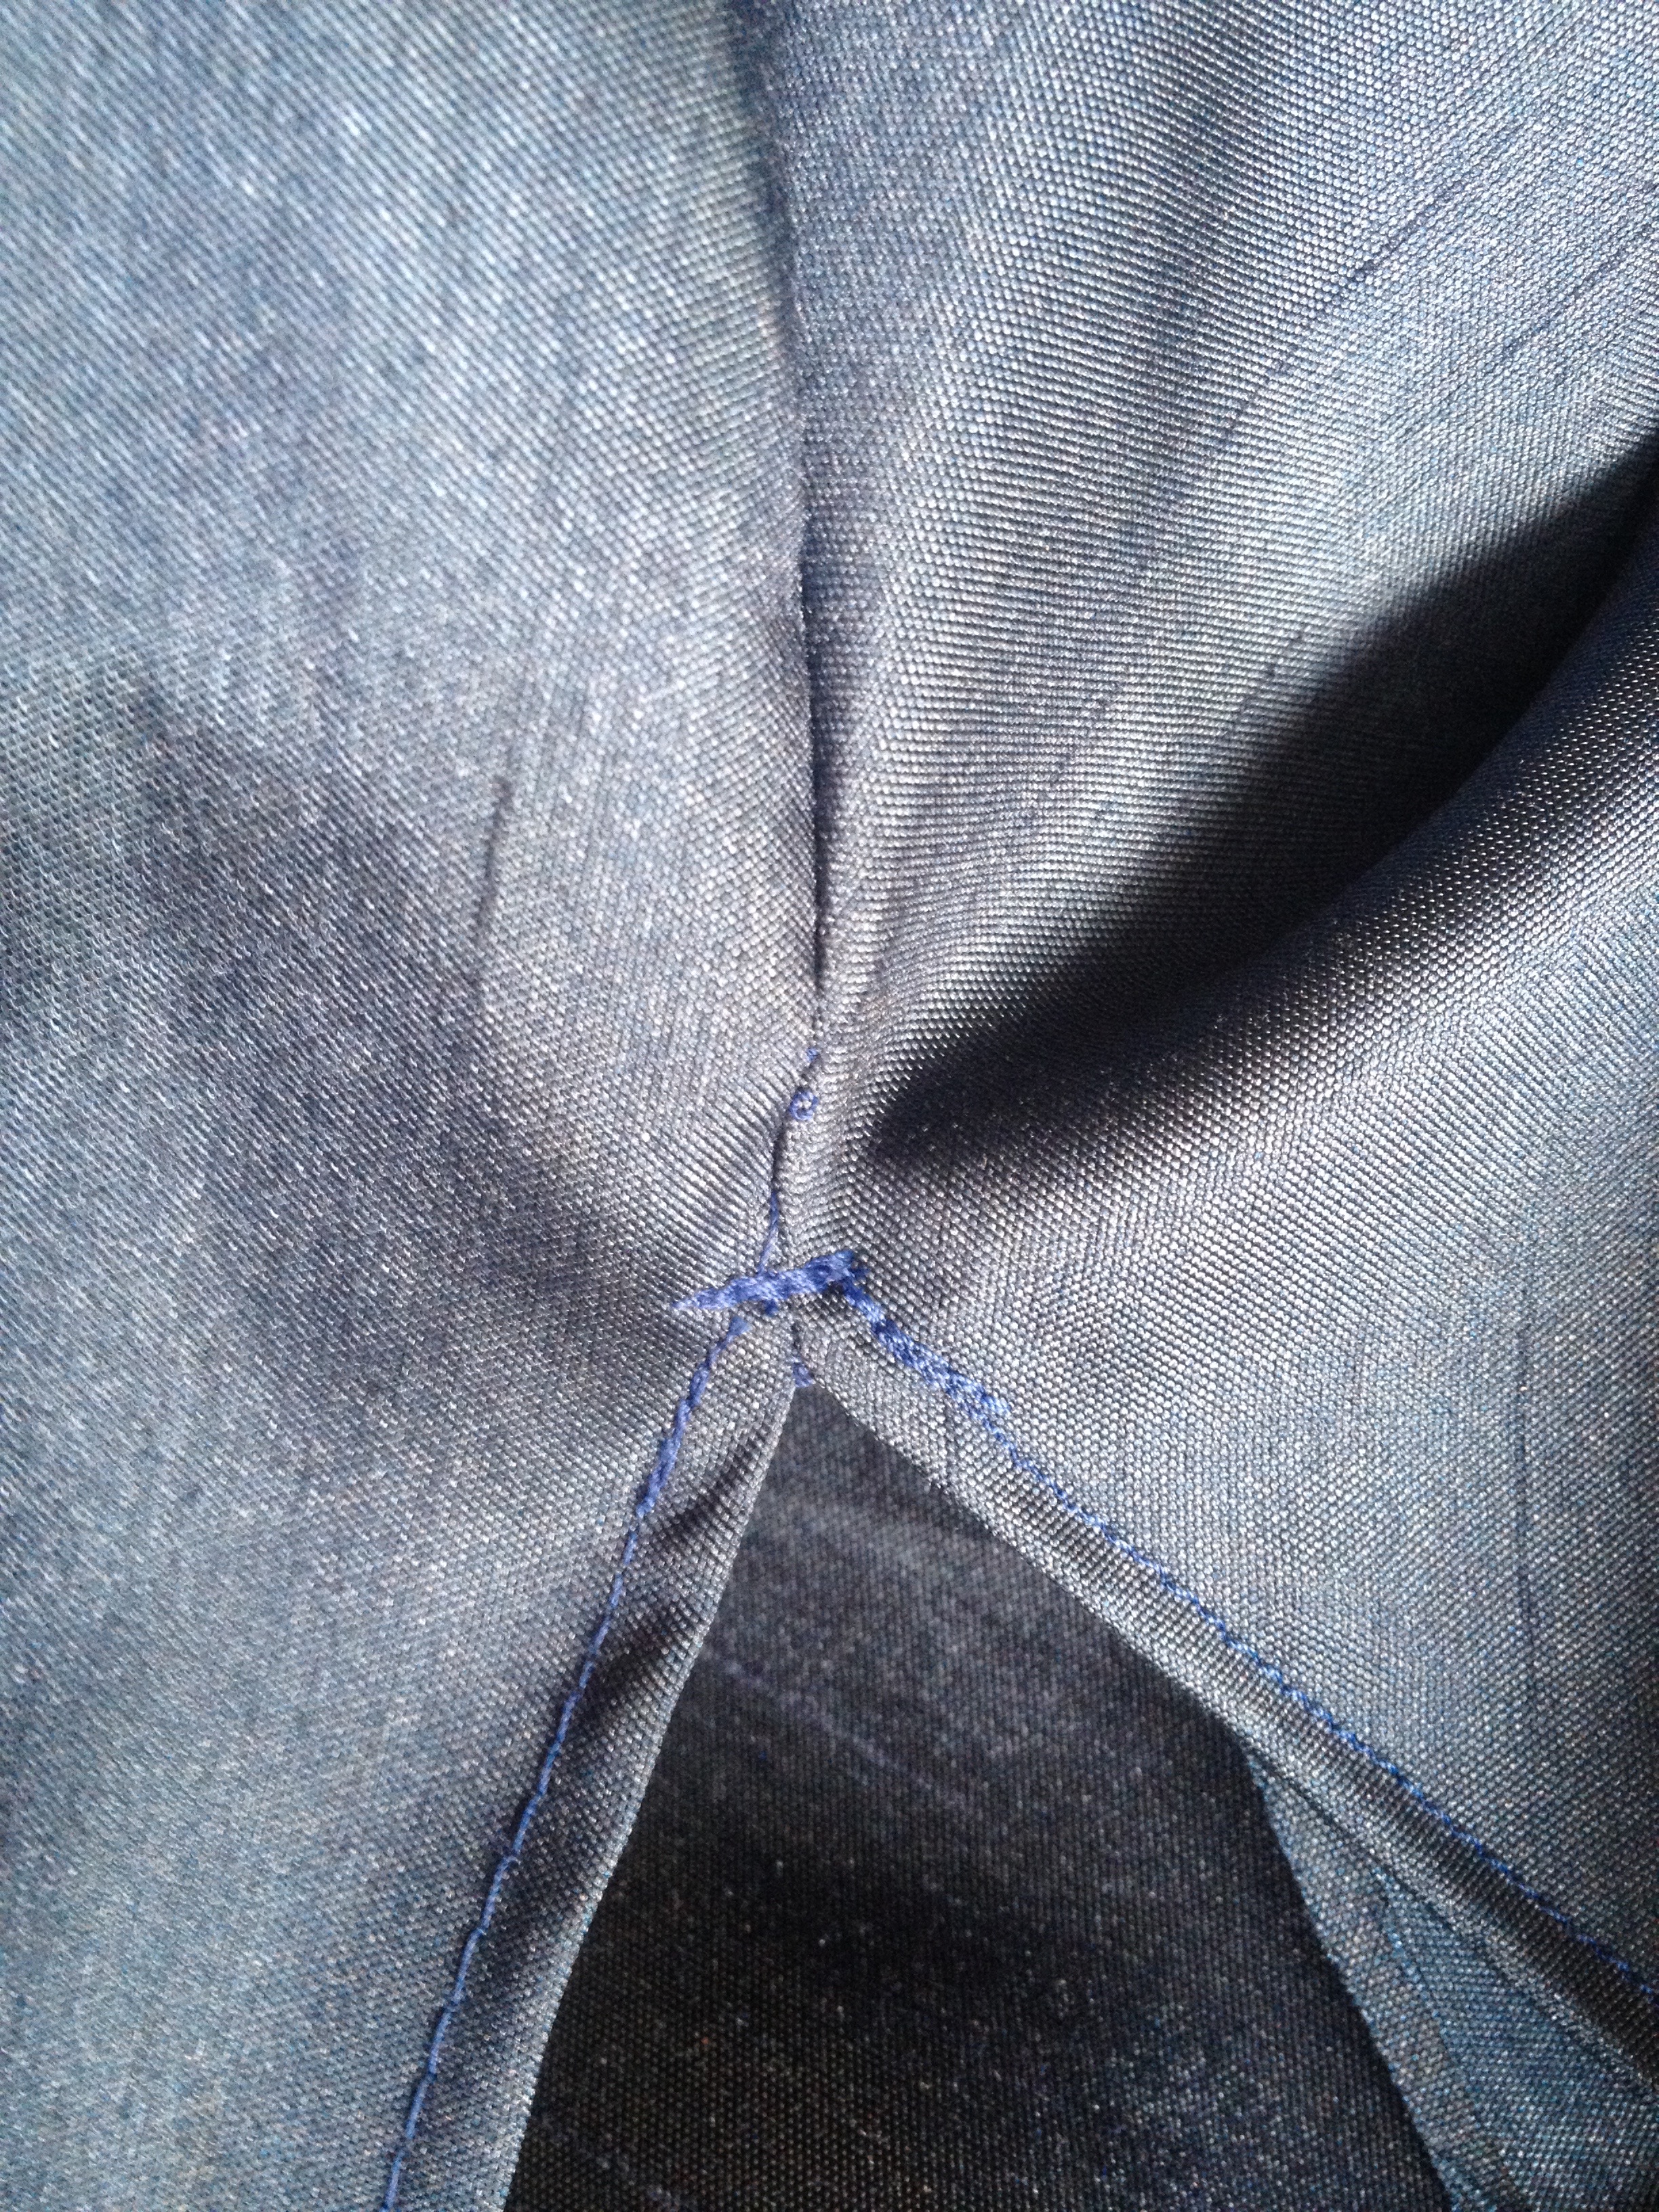
I stitched the skirt together, then finished the opening (which was on the right side) by turning the edges over twice and stitching them down. I backstitched across the point several times to keep everything nice and secure!
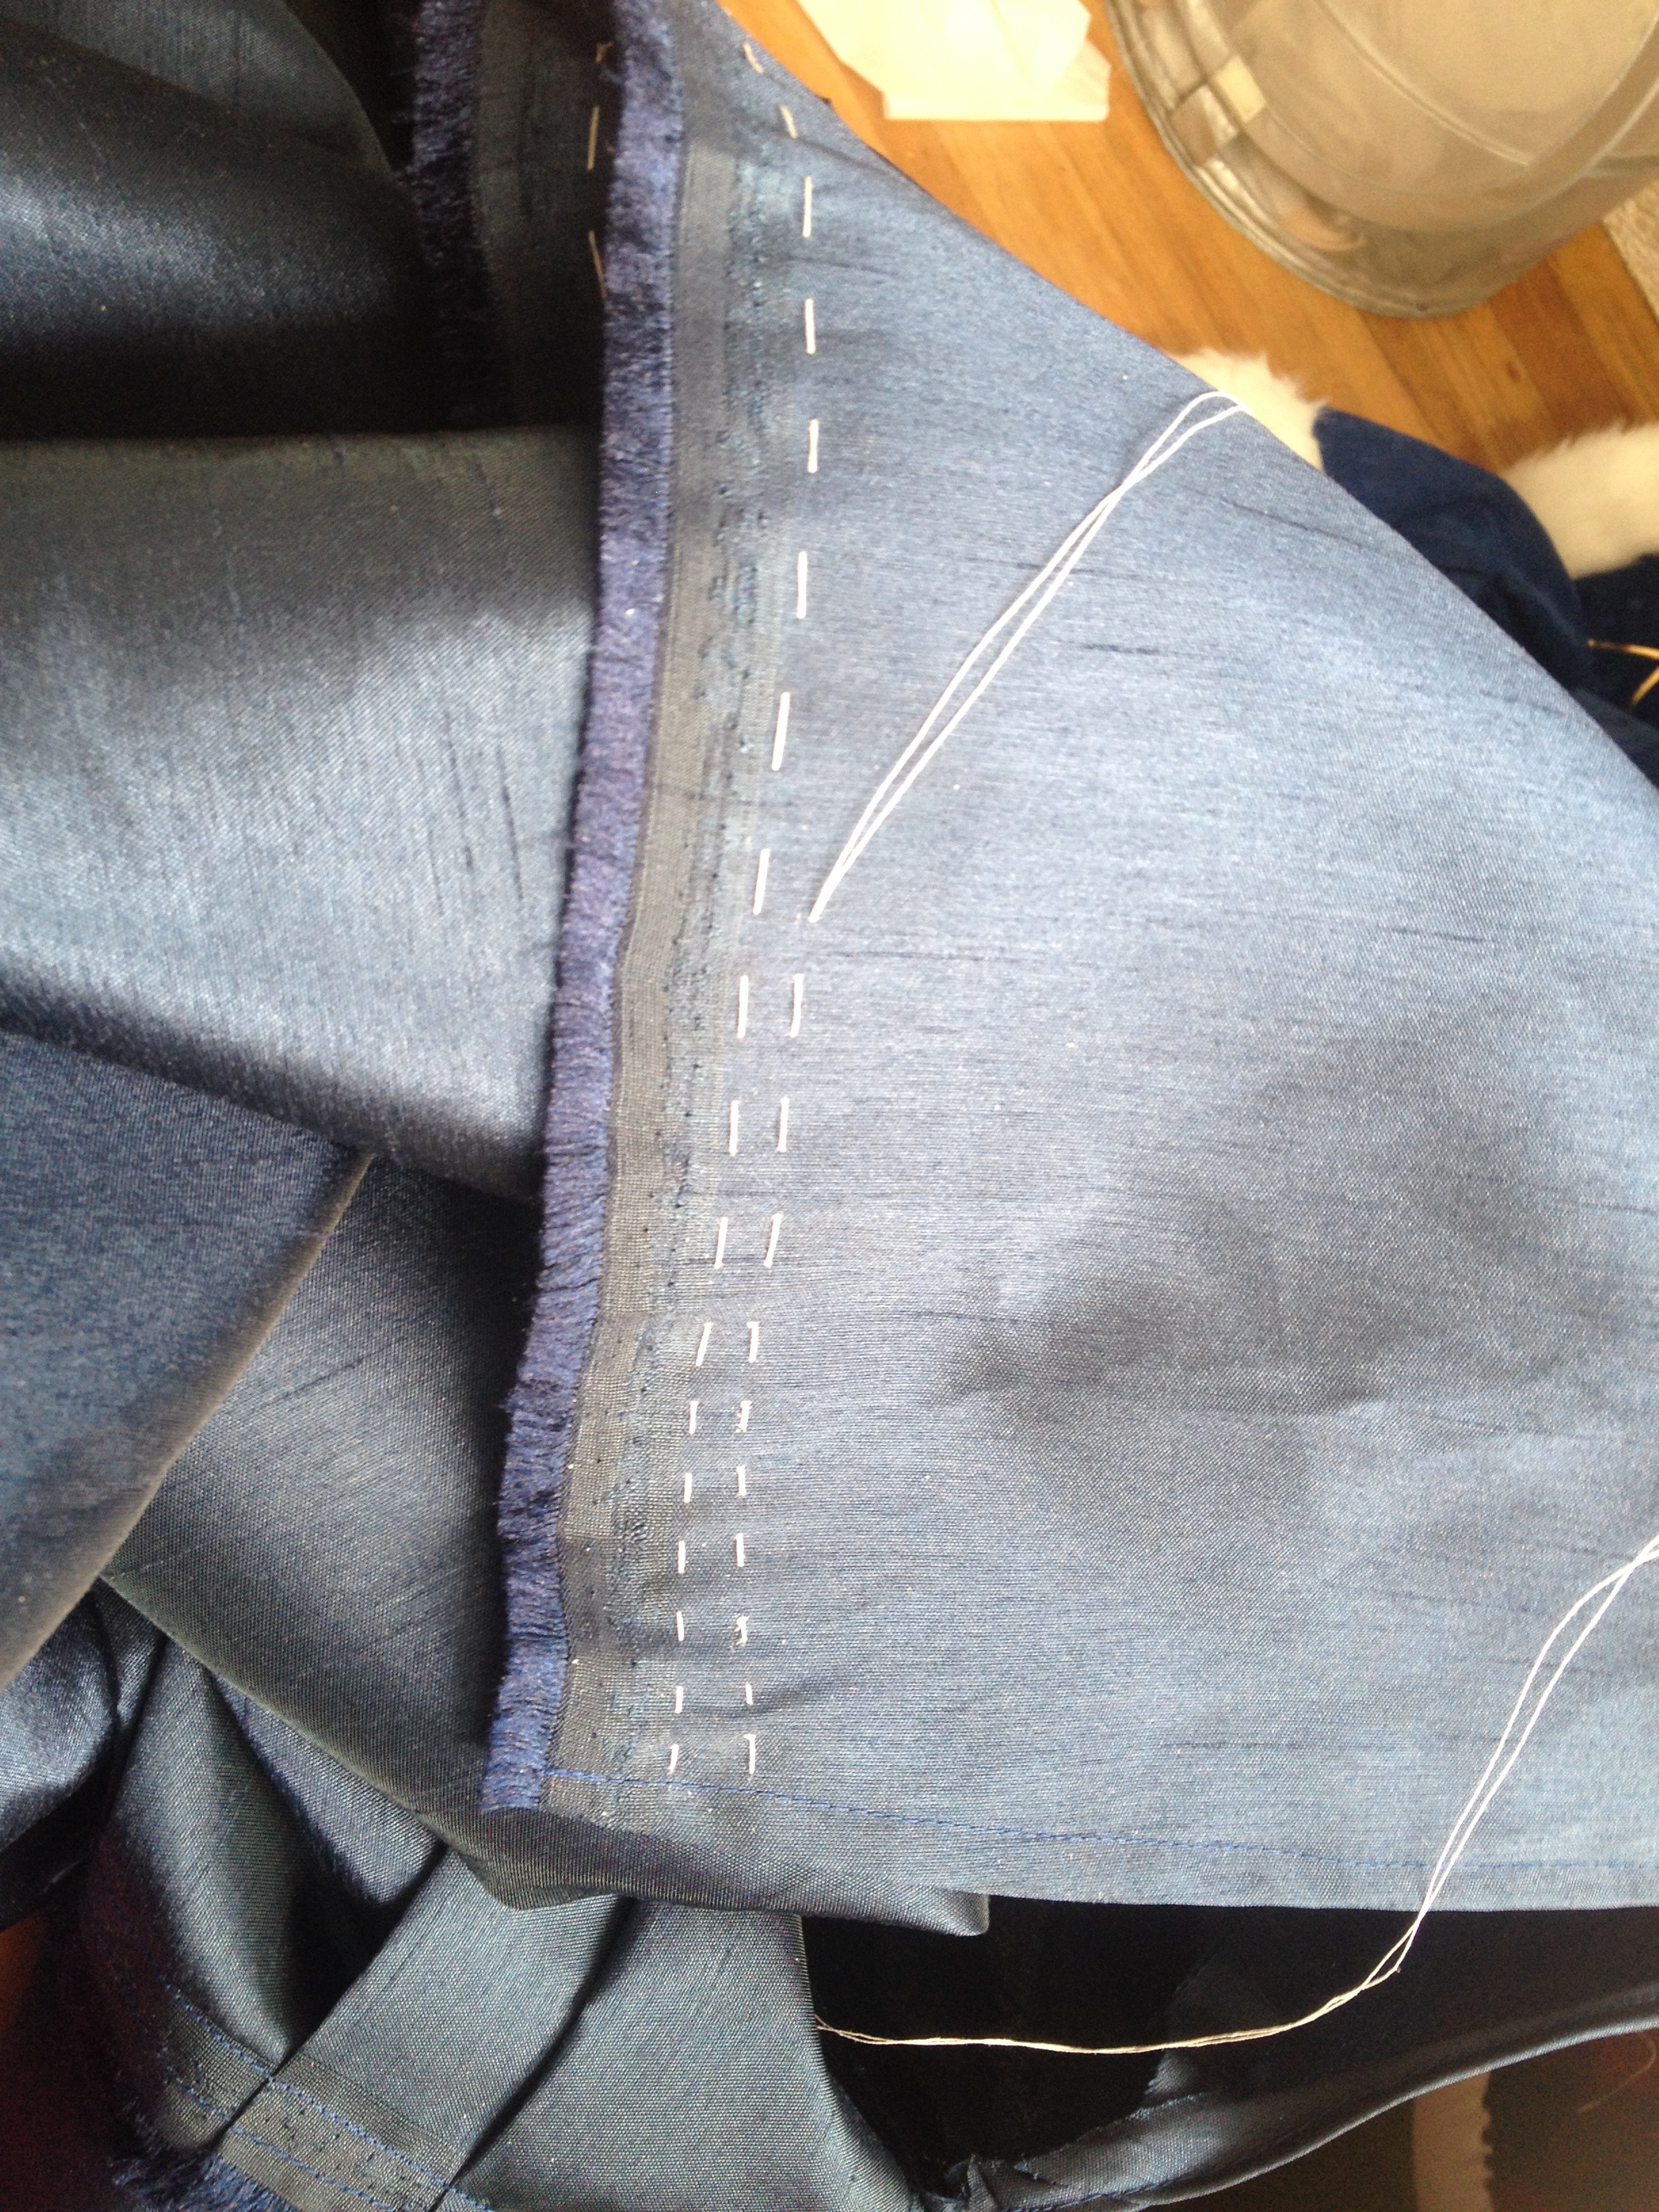
I cartridge pleated the skirt with two even rows of running stitches. Using waxed upholstery thread and working in sections is definitely the key to successful cartridge pleating– and even then I had issues with tangling! It’s definitely not my favorite thing to do, but I did manage to get the entire width pleated onto the waistband.
This is the WORST photo. I’m sorry for subjecting your eyes to it. However, you can see how terrible the hem looked with all the uneven, trailing pieces. I cut those off and stitched a quick, messy hem. It was pretty awful, actually, and was even worse once I tried it on! Surprise, surprise, garments sit differently on my mannequin than they do on me. Fortunately, my skirt is long enough that it isn’t too visible in photographs.
Next, I switched to working on the bertha. These are large, lacy, pleated collars almost always seen on ballgowns from this period! I had no idea what I was doing, so I just tried to figure it out as I went along.
I started by tracing the neckline of my bodice onto lightly interfaced quilting cotton, and cutting it into a shape I liked. I did the same with the back, but drafted it as two pieces so it could hook closed.
Rather than pleating a single piece of fabric to shape, I made bias tape out of a lovely white silk-cotton blend and stitched the layered strips on top of each other. This ended up being an extended and labor-intensive process, and one that I do not recommend at all!
I chose not to continue the pleating on the back, as I was running out of time, patience, and bias strips, so I covered each side with a layer of silk and finished the edges with leftover tape.
To cover up the ugly bits where the bias “pleats” met, I used a doubled strip of my dress fabric and folded all the edges in for a tidy finish.
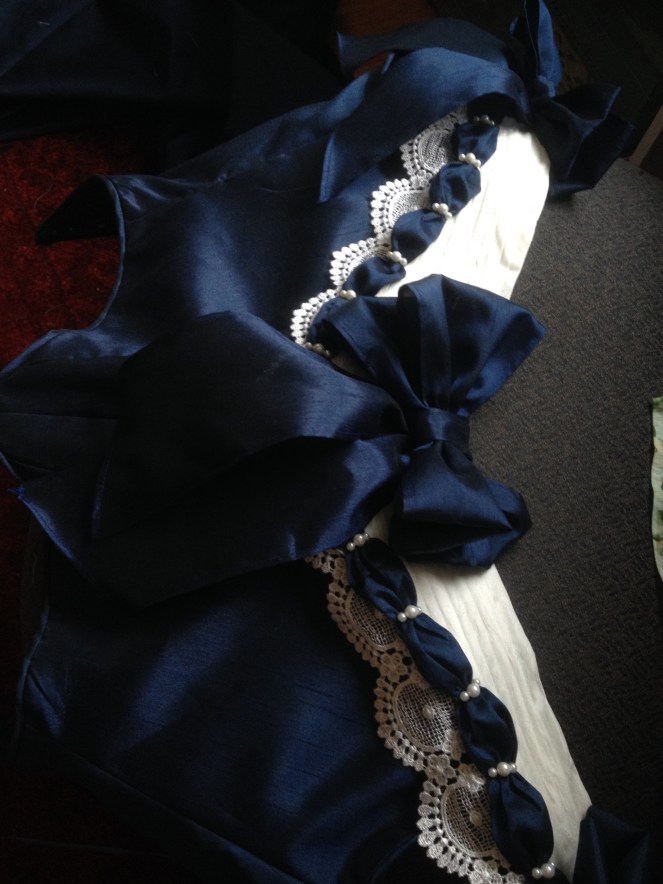
I subsequently switched gears and started working on the decorative puffed trim. This is the simplest trim in the world to make, but looks absolutely lovely! You just need to double hem a 2.5″ strip of fabric and gather it every inch and a half or so. Keep in mind that altering the proportions and density of puffs will yield a variety of interesting looks!
Once the puffed trim was all stitched on, I added a border of delicate venise lace and stitched hooks and eyes to the back as a closure. The front is tacked to the bodice, but the back needed to remain free so I could lace the back of my bodice underneath it!
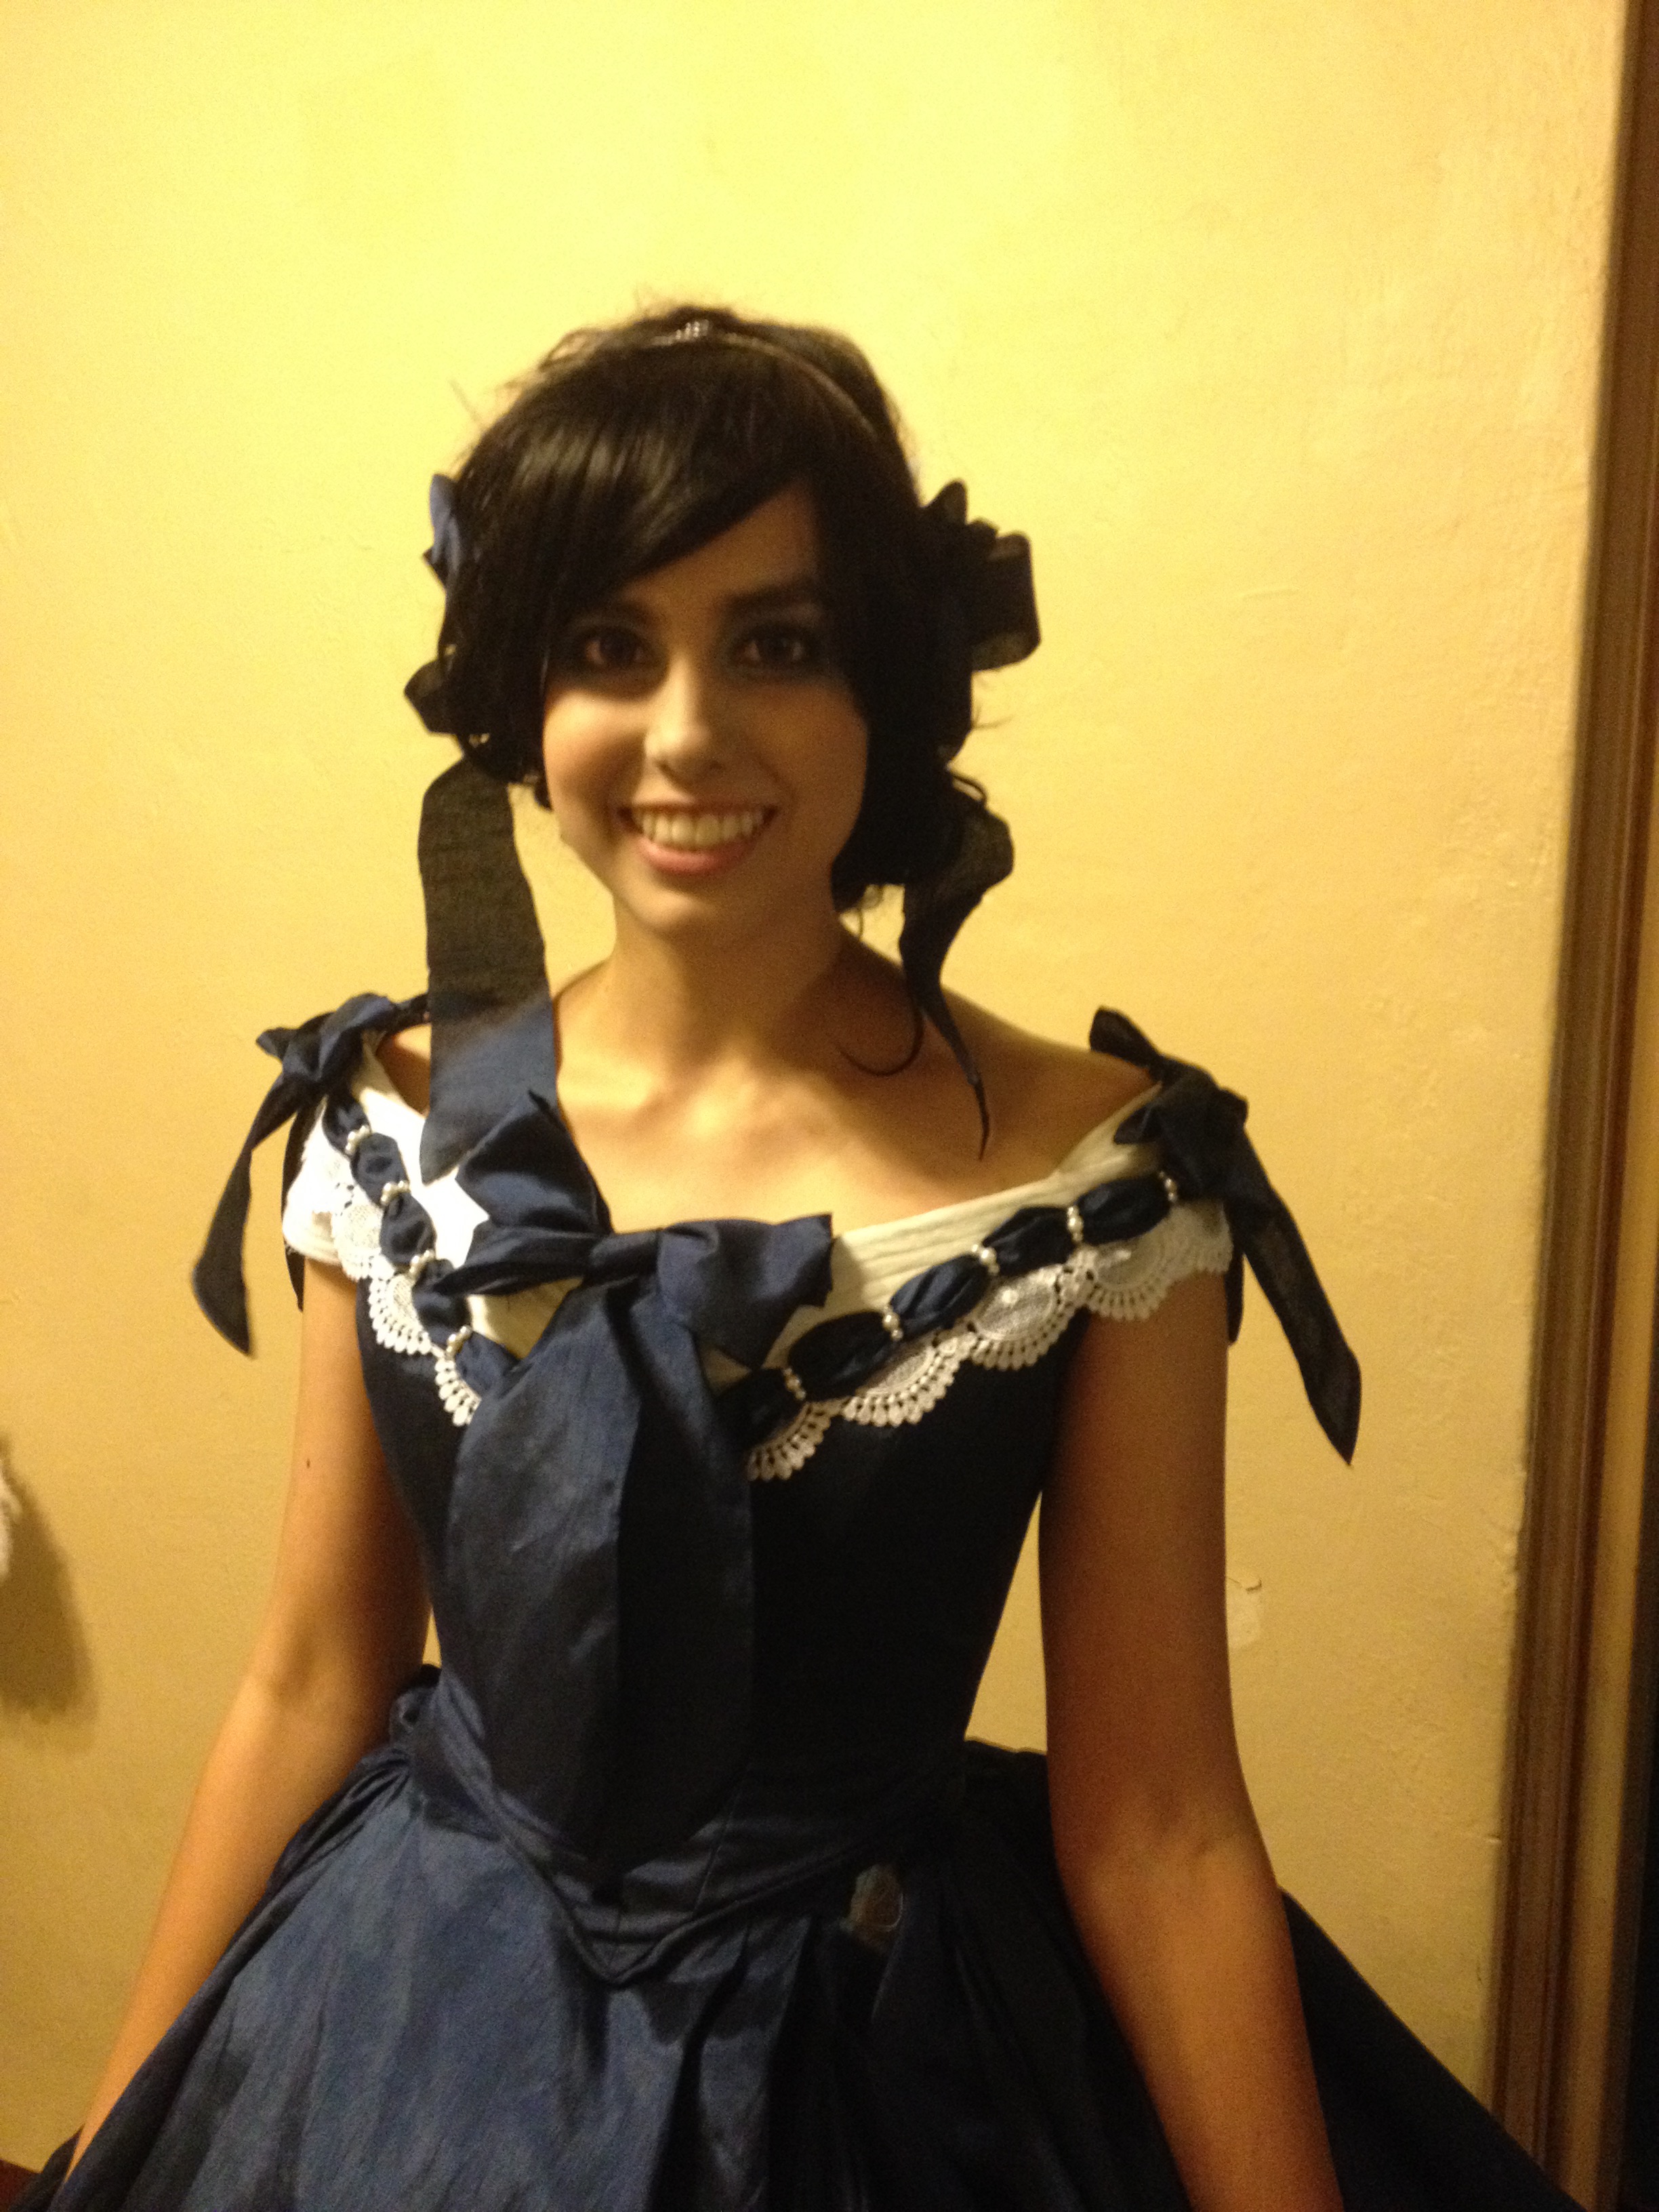
I loved the way it looked at this stage, but it lacked a lot of the frilliness that I wanted. Accordingly, I decided to add beads and giant bows (because who can possibly object to either??)
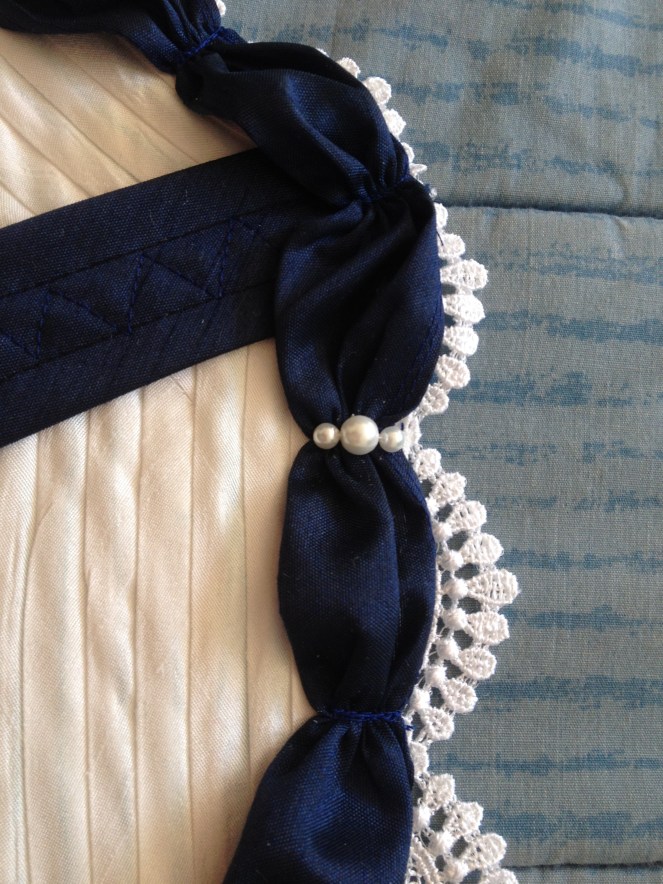
I chose a simple repeating pattern of large and small pearls to hide the stitches on the puffed trim. It was unexpectedly quite pretty!
Giant, obnoxious bows provided the perfect finishing touch!
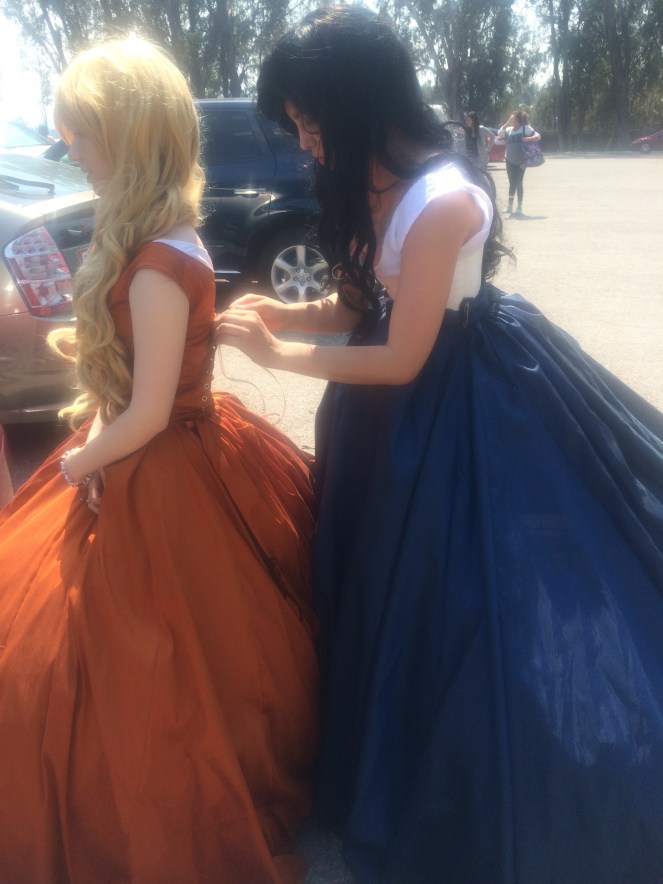
After that, it was off to the NorCal gathering. It was 98 degrees in the shade, so we only managed to stay for about 30 minutes!
The orange bodice and skirt base were also made by me.
We just wore our chemises and corsets in the car, both for coolness and convenience, and had to dress hastily in the parking lot. This was a source of great amusement for several passers-by and their children!
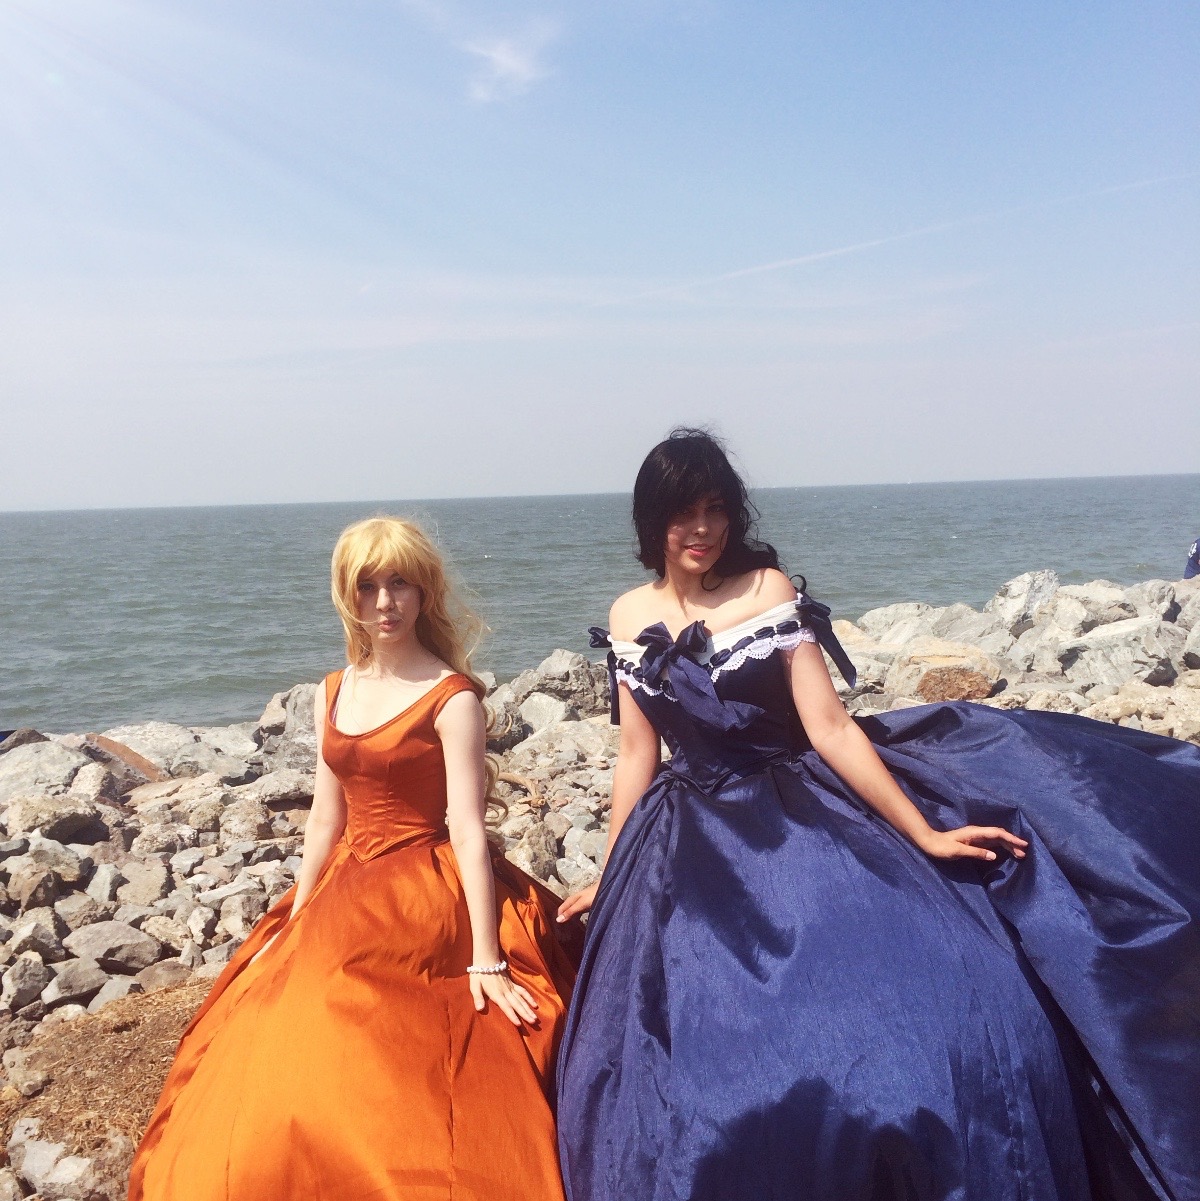
This delightful Belle made our day! You can tell how dreadfully hot it was by the hazy glow in these photos.
While we weren’t able to stay for very long, the gathering was a lovely debut for these costumes! They needed a lot of work, however, to be ready for the SacAnime Summer 2015 masquerade.
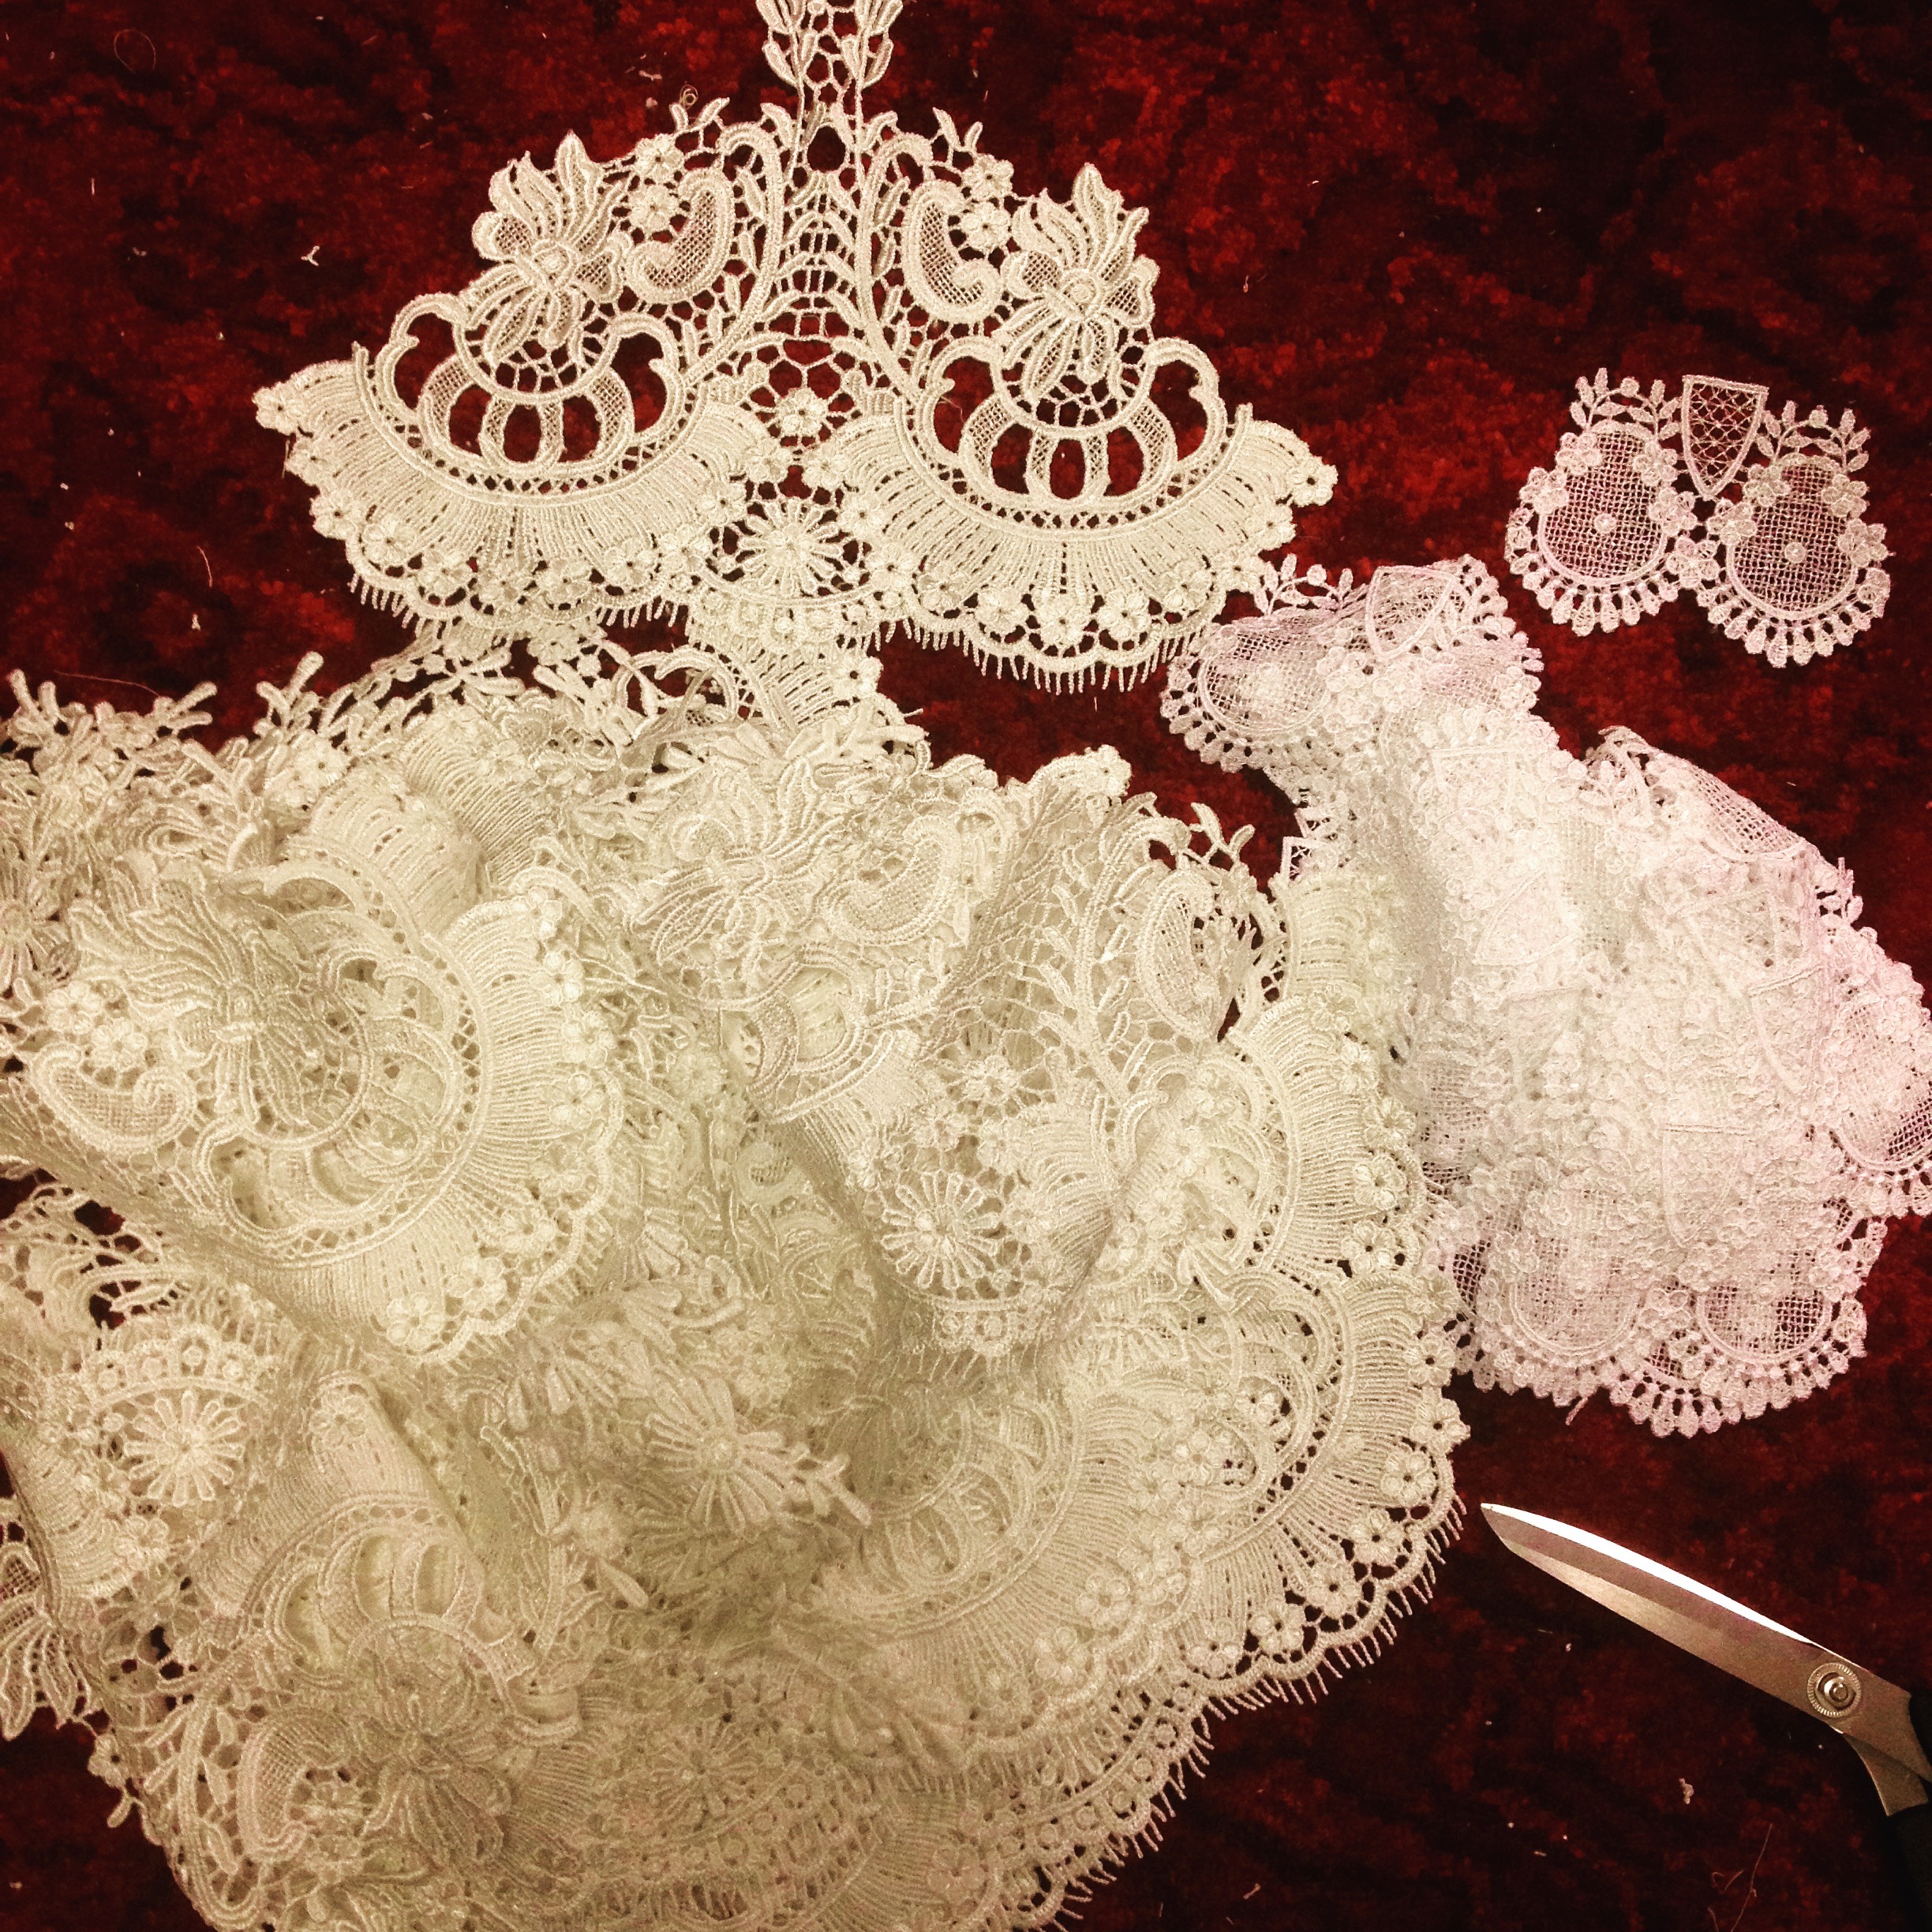
I started with the hem, since I had intended to add lace to it from the beginning and had simply run out of time.
I had twelve yards of this beautiful, elaborate venise lace… and it was nowhere NEAR enough. So, with great sadness, I decided to fussy cut individual motifs out and space them with another lace that I had in my stash.
Stitching them all on proved to be extremely time-consuming, but I managed…
Until it turned out that I hadn’t measured correctly, I had nowhere near enough of the large motifs, and there was a large gap that had to be filled in with the small ones.
Which was depressing, but I was in con crunch mode and had zero time to mope (or vacuum)!
The headdress was the final piece, finished the night before we left for the convention.
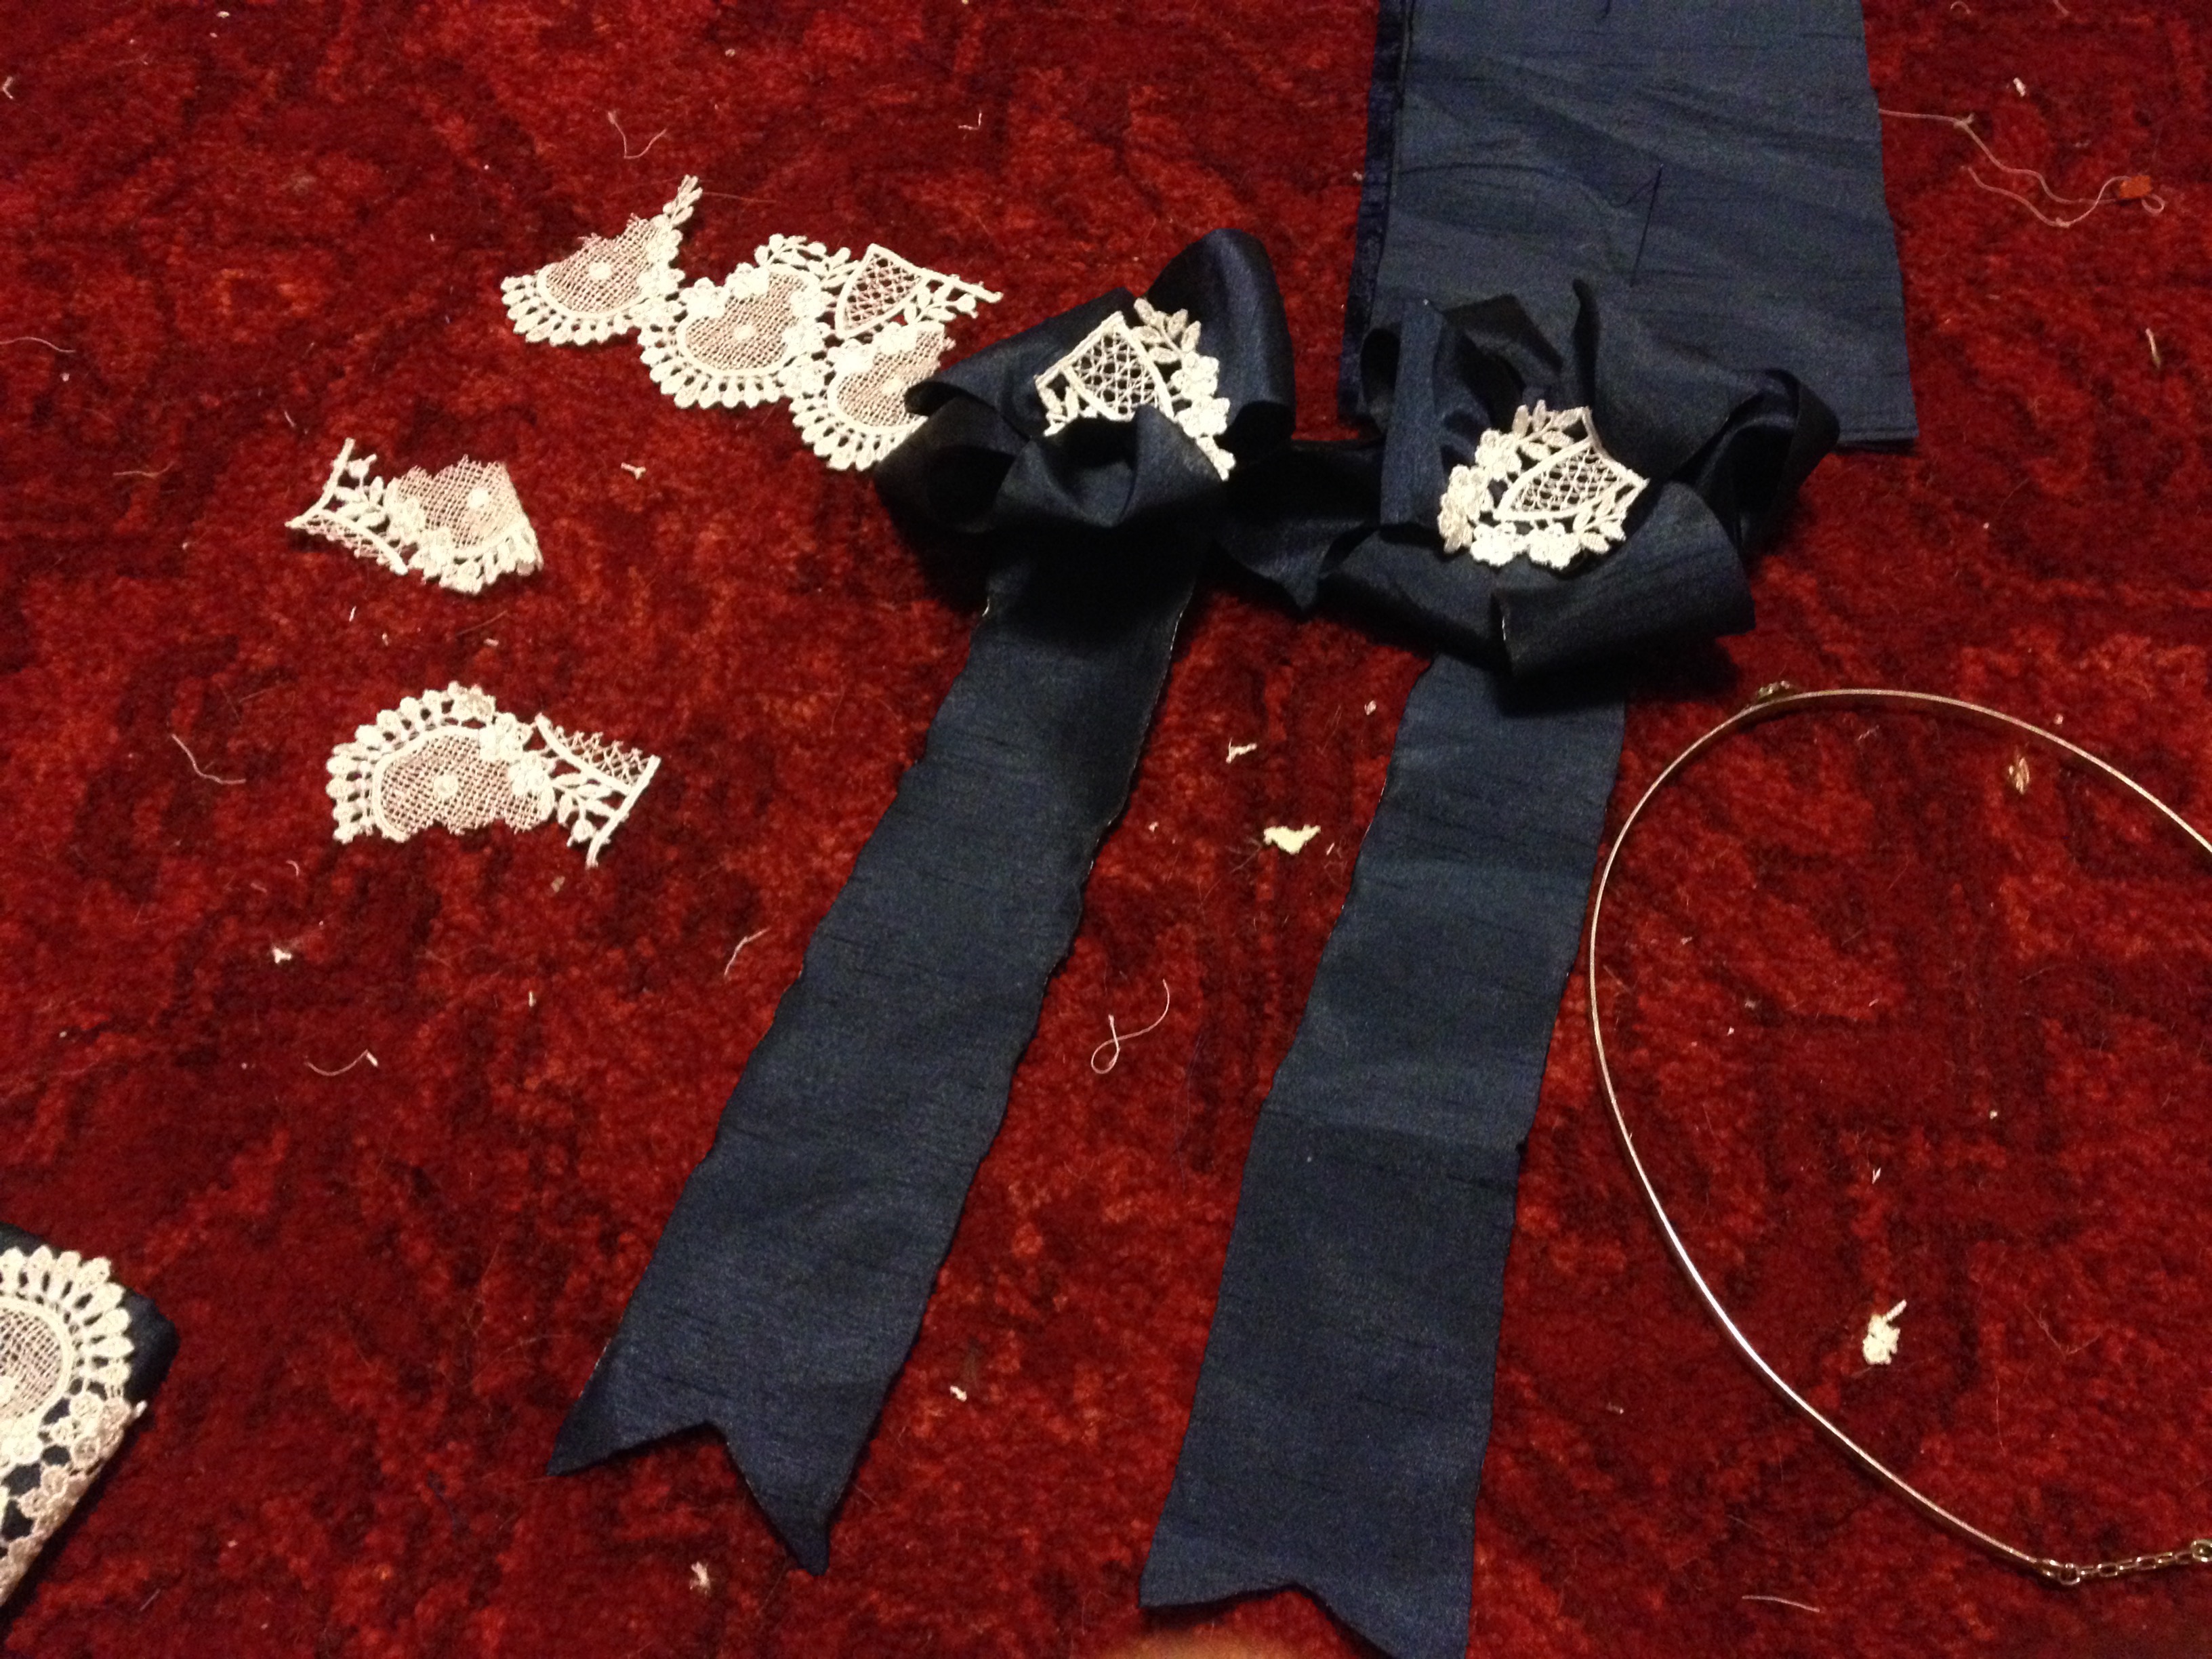
I started with a silver headband base that I had purchased at the Dickens Fair several years prior and never worn, some fabric scraps, and some feathers. I based the design on an extant photo of a period headdress with two large gathered ribbons on either side.
I burned the edges of the ribbon rather than hemming them, folded them over until they were vaguely bow shaped, and stitched them down. Some trailing ribbon and lace scraps finished them off.
I glued feathers onto the back, then added loops so that the bows could slide onto the headband. The lace looked a little unfinished, however, which really bothered me! So I added some pearls in various sizes.
Aaaand finished! Safely in time for the convention, too. I also managed to make a fur wrap and add the black netting to the skirt of the orange ensemble, so I considered it a very fruitful con crunch.
The masquerade itself was… interesting. I had fun, and met some wonderful people backstage, but there was a LOT of waiting involved, and schedules for check in/craftsmanship judging/the actual performance just kept getting pushed further back. The corsets were actually causing us back pain, so after the seven hours (!!!) of waiting, we finally just loosened them backstage. Ten minutes later, they called us on and it was a mad dash to tighten them again and lace our bodices back on. The last eyelet on mine was laced literally seconds before we walked onstage!
Besides being the thumbnail, we can be found at 4:31.
It was all smiles backstage, although you can see my phone sneaking its way out of the pocket I added to my skirt!
Futuristic eye makeup is always appropriate for mid-Victorian eveningwear.
And, in a very pleasant plot twist, we won Best Original despite being moved into the advanced category as novices! That was my second time ever competing, after debuting Lady Three at Fanime earlier that year, so to have received an award both times went a long way toward boosting my costuming confidence. It truly inspired me to extend myself as an artist and to improve my technical skill!
It is (hopefully) on to bigger and better things now. I’m currently attacking a Sakizo design, which I would like to post about soon (although I have quite the backlog of projects) as well as Valkyrie Leona from League of Legends and a ballet version of Sailor Pluto. If you would like to follow along with my progress, I am most active on my Instagram and am attempting to post more frequently on my Facebook. I am also a current competitor in the TranspArt contest held jointly by Worbla and Cosplay Supplies, so I will be posting updates on my project for that as well!
Here we go with part 2 of Victorian Dragonair! Fun fact: this wasn’t intended to be a cosplay in the beginning, simply a semi-accurate 1860s evening gown, but in order to enter the SacAnime Masquerade the costume needed to be based on Japanese pop culture. Accordingly, I chose Dragonair, a Pokemon with a similar color scheme, and added little touches (like the feather headdress and the pearls) to turn it into a proper gijinka.
I draped the bodice quickly on my dress form (it took about 15 minutes, since it’s a simple 6-piece pattern with basic style lines) and turned that into a mockup. It fit almost perfectly– I just had to take it in at the waist and the back, and I had my pattern! The neck, arms, and waist have reduced seam allowance since they’re finished with piping.
I shall digress for a moment to discuss my new shears, the Kai ones pictured above. My old shears were German steel and 10 years old, so they were a little rusty and a little stiff from the prolonged use but still in great condition. These Kai shears, however, totally outclass them. In fact, I even prefer them to my Ginghers! They’re a fraction of the price, but lightweight with incredibly ergonomic handles and razor sharp blades. They cut through the awful, tarp-like faux dupioni I was using for this gown like it was butter.
In this dreadful, grainy photo, taken much too late at night in terrible lighting, you can see how perfectly the resulting garment fits over my corset. I’m very happy with this bodice, it’s probably my favorite part of the entire costume.
All of the bodice pieces were flatlined with this pretty blue quilting cotton, and the seams were pressed open and the bones applied. I used some leftover twill tape as bone casing and stitched it into the bodice by hand, catching only the seam allowance.
To finish the waist and armholes, I made my own piping. I cut 3″ bias strips from my fabric (following this fantastic tutorial) and enclosed a piece of Lion Homespun yarn in it, then used my zipper foot to stitch right alongside the yarn. I then machine stitched this onto the bodice, again using my zipper foot.
Don’t forget to clip your curves! Even though it’s cut on the bias, you still need to cut piping around extreme curves (like the center point on this bodice).
I know you’re supposed to use proper cord for piping, but Lion Homespun yarn is super bulky, so it looks really nice as piping, and I just happened to have quite a large quantity on hand.
I subsequently used pinking shears to cut the loose ends of the piping (since this fabric is the devil and frays horrendously) and tacked it to the inside of the bodice using a herringbone stitch. I love the way it looks! I only caught the flatlining cotton in each stitch, so it’s invisible from the outside.
Here’s how it looked pinned onto my dress form. I was super happy with it, so I finally forced myself to start on the scariest part– the eyelets.
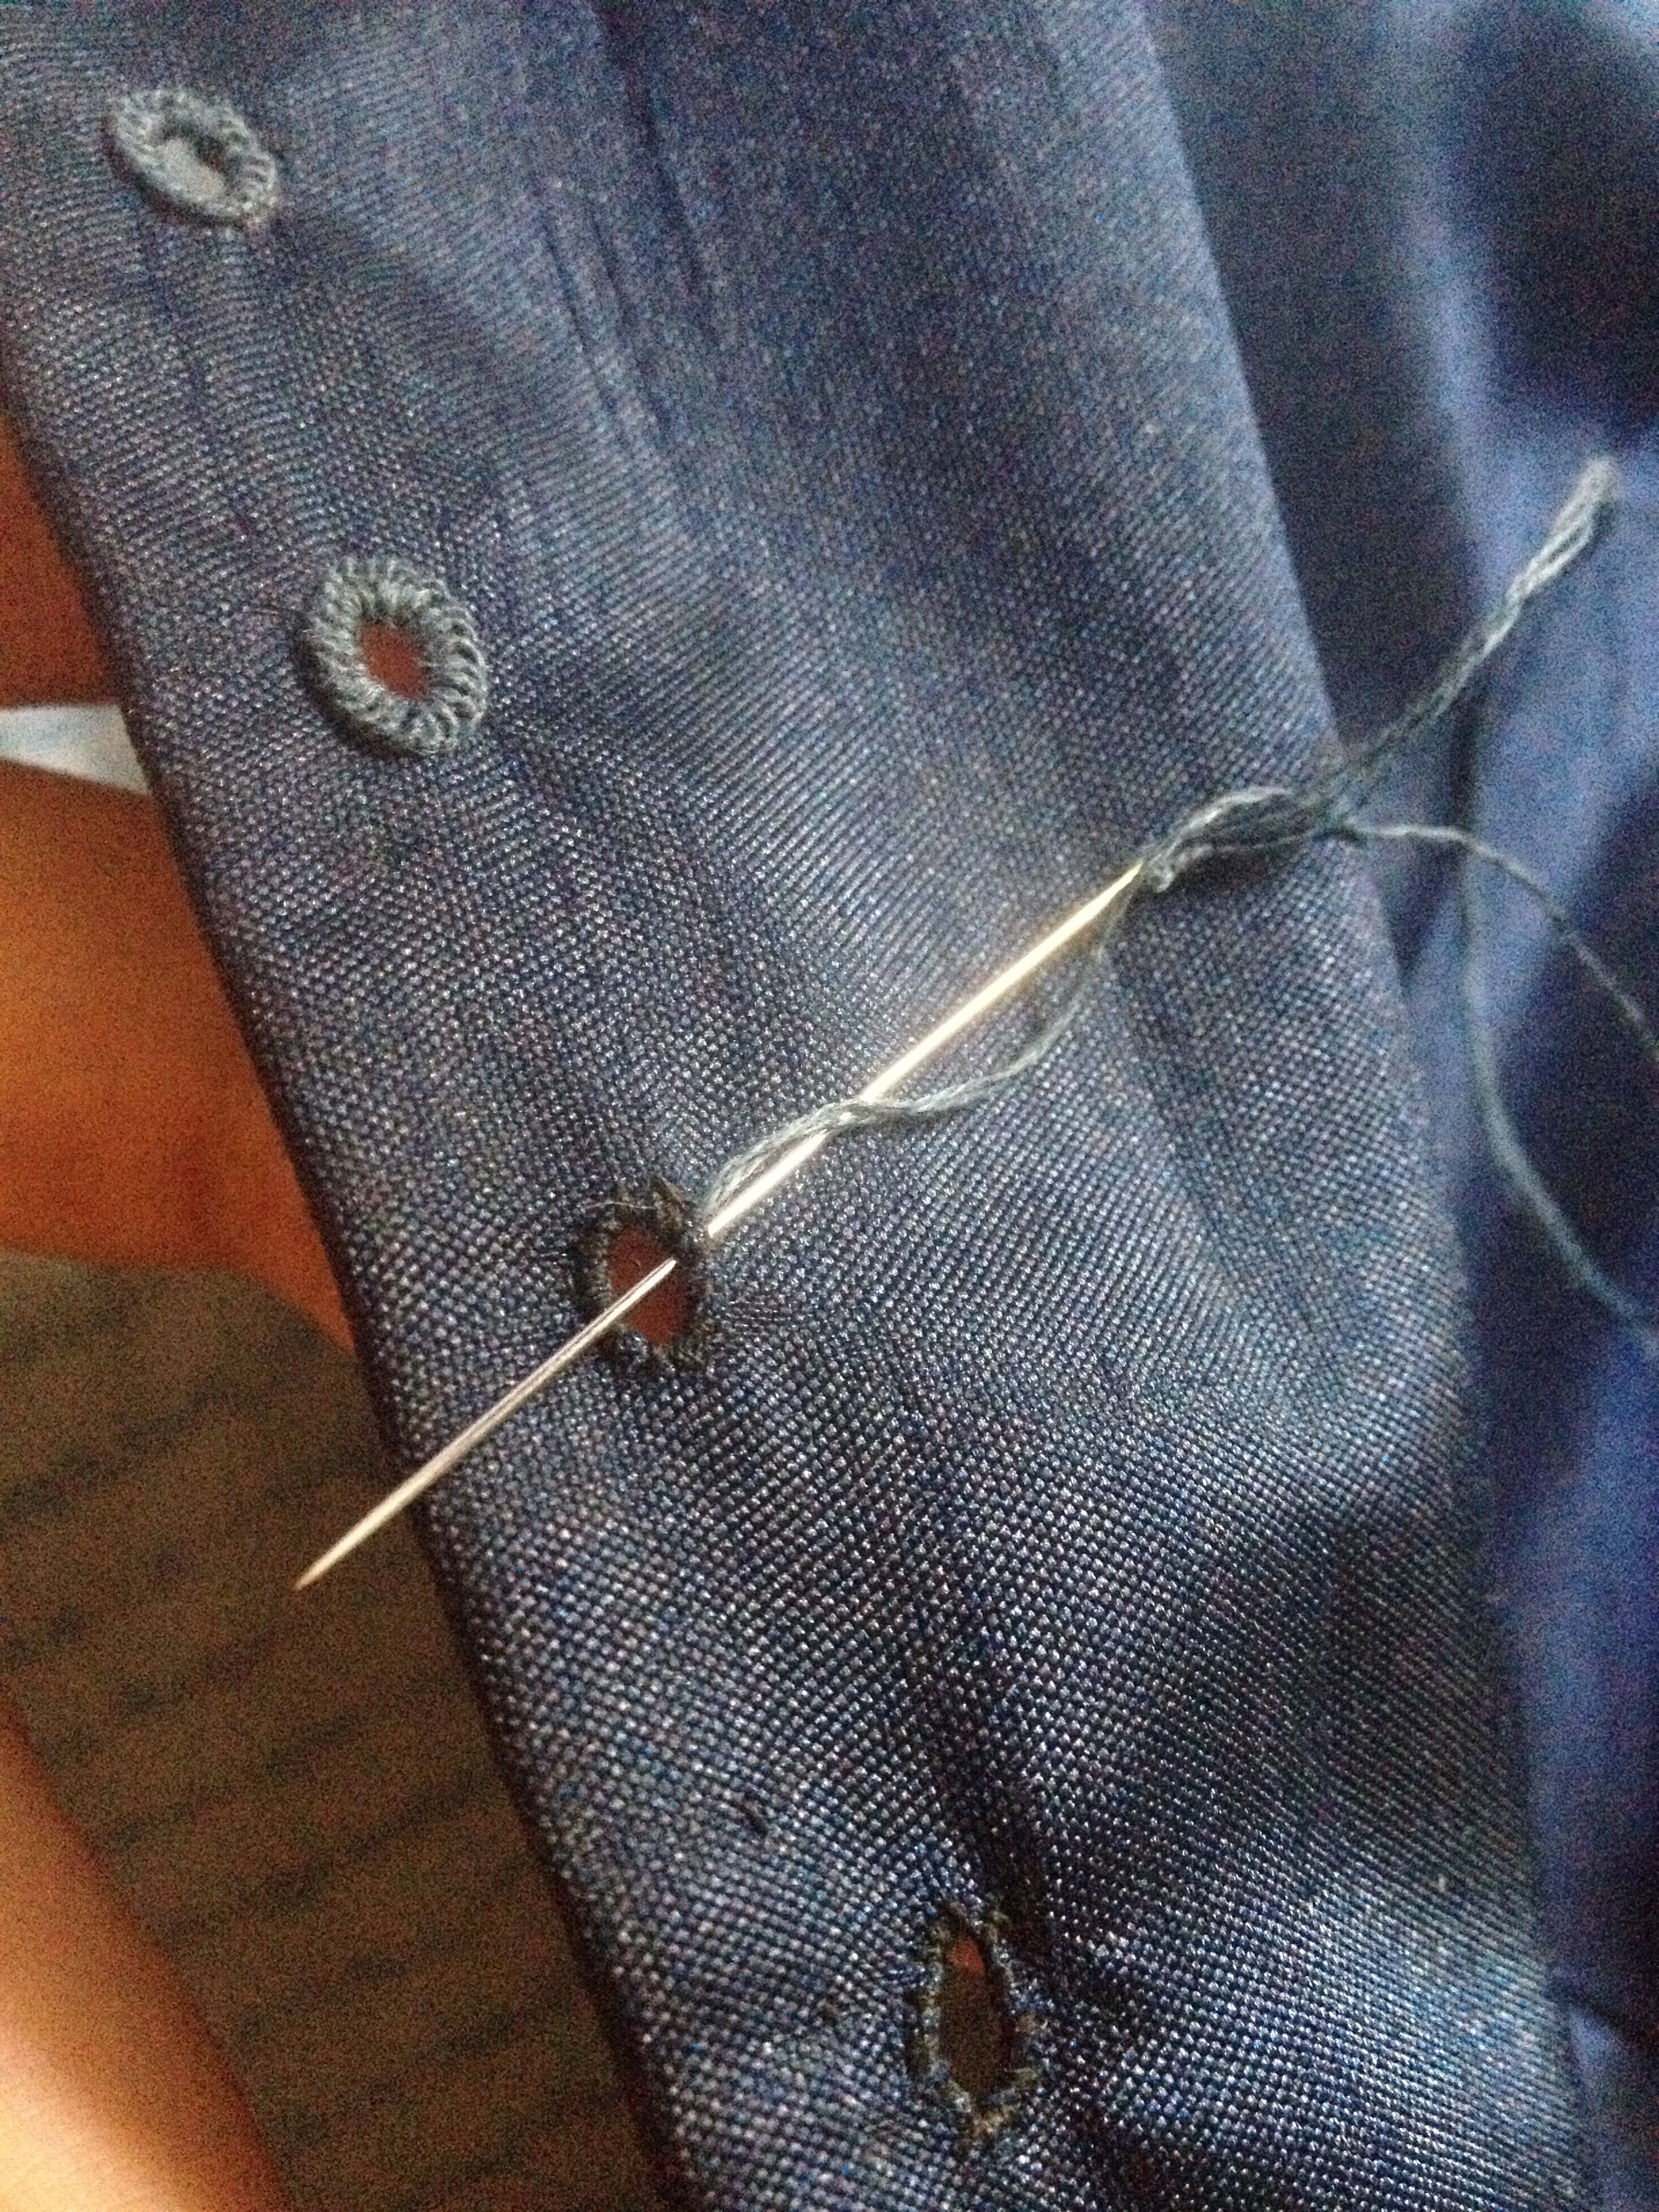
I had never done hand bound eyelets before, so I started by testing one on a scrap. I used two strands of waxed embroidery floss and a buttonhole stitch. This led to a very pretty result, but the fabric kept shifting and the finished eyelet was too small. To combat this I decided to whipstitch around each hole with normal thread (a staystitch, if you will) before going back around with the buttonhole stitch.
The top eyelet is done, and you can see the whipstitching on the bottom two. This preliminary stitching doesn’t have to be neat, it just has to keep the fibers tidy and out of the way.
To do the buttonhole stitch, start by putting your needle into the hole as pictured above.
Make your thread into a loop…
… and pull it through like so.
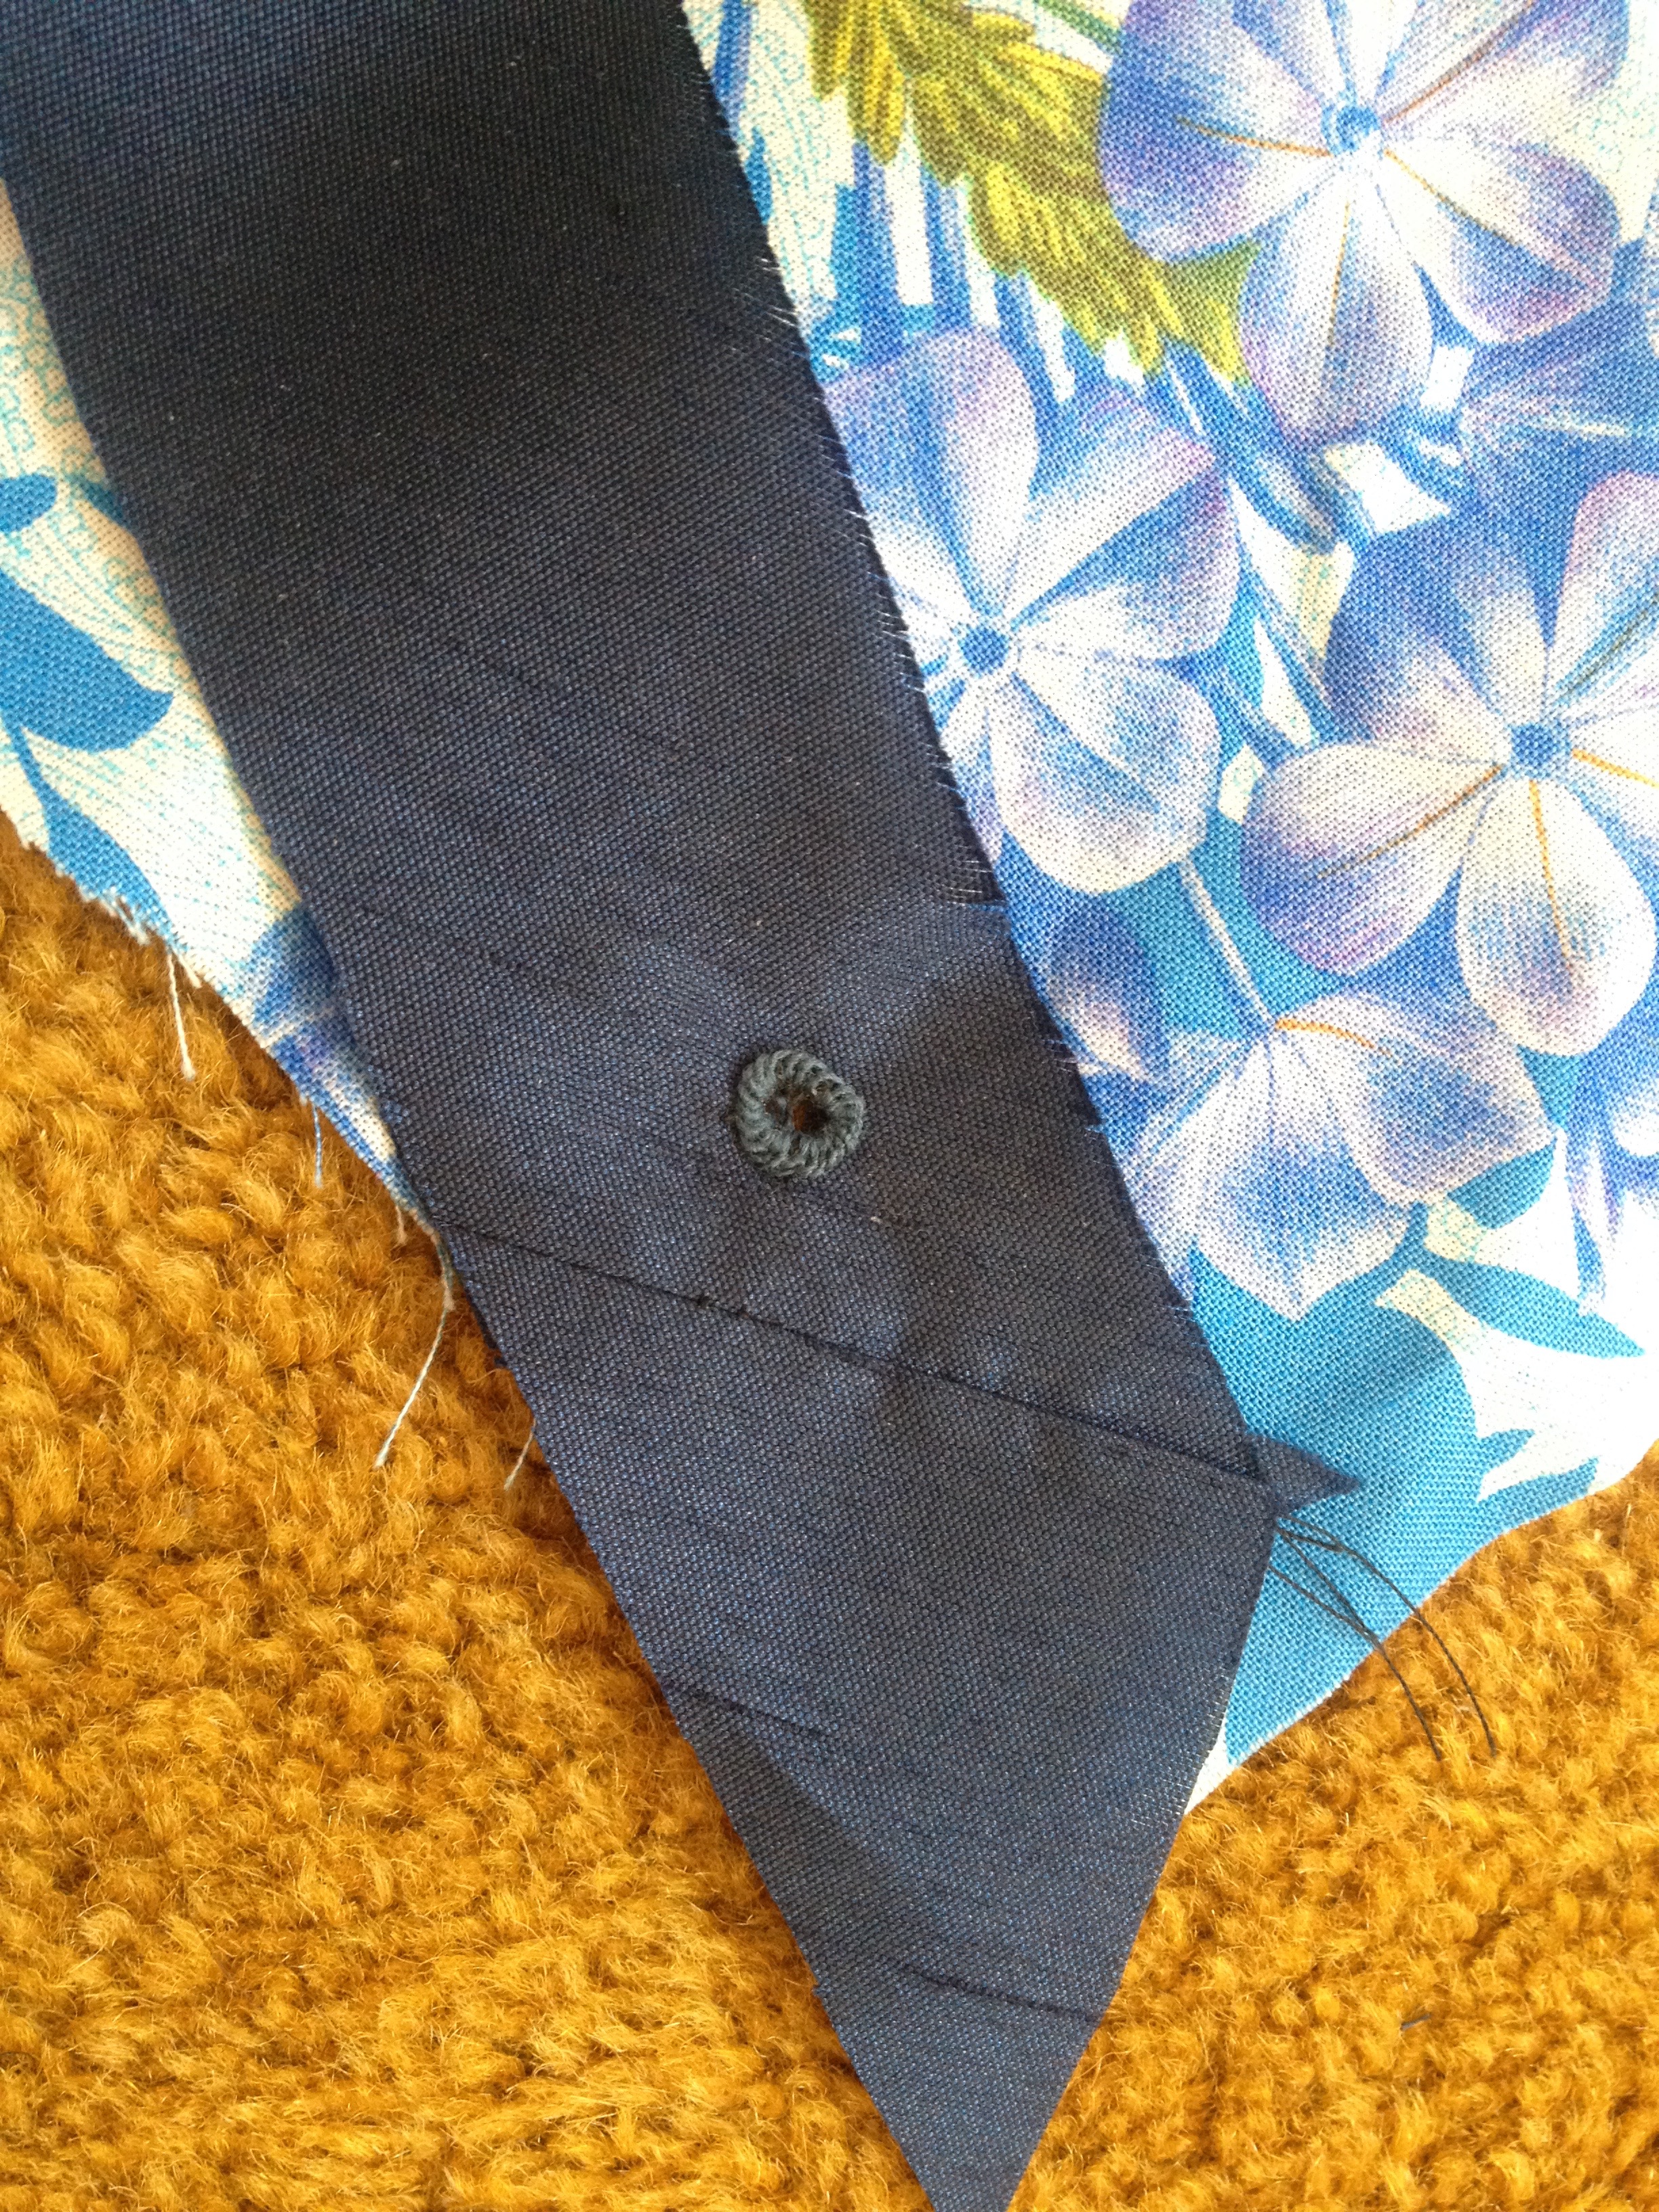
The buttonhole stitch forms a little knot, as you can see above. It’s your decision whether you want your knot to be positioned to the outside of your eyelet or the inside– I personally like the way it looks on the outside, even though it’s slightly less durable, so that’s what I went with.
Here’s what it looks like with two stitches! Many people do eyelets with just layers of whip stitching, but I personally love the textured look of the buttonhole stitch, so I prefer it despite the extra effort it takes.
And here are my finished eyelets (which took FOREVER and could certainly stand to be neater, but I’m very proud of them). They are staggered for spiral lacing, which Jen of Festive Attyre talks more about in this post.
Here’s a closeup of the lacing! I happened to have this 50c ribbon in my stash, which was the perfect width for my eyelets and an appropriately complimentary color. I didn’t have any lacing tips so I tipped it in several layers of scotch tape rolled up tightly, and then went over it quickly with a lighter to melt the tape + fraying poly ribbon. It worked wonderfully as a quick solution!
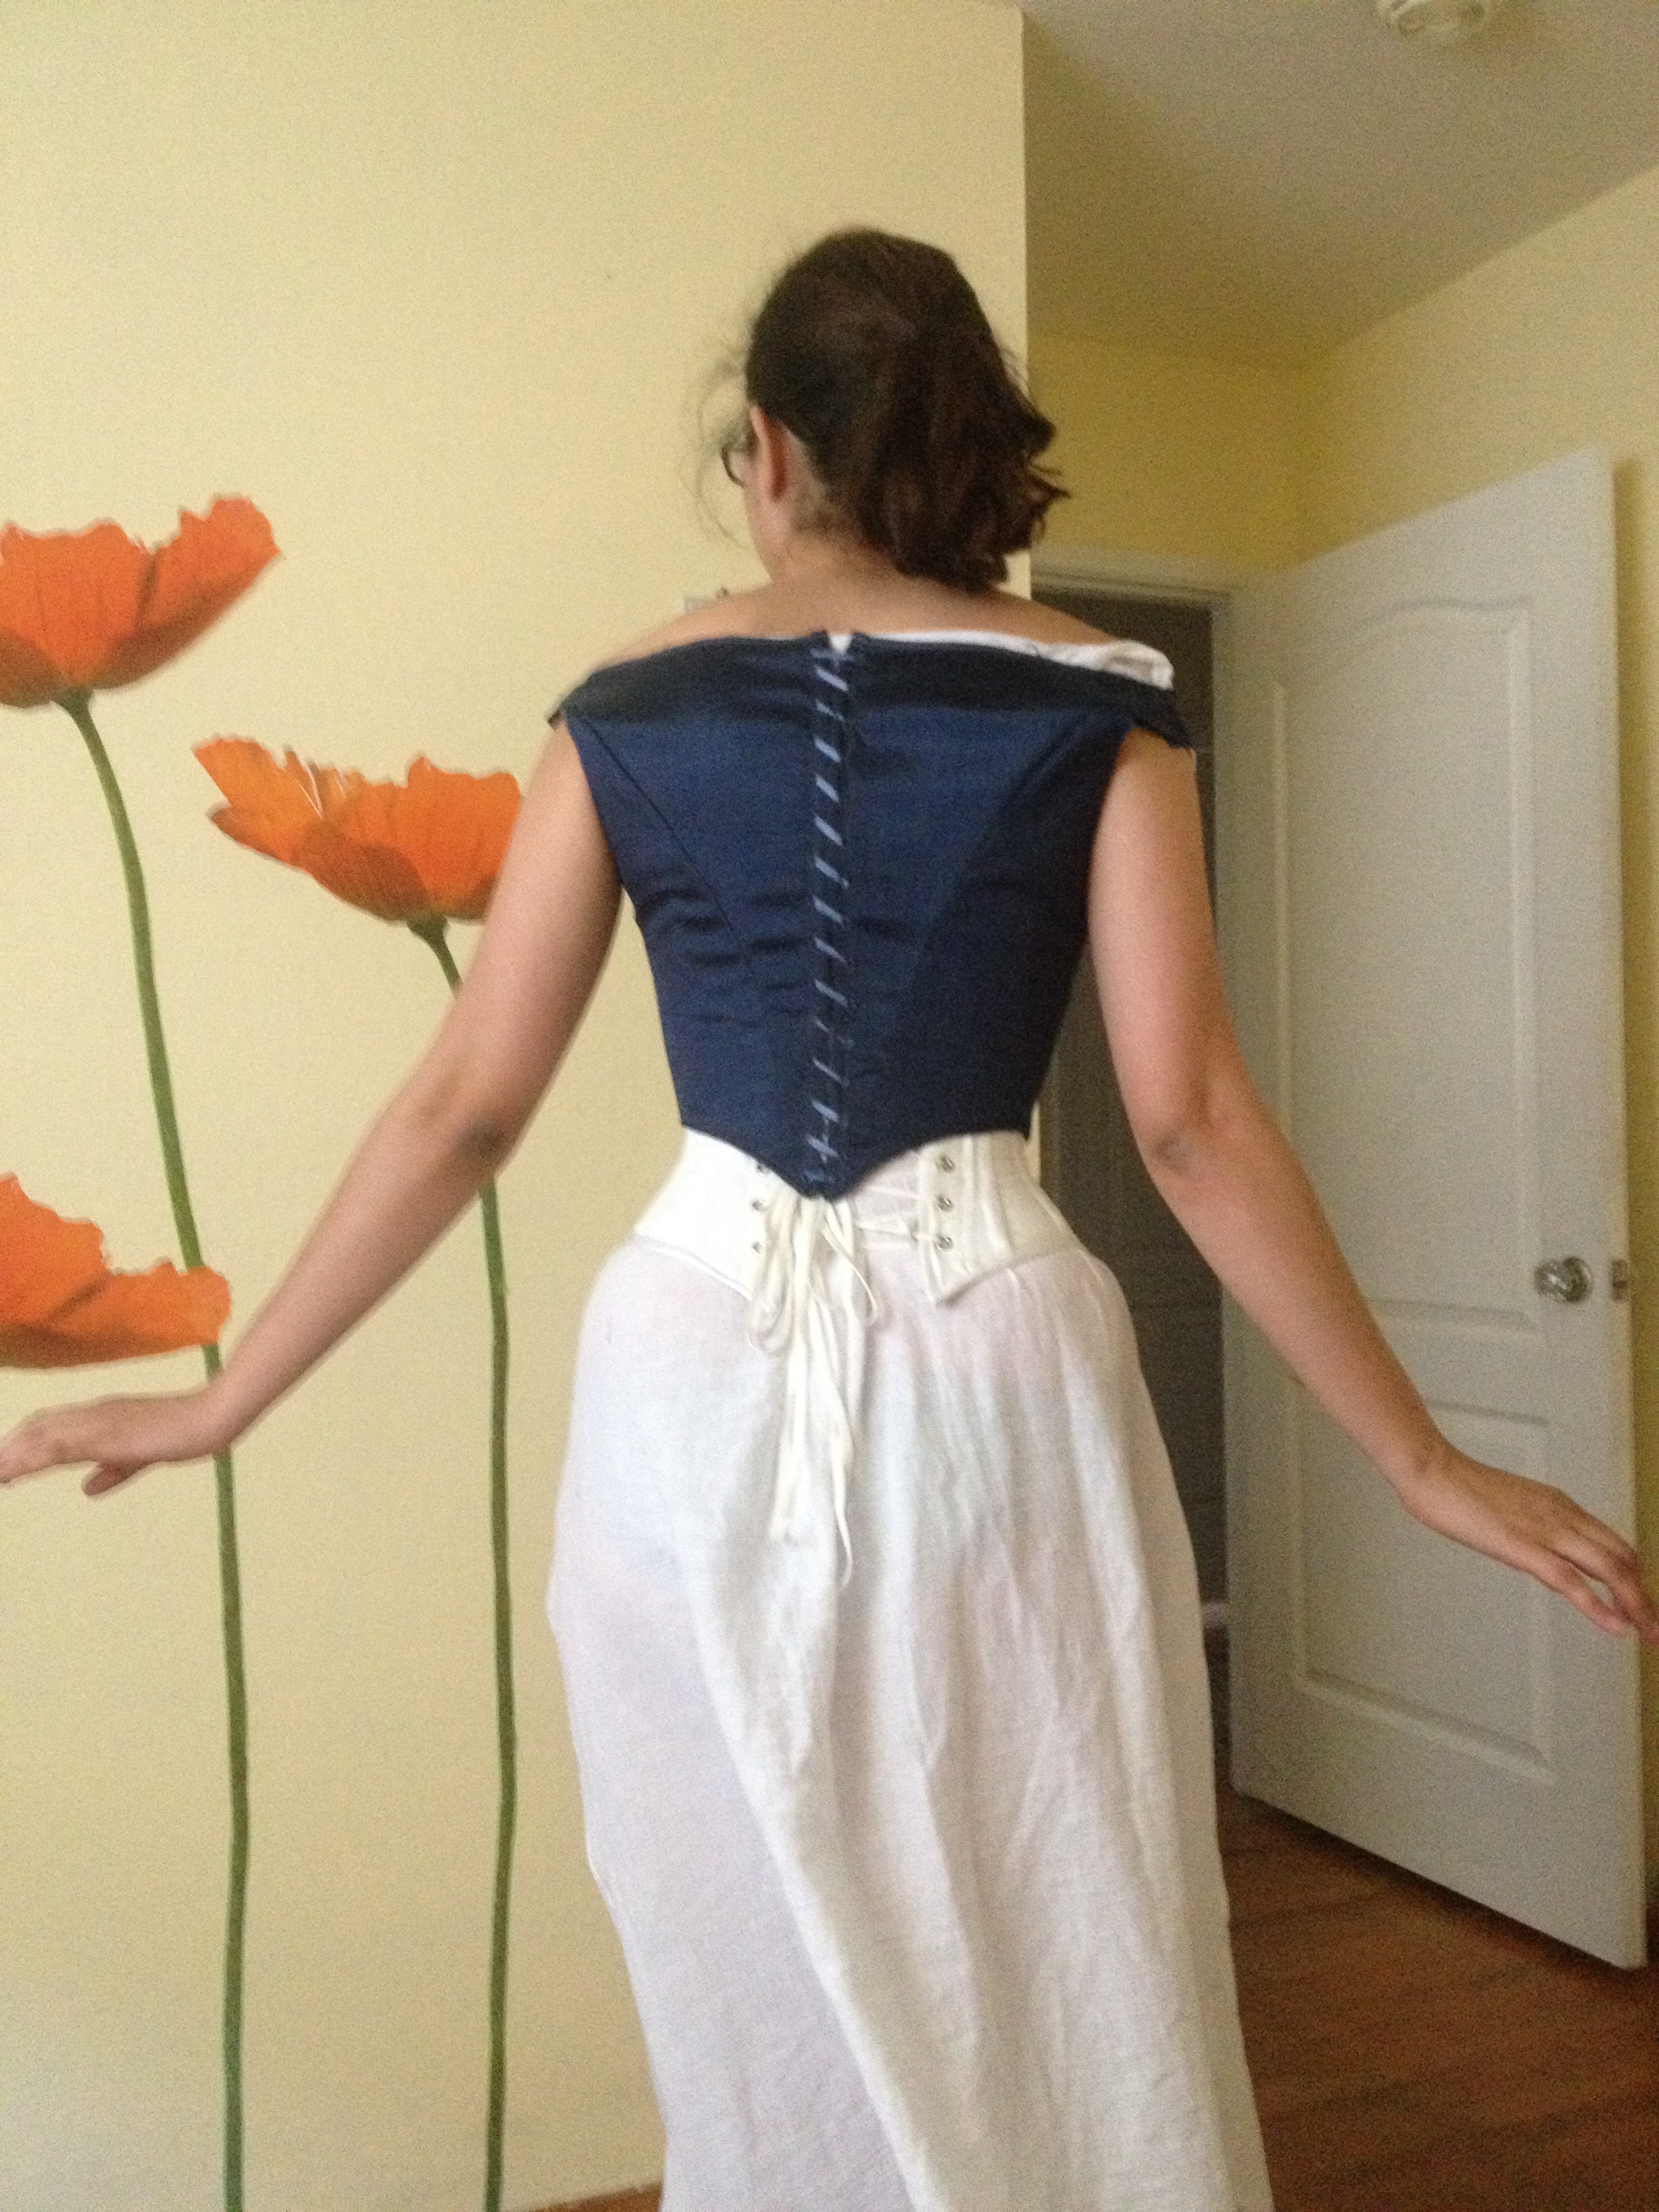
The finished bodice fits perfectly over my corset! The patterning gods were definitely smiling on me. Please note that I left the neckline unfinished because it was going to be covered by the bertha anyways and I’m lazy.
Here’s a full shot of the back all laced up! Forgive the rumply chemise strap– since it was originally made as a Regency shift it did not want to cooperate with the low, wide neckline that was stylish in the 1860s.
And that’s it! I’ll be back next week with the last post, which will cover the skirt, the ruffly bertha, and the headdress.
After far too long, I have finally got around to writing about this costume. It was honestly one of the largest projects I have attempted, besides Lady Three, and taught me just as much about time/money management! I also learned a good deal about both historical and modern construction and learned to fit better in general.
Today’s post will be about the undergarments– the corset, cage crinoline, and petticoats (I made the chemise too, but it isn’t very nicely constructed or finished so I won’t be talking about it).
I began this costume the day after Fanime 2015. I was still riding high on the feeling of having won something (as I was certainly not expecting to), so I was super motivated and got right to work on my next adventure!
This costume actually evolved as I went along. Initially I was inspired by Cinderella; after seeing the live action movie I knew I needed to make myself a huge elliptical 1860s ballgown. I ordered fabric and notions in March, but didn’t have time to work on it in the mad dash to get Three done.
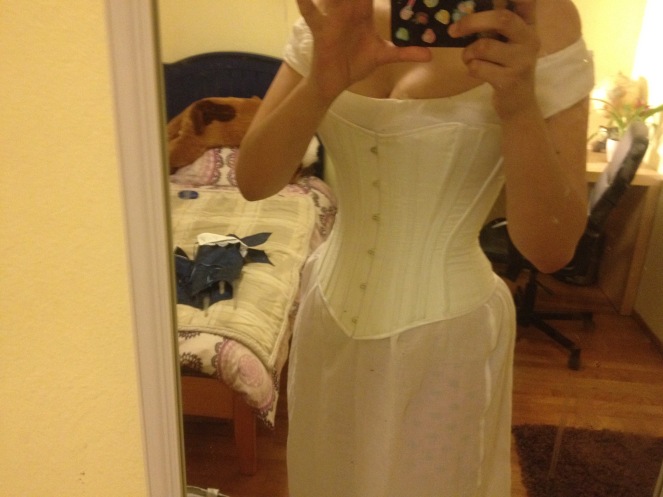
The first piece I started was the corset. The pattern is scaled up at 400% from Corsets and Crinolines and mildly altered to my shape. I used two layers of domestic coutil from corsetmaking.com with a super thin Indian silk-cotton blend as the fashion fabric.
I left generous seam allowances in order to flat-fell all the seams, though I wouldn’t recommend doing so since it added a lot of unnecessary bulk. In all honesty, I only needed one layer of coutil anyway!
I was super nervous since this was my first time inserting a busk, but I followed Sidney Eileen’s tutorial (and gathered advice from a variety of corset making forums) and it turned out perfectly! I just used a normal tapered awl to make the holes for the pin side of the busk, and there hasn’t been any fraying thus far.
I used ¼” spiral steel bones in the curved seams and ¼” flat steel in the straight seams. I did use proper boning tips, but it wasn’t worth the trouble for the flat steels. I prefer using tin snips to cut the ends into a rounded shape, wrapping them with several layers of medical tape, and dipping them in clear nail polish! It’s cheaper, easier, and plenty durable for light costume wear.
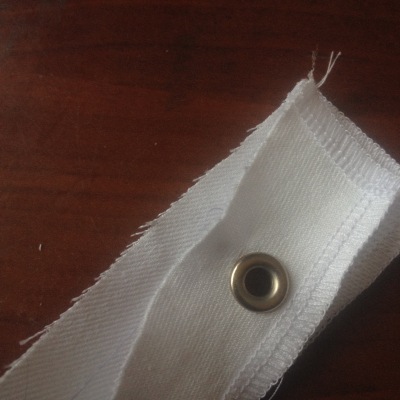
Since I’d never used two part grommets before, only those awful Dritz eyelets, I made sure to do several tests. I used this grommeting kit and it worked beautifully! Instead of cutting the holes, however, I made them with my awl– since using an awl doesn’t cut the fibers, the fabric surrounding the grommet is sturdier and won’t weaken over time.
I did get so carried away that I forgot to put the back on one of the grommets before hammering it in! It’s pretty much impossible to remove a grommet without cutting the fabric, so I left it, but it still irks me.
Here it is all boned and laced up. I used this corset lacing and laced it in the bunny ears style which facilitates self-lacing. The loops are located at the waist so I can easily reach behind, pull the corset tight, and tie the loose ends into a bow.
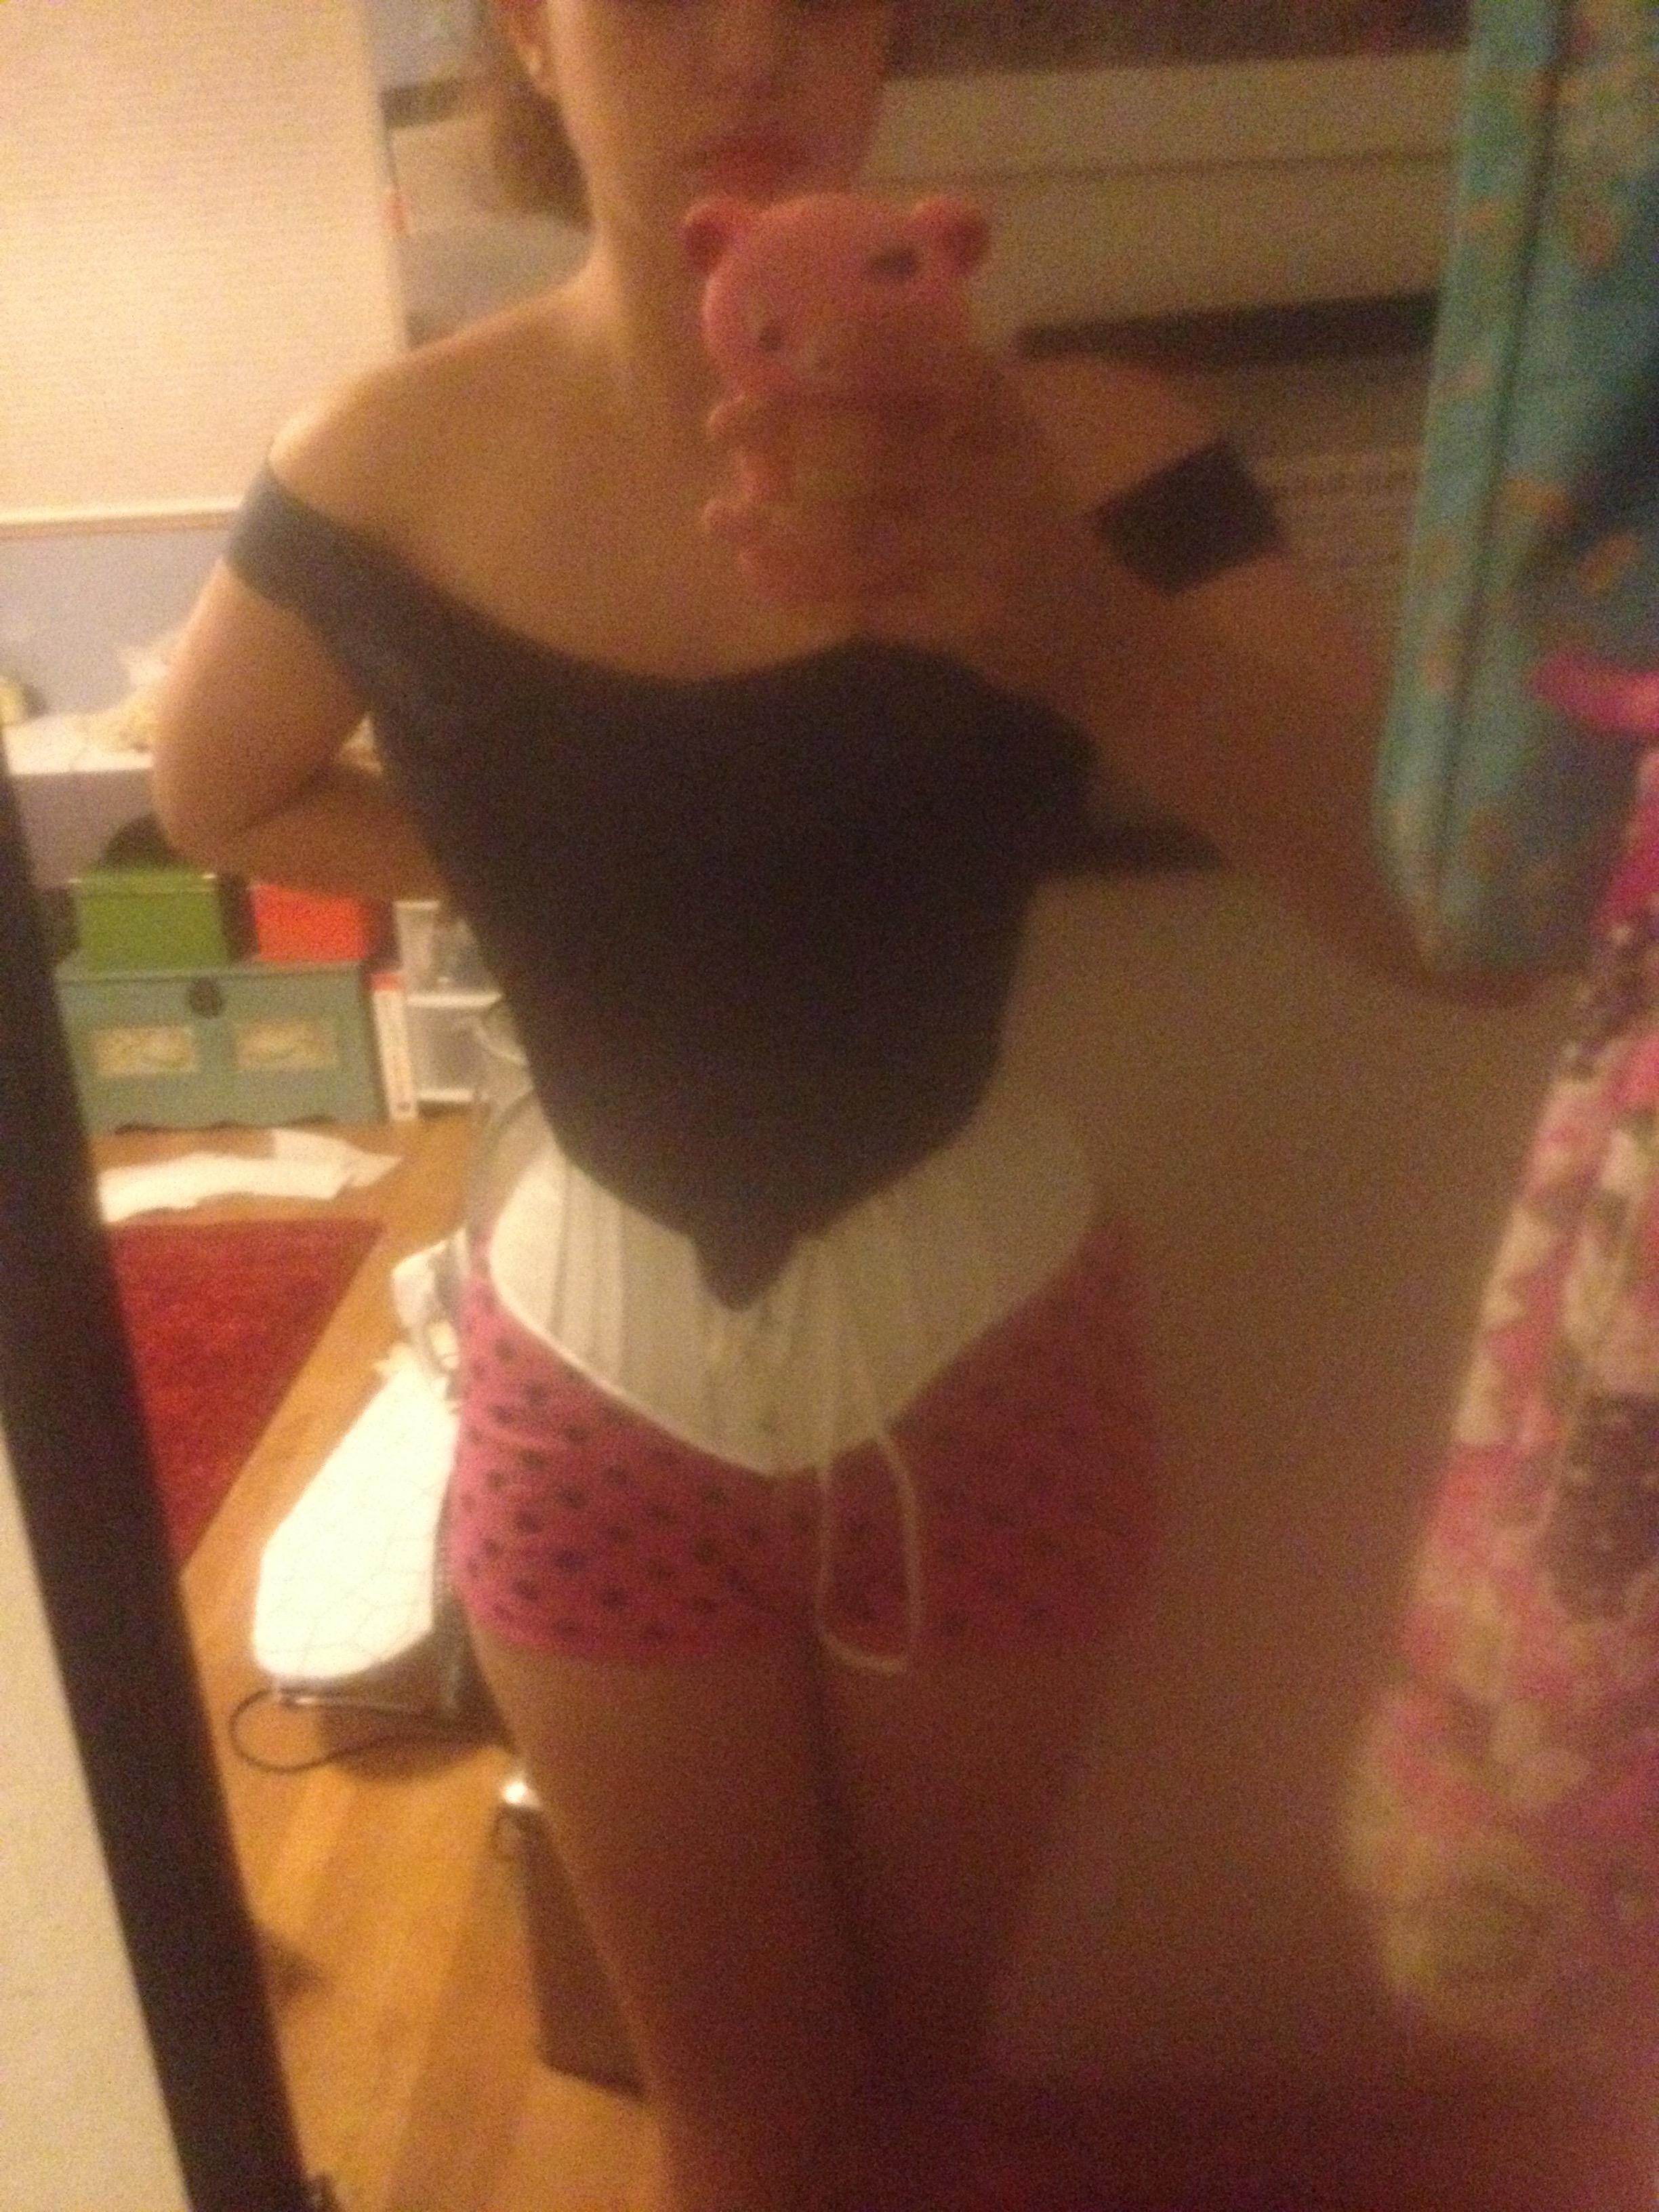
And this (blurry, awful) photo is my first fitting! I really loved the shape it had, so I forged ahead. All that was left at this point was the binding.
I used premade satin bias binding– it was actually too wide, so I just stitched it closer to the edge and tucked the rest of it under. It doesn’t look that nice from the inside, but it’s a okay from the outside (and that’s what counts).
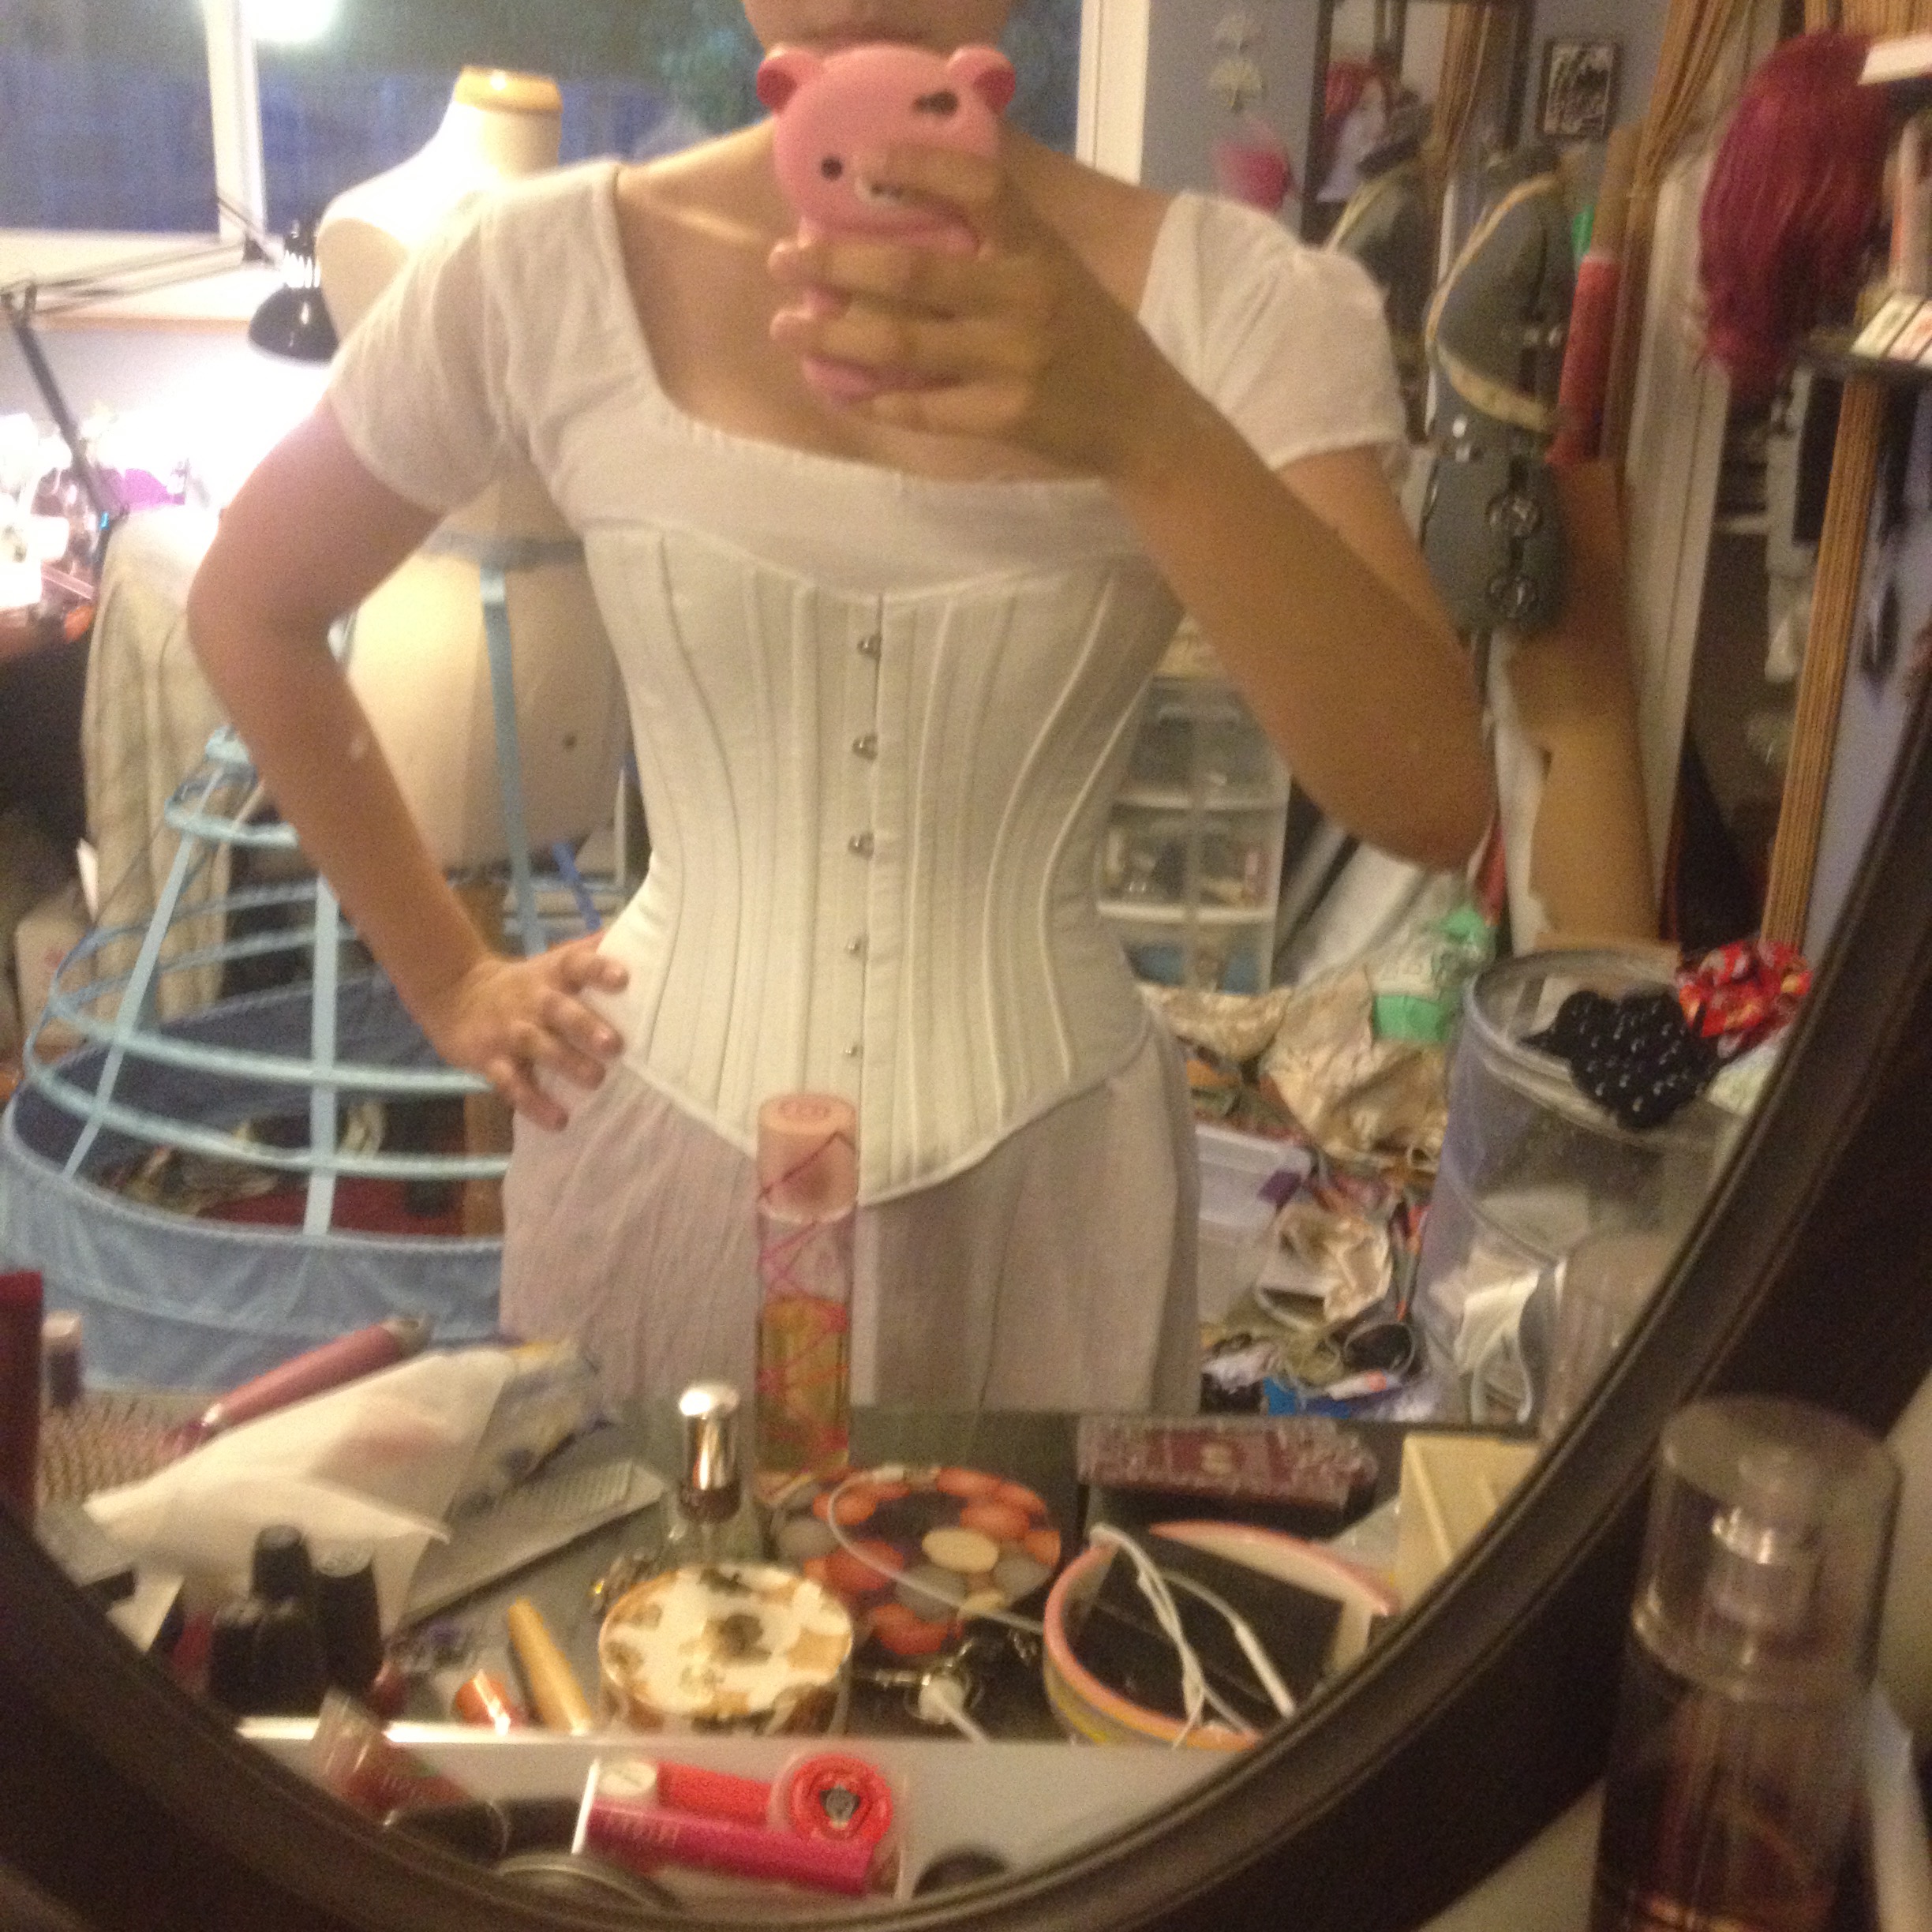
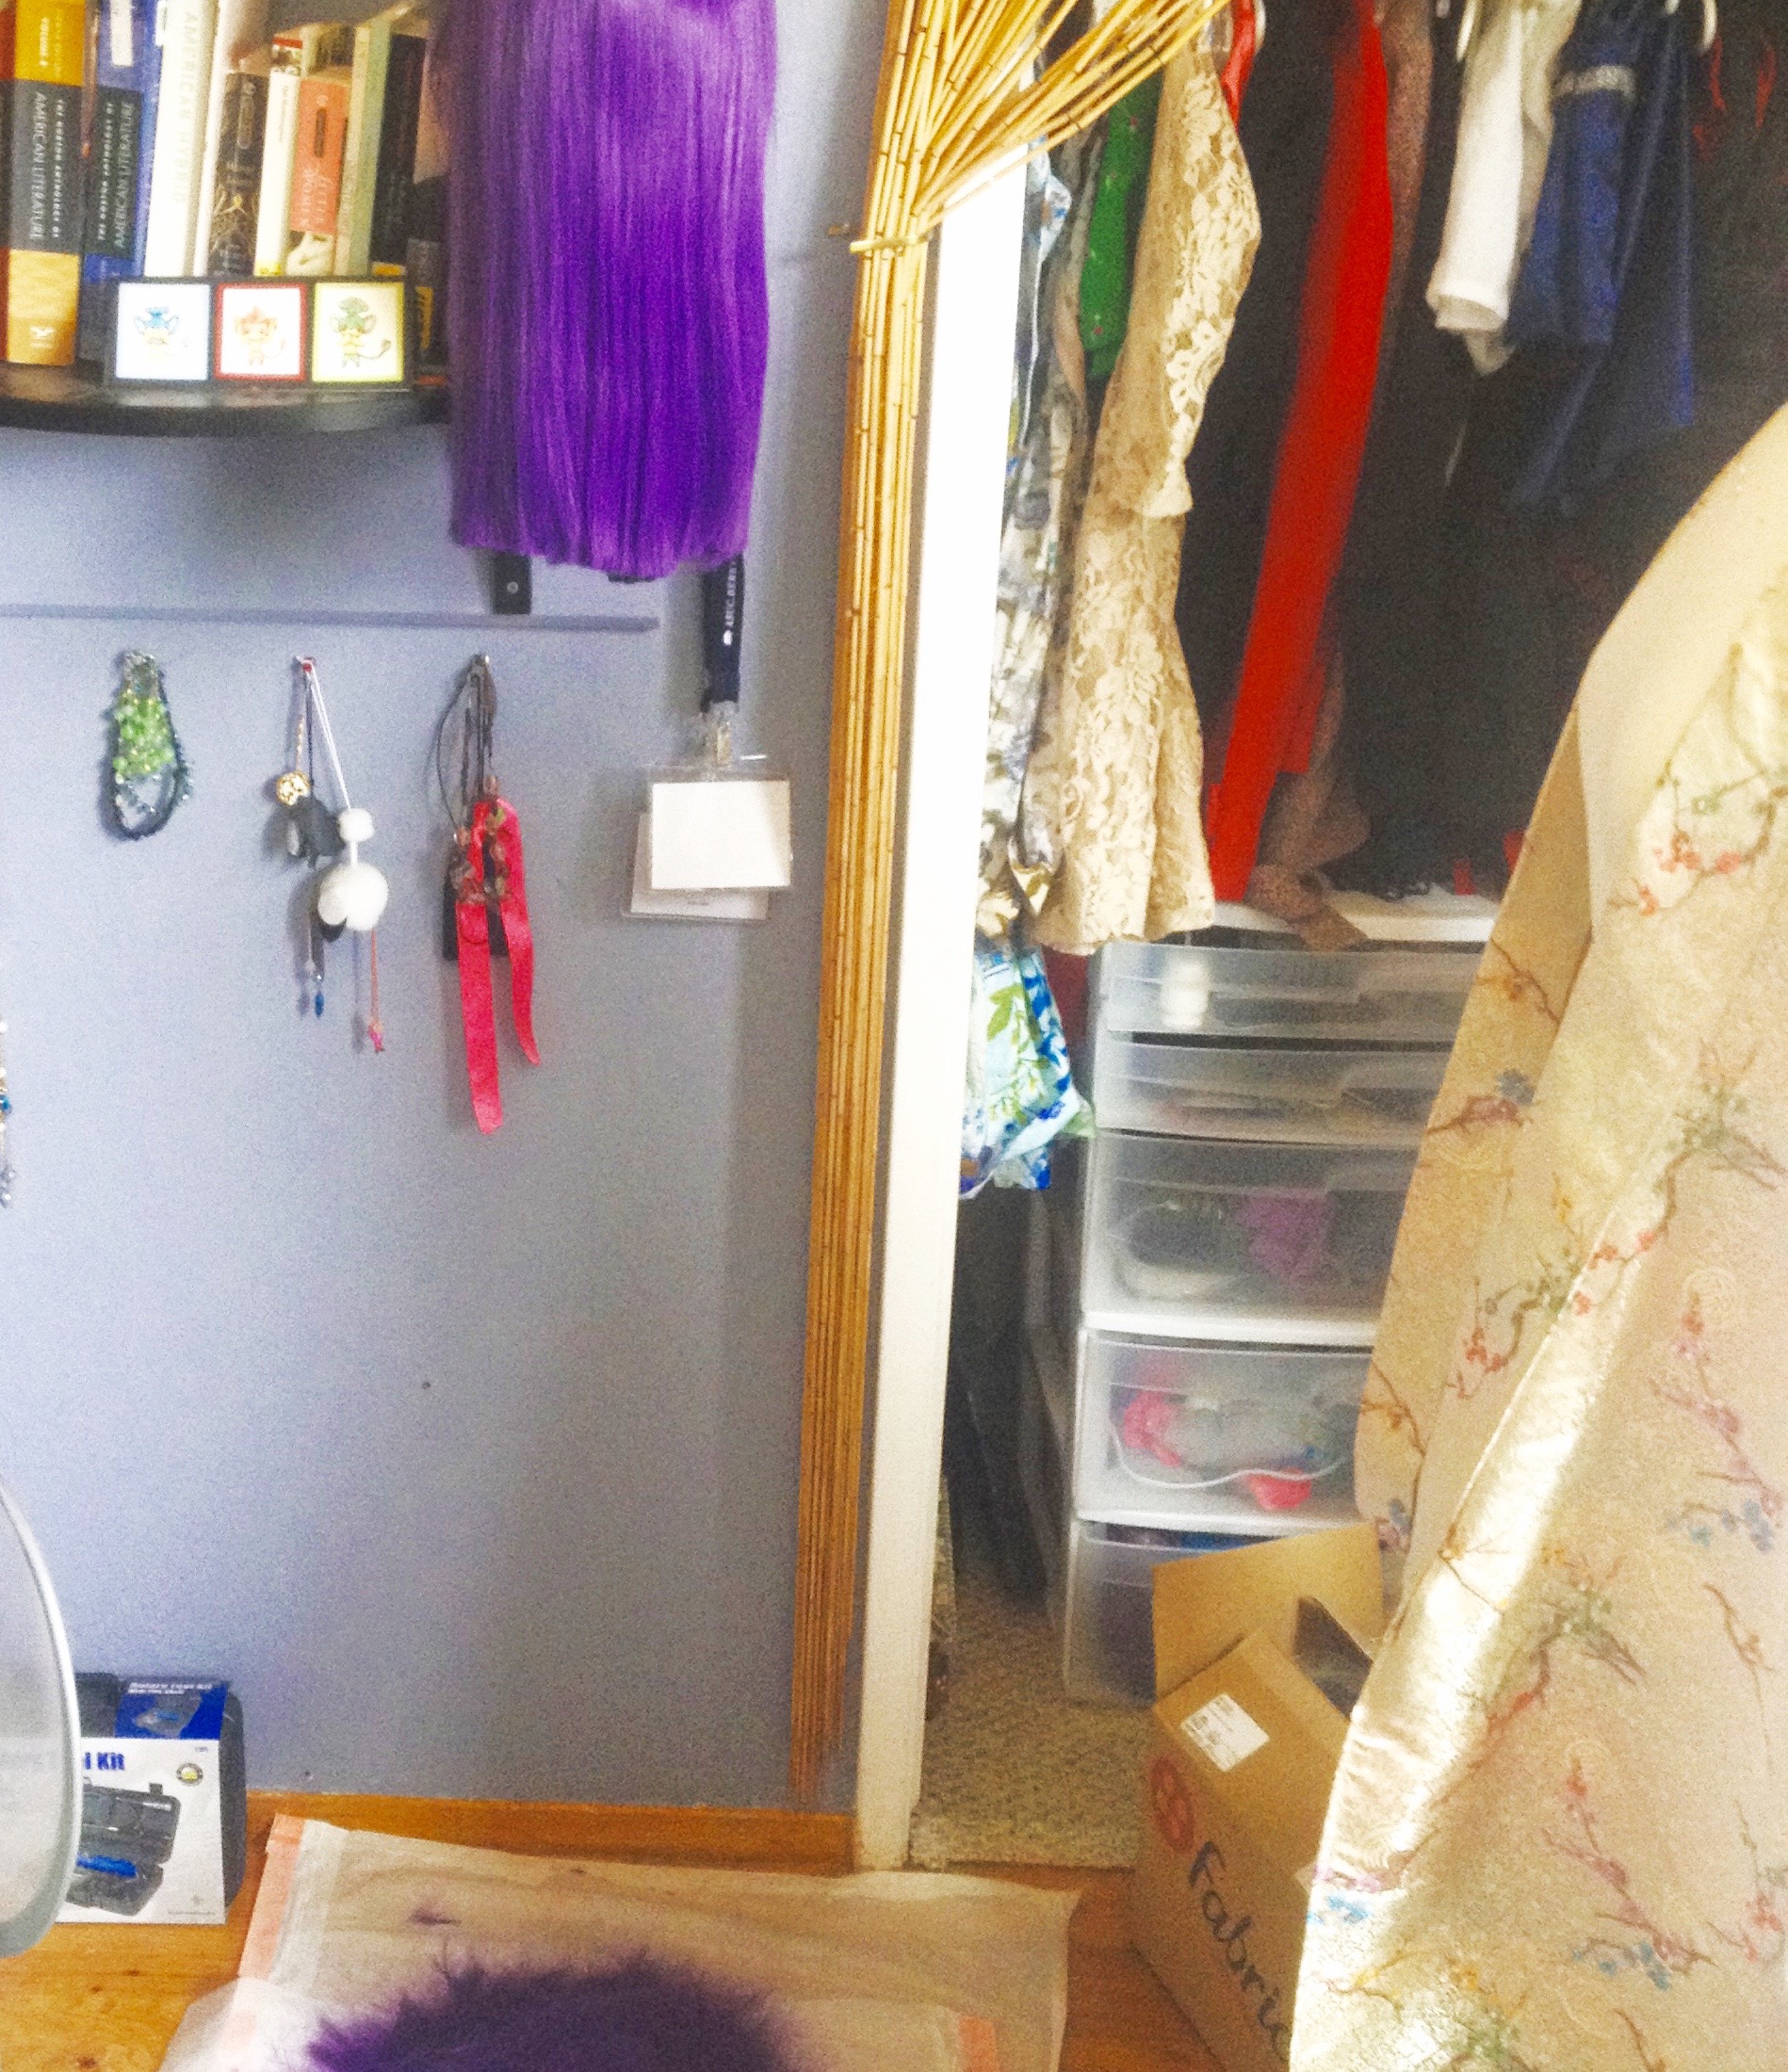
Here’s the finished corset over my chemise. It was barely laced at all at that point, since I was still seasoning it! And pardon the messy room, I’m terrible about cleaning when I’m working on a project.
The true secret of corsets isn’t the compression– it’s the redistribution! I barely get a 2″ reduction in this one, and that’s apparent in profile since my midsection looks much wider than normal.
However, from a front or ¾ angle the shaping is much more apparent. You can also see, now that it’s seasoned and laced properly, that I should have added about 5″ more to the hips, since I’m getting some very unflattering muffin… bottom? Whatever it is, it is not cute! Fortunately everything below my waist is hidden in this costume, and now I know which alterations are necessary should I choose to reuse this pattern.
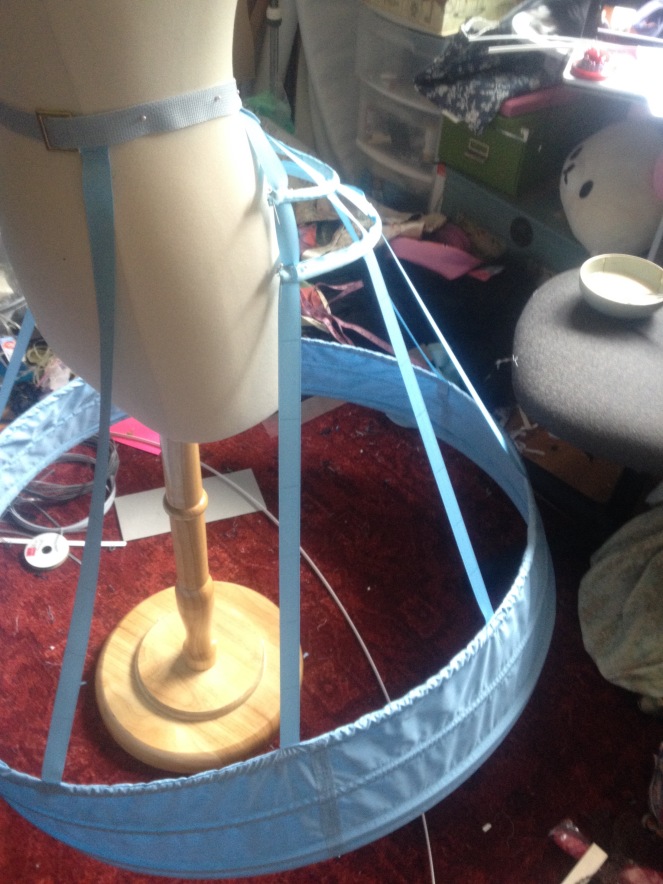
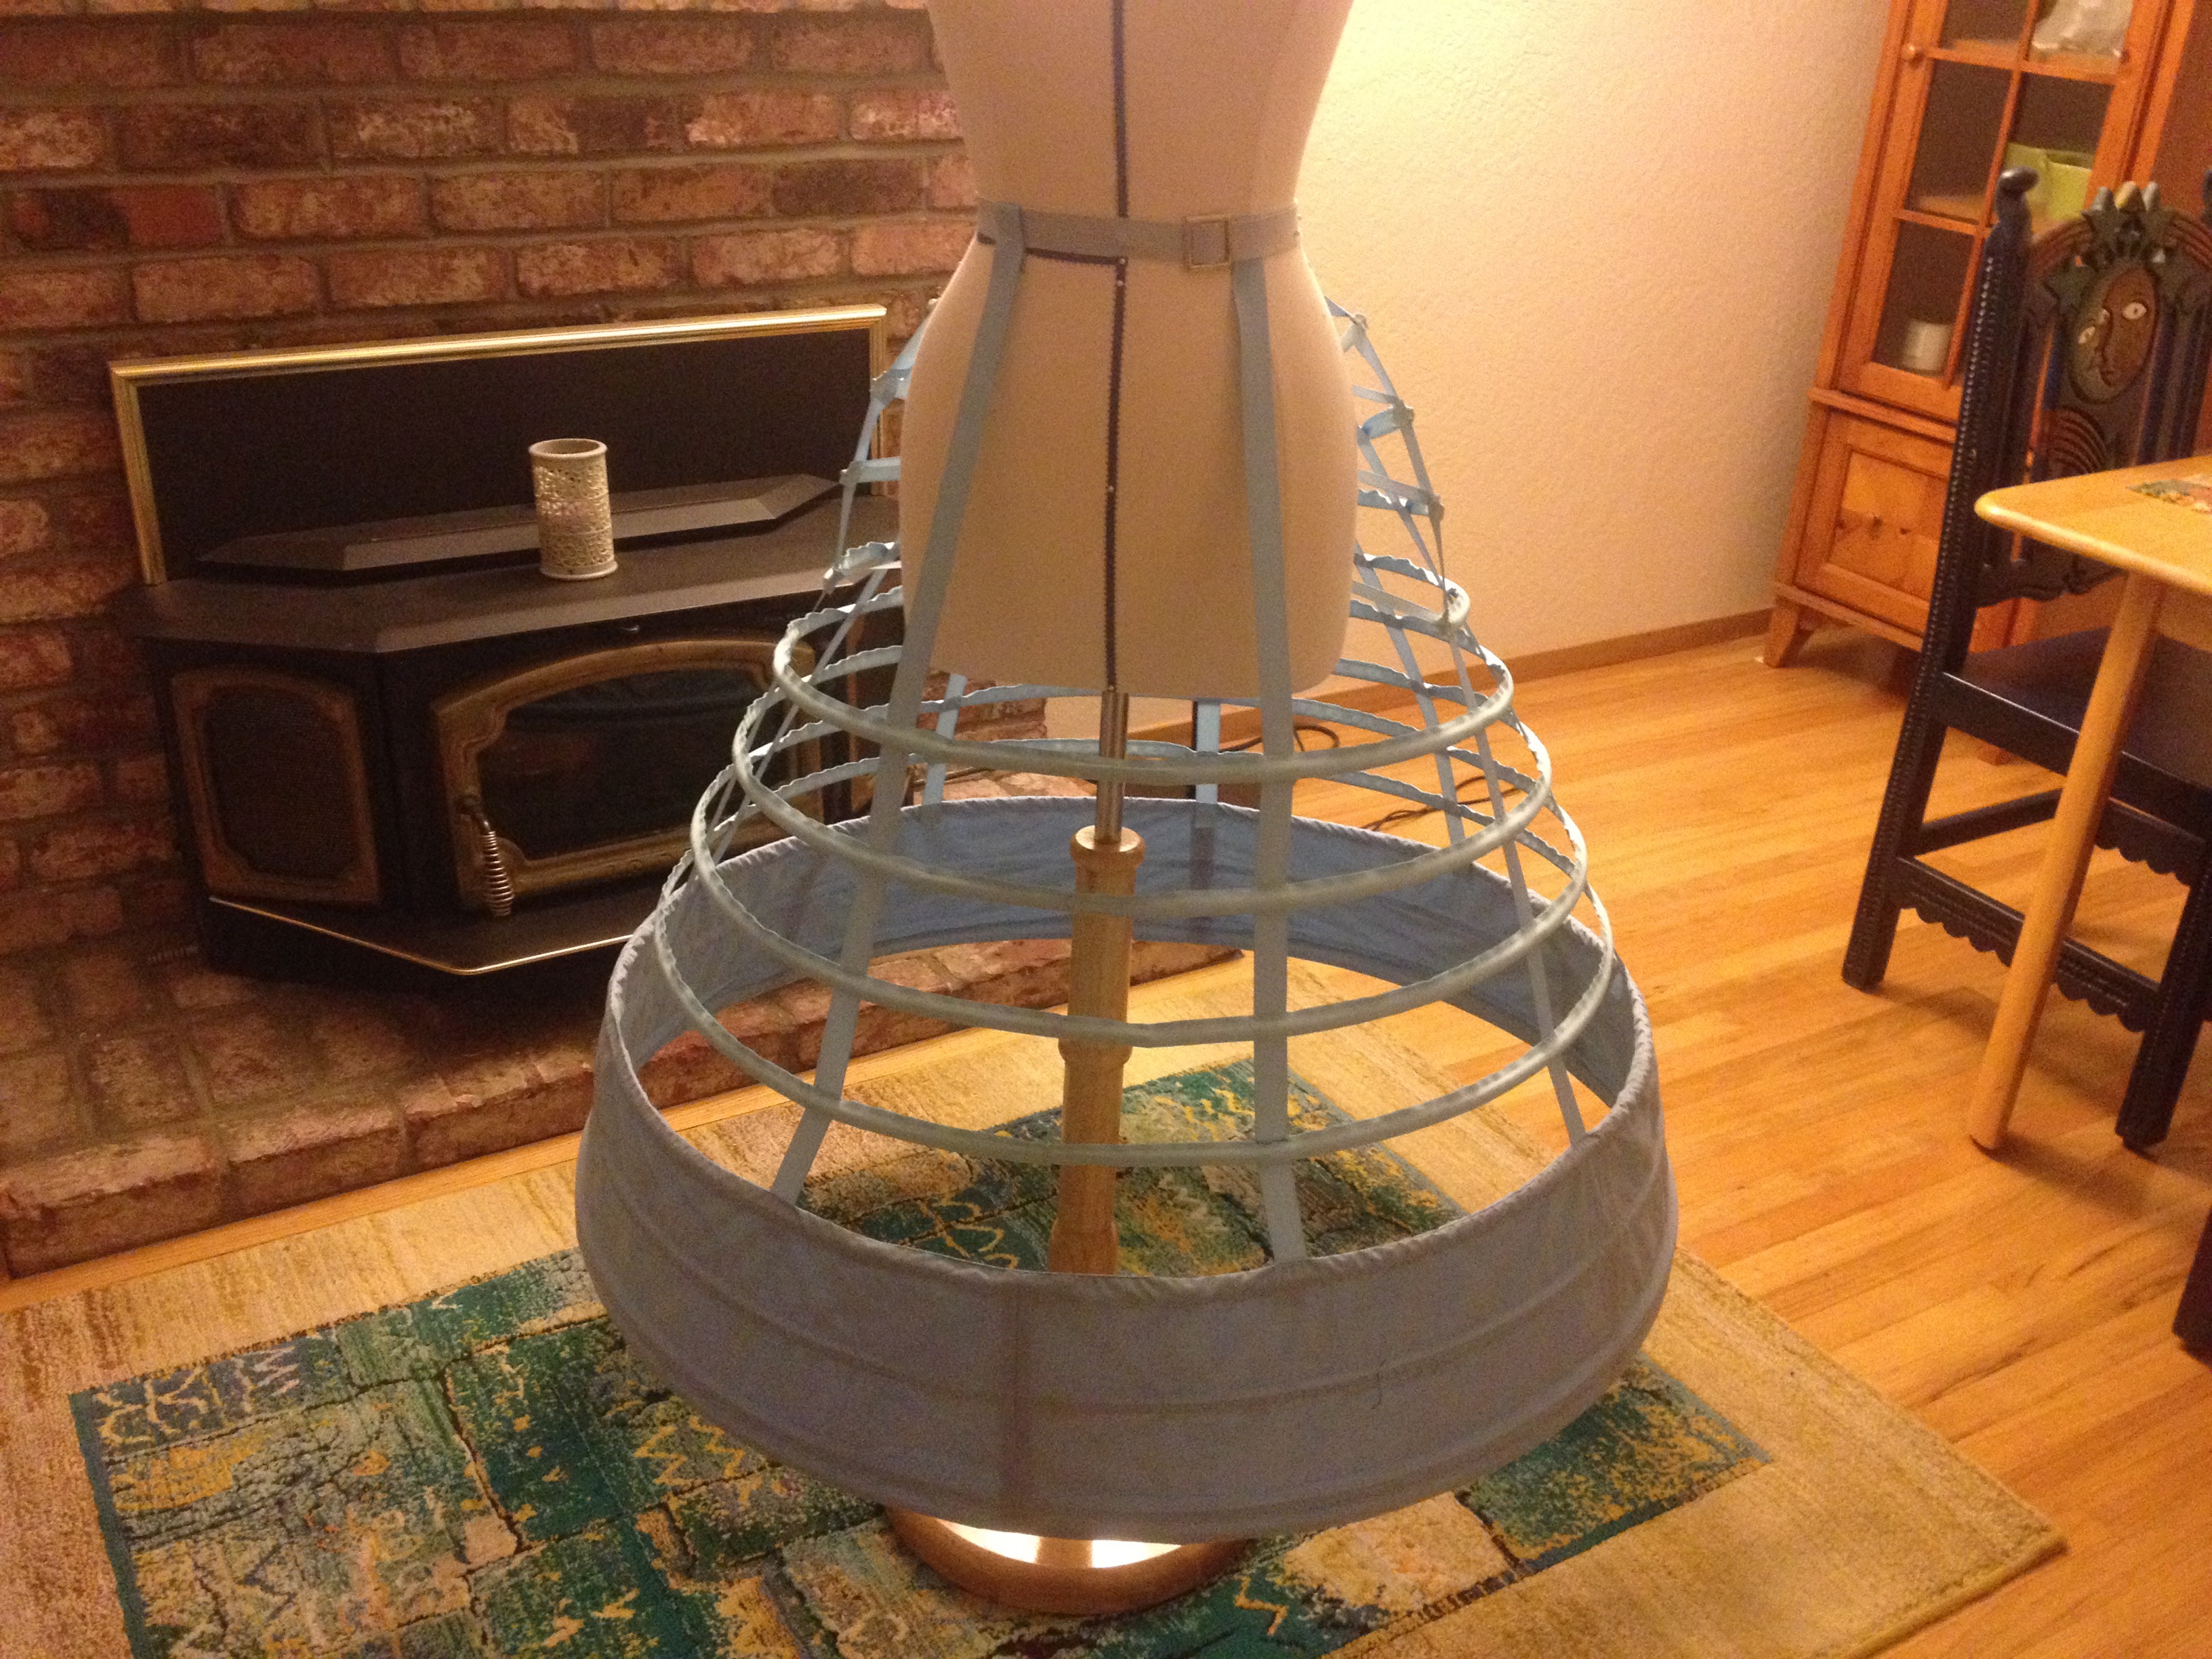
The next piece I worked on was the cage crinoline. I used Truly Victorian’s 103 elliptical crinoline pattern, as I couldn’t find any reliable tutorials for elliptical versions on the internet and I had my heart set on the proper 1860s silhouette.
Construction was more difficult than I expected, but I managed without too much difficulty. All my materials were pale blue in homage to Cinderella, though I decided to make my dress a darker shade that better suited my complexion.
Here are some front, side, and back views of the finished crinoline. You can adjust the level of “bustle” by tightening or loosening the ribbon ties at the back! It’s a clever design that gives it a lovely and authentic shape.
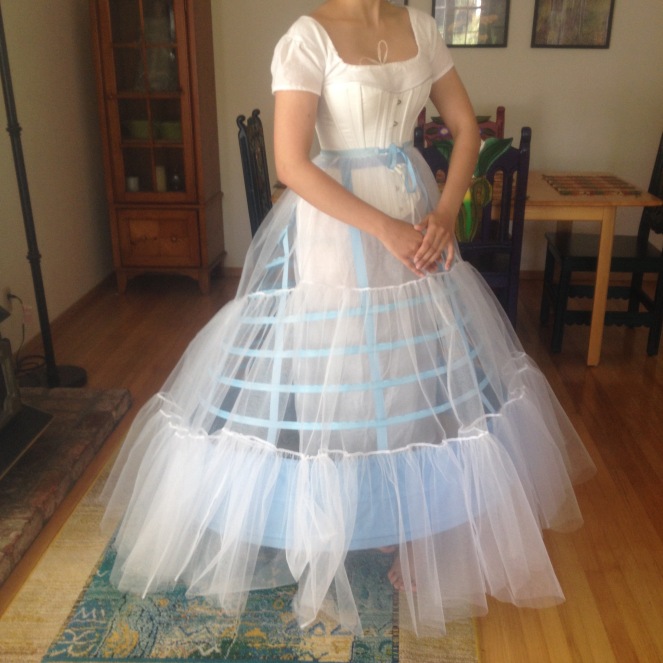
These lovely photos snapped by my father show the finished undergarments all together!
The petticoat (pictured is only the first layer of three) was made out of netting purchased here. I used the entire bolt! Needless to say, this is not remotely historically accurate, as I just wanted as much volume as I could possibly achieve for a minimum of cost and labor. It was also a chance to test my new ruffler foot, though I did have some issues because I purchased a Singer foot for my Viking machine (it worked in the end, but not before several needles met untimely ends).
The process of actually making the petticoat was quite simple. It’s a three-tier petticoat, which means that the first tier is 3x my corseted waist measurement (78″ long), the second tier is 3x that (234″), and the third tier is 3x that (702″). The height of the tiers combined equalled my waist-to-floor measurement over my crinoline. It was 45 inches, which meant that each tier was 15″ tall. However, since this crinoline was elliptical, my waist-to-floor measurement at the back was actually 2″ longer (47″). To make sure my petticoat was even all around, I added an extra 2″ in height to JUST THE BACK of my top panel. In short, the top back piece wasn’t a perfect rectangle, but more of this shape.
Please excuse the horrendous trackpad drawing! The shape is exaggerated, but that’s the general idea.
Once the tiers were ready, I just ruffled them together. I placed my tiers right side together, shorter tier under the ruffler foot, and fed them through. When doing this, the longer tier should get ruffled while the shorter one stays flat. I did gather the top by hand, since I wanted control while sewing it to the grosgrain ribbon that I used as a waistband. After that, I just sewed up the front seam and it was finished! This takes a lot of time and fabric and it’s super irritating to have to shove so many layers of scratchy netting into your machine, but you get a lovely ruffly petticoat in the end. I do not recommend using tulle, it just doesn’t have enough volume. This would, however, be lovely in organdy!
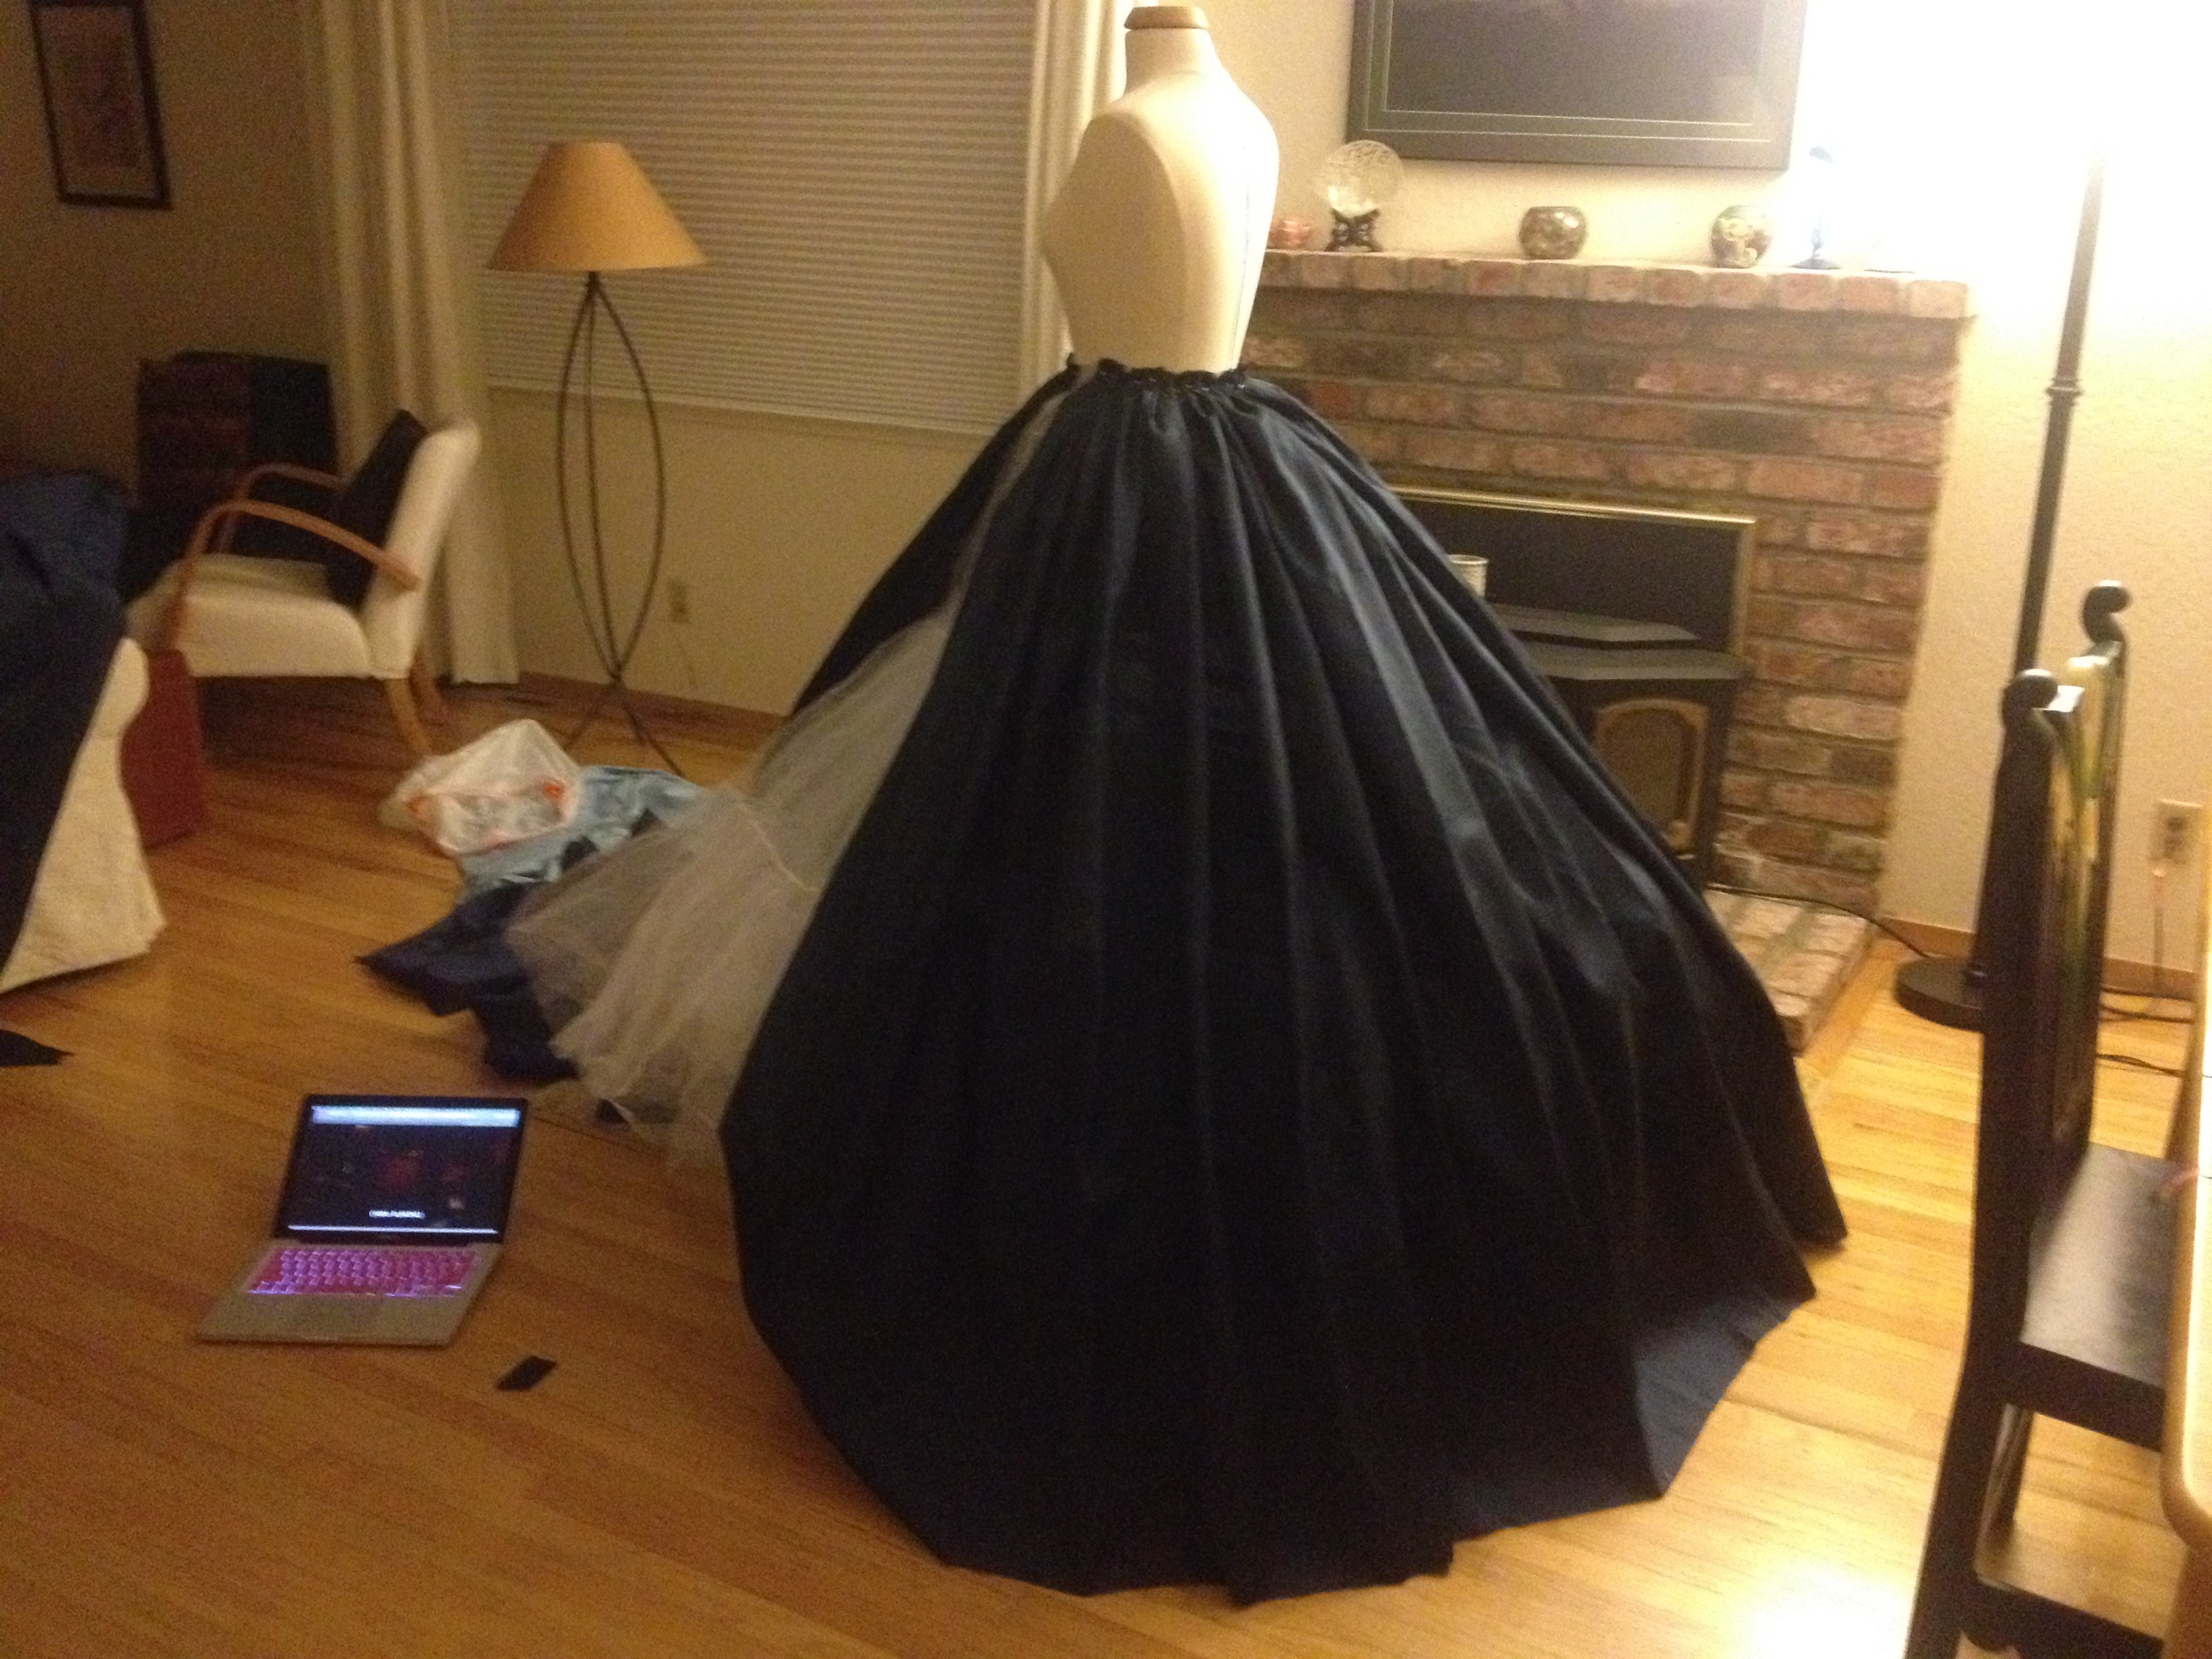
And here’s a back shot of the (semi)finished gown! I’ll write about making the bodice next week.
*Made in early 2015, won Novice Craftsmanship at Fanime 2015*
This post was originally written in September 2015
~~~
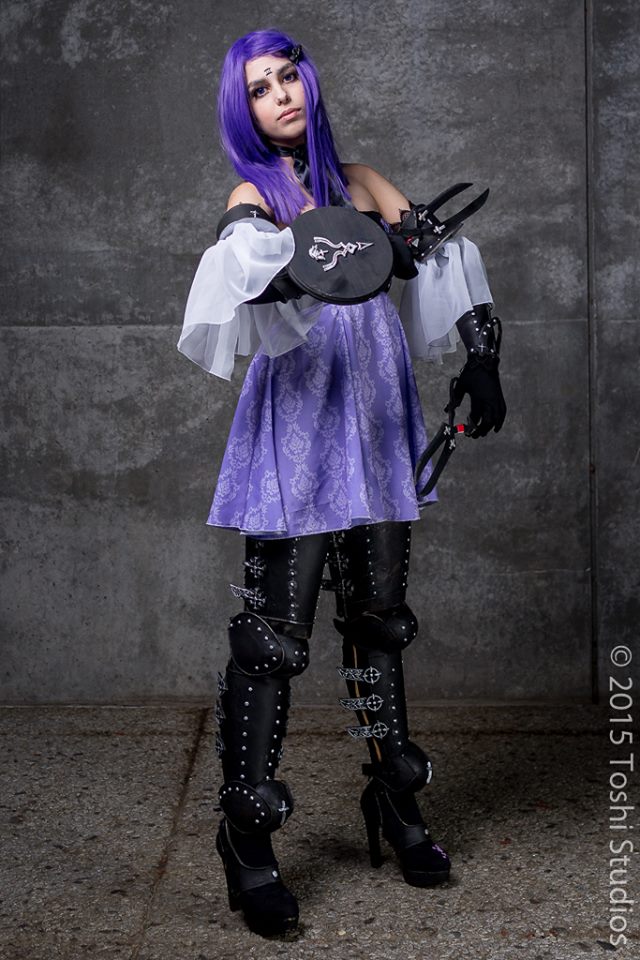
Let me preface this by saying that Lady Three is the largest project I have attempted to date! It required multiple techniques that I was unfamiliar with and also a whole lot of planning– which I completely failed at, but we’ll get to that later. In February I decided I would enter this costumes in the Fanime 2015 masquerade with a group. I actually began the costume in early March (mistake #1). A costume of this caliber, given my lack of experience and busy schedule, needed MUCH more time allotted.
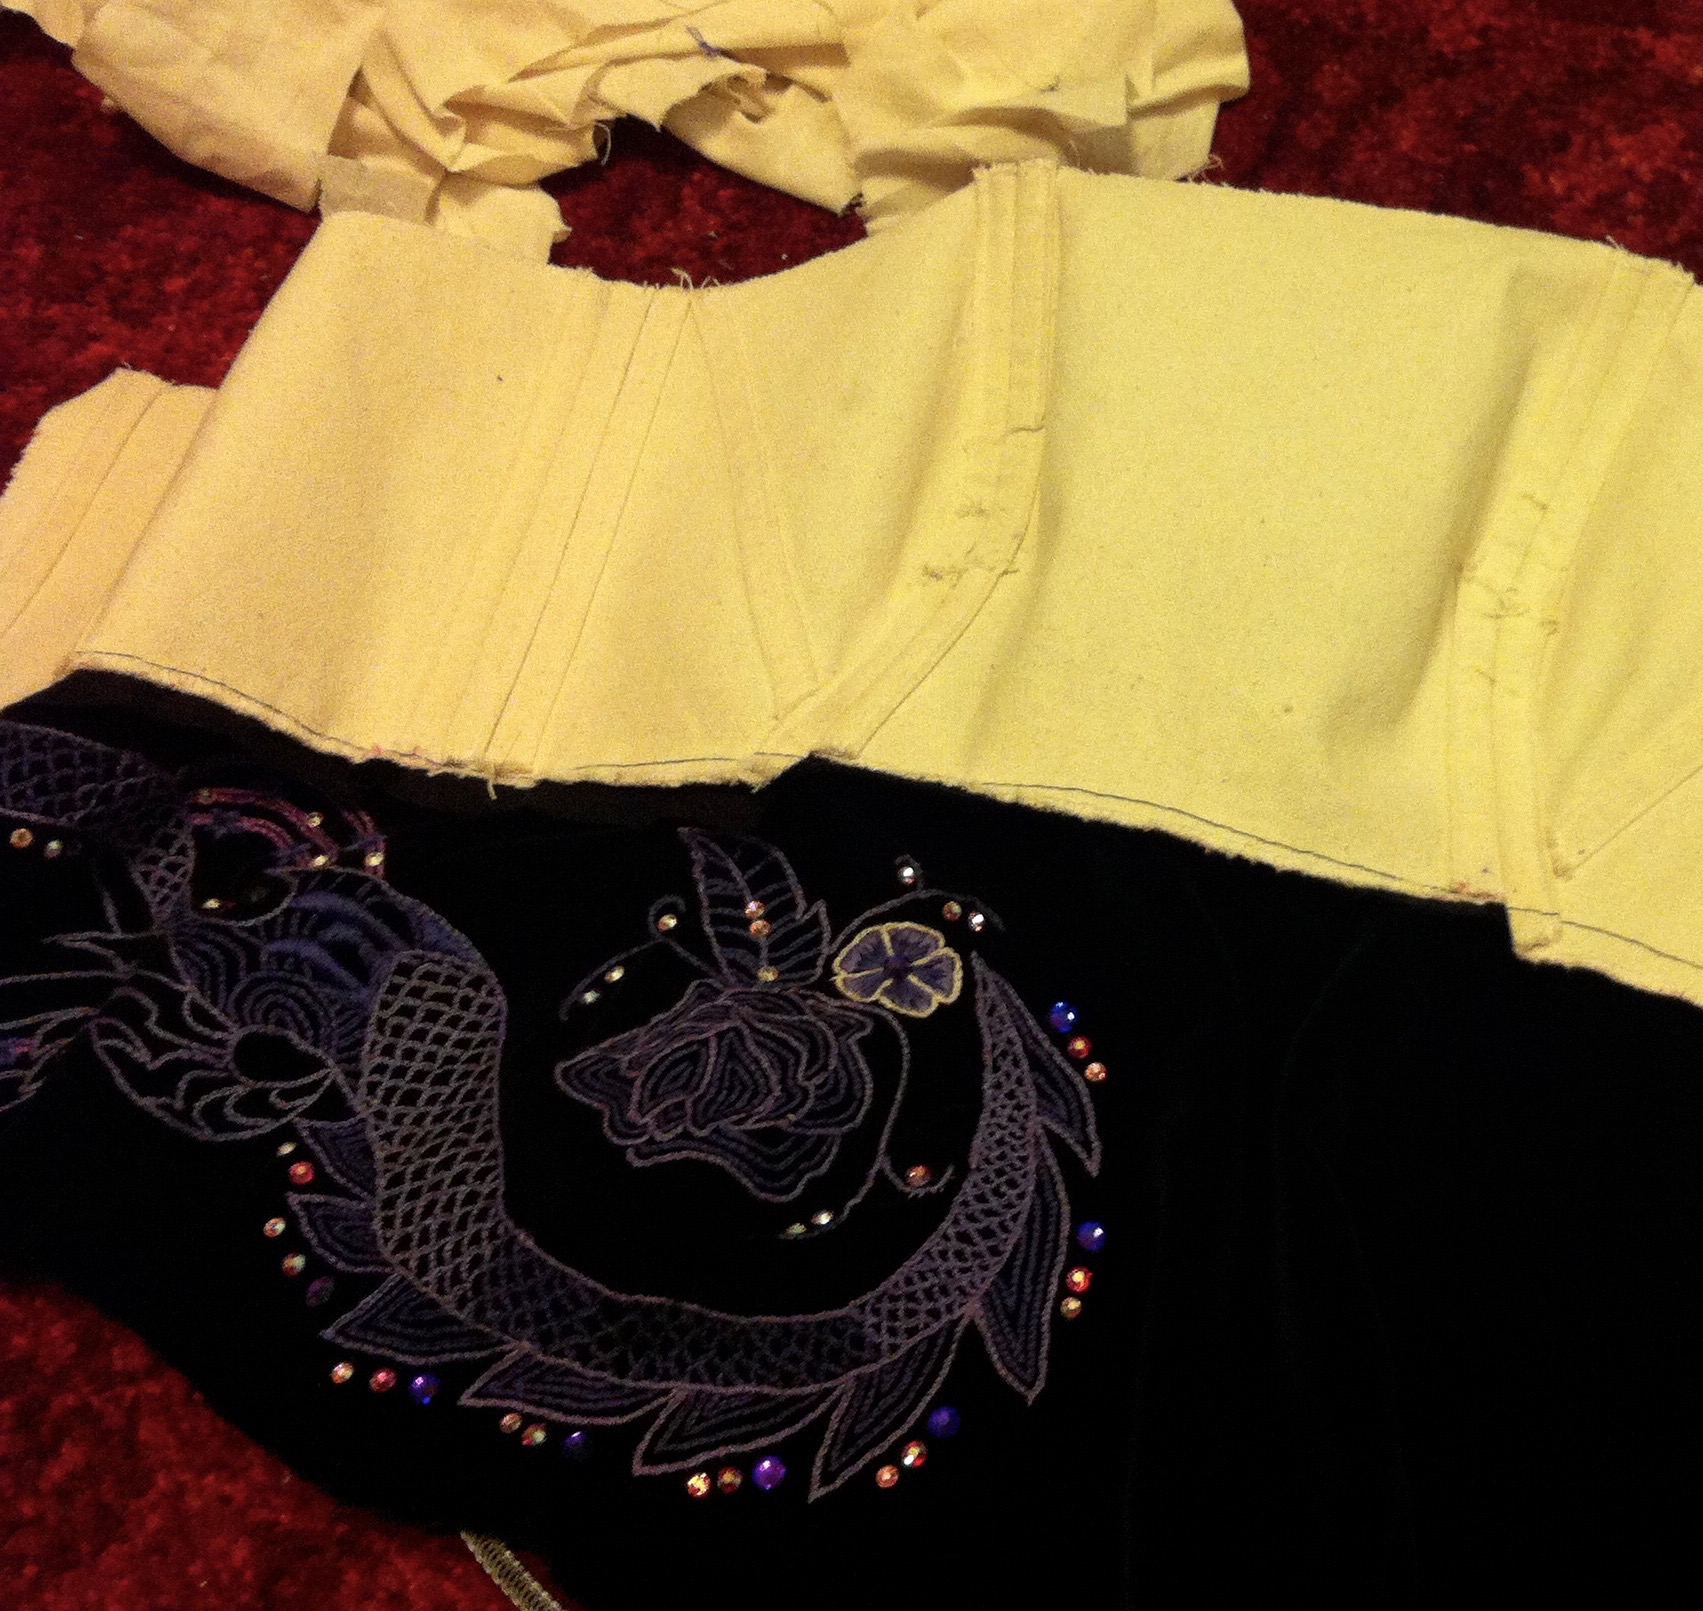
I decided that it would be easiest to start with the dress. I knew that I wanted the bodice to be velvet; I really like the way dark velvet has a tendency to absorb light in photos, so I used the nice black Premier velvet from JoAnn for the fashion layer (unfortunately, it’s since been discontinued– microsuede would be a nice replacement though). I drafted the pattern for the entire dress in about 10 minutes. Since it is strapless, and I wanted plenty of support, I boned the bodice. I used duck canvas for interlining and made boning channels out of the scraps, then boned them with a mixture of spiral and flat steels that I had purchased for a future project.
You can see the canvas layer with the velvet layer attached at the bottom!
There’s a design on her bodice that is really quite detailed but hard to make out, so I referenced Shmuberry‘s beautiful Three cosplay for the basic design. I had never embroidered anything before, so I did a lot of research before I started and found out that using a hoop would crush the pile of the velvet– so I just held it in hand. It was not the best way to learn how to embroider!
I drew the outline of the pattern on stabilizer and then stitched that onto the bodice. Once I was done, I tore the stabilizer off and filled the shapes with more details. I used DMC floss in 3 shades of purple and did the whole thing in a two-strand chain stitch with a little satin stitching thrown in here and there. I tried a backstitch, but I preferred the texture of the chain stitch more, and I thought two strands had just enough pop against the velvet.
(Embarrassing story time– The first time I tried this embroidery I started it waaaay too far to the side, but only realized it after I had completed the entire outline, which was about 10 hours of work. I had to rip it out and redo it. That was a sad, sad day.)
Later I found these references from the incomparable Philip Messina on DeviantArt, and realize I needed to expand my embroidery and have it wrap around the entire bodice to the zipper. Which was very upsetting, but eventually I pulled myself together and managed to get back to work.
It was the same process all over again– I think in total I logged over 90 hours into this piece of embroidery. It was my baby for about two months, and I took it (and my floss, and pincushion, and scissors) just about everywhere. I’m pretty sure I became known as “that weird girl who sews in the back” in one of my English lectures. Better yet, it took place in an engineering building so whenever I’d get to class early and work on it in the hall, I’d get some strange looks.
When I was done I decided the whole thing needed more sparkle… so I added crystals. It turned out one of my sister’s old figure skating dresses had used Swarovski crystals in violet and AB– the perfect colors, in fact. Of course, I commandeered all the leftovers that were lying around the house. I used E6000 to glue them on since Gem Tac doesn’t work very well on velvet. Once the embroidery and crystal work were finished, I folded the top of the velvet over the canvas and prick-stitched it together, so the stitches would be invisible on the velvet layer. Then I whipstitched the (red polka dotted! :D) cotton lining in by hand around an invisible zipper.
It’s still a work in progress, but you can see most of it!
By the way, if you’re making a boned bodice do not, for the love of all that is good, use an invisible zipper. The strain is too much for them to handle, as I found out at Fanime– the day before the masquerade. The zipper track separated itself from the tape halfway, meaning that when I went in for craftsmanship judging I was sewn into my dress. Badly and visibly. There are photos on ACParadise if you’re curious. (But actually don’t look it’s pretty embarrassing).
The next thing I made was my gloves, out of a heavy, matte 4 way stretch spandex I got off Amazon. I used this freezer paper stretch glove tutorial. (By the way, freezer paper does not make spandex an upstanding member of the fabric community. It is still evil.)
When I finished the gloves, I painstakingly hand-stitched venice lace to the top of each one. It is very irritating to sew a non-stretchy thing to a stretchy thing. If you can avoid it, you should– it will save your sanity.
Here’s a collage I put on Tumblr of my progress! The skirt fabric is from Spoonflower, and the design is by the lovely Shmuberry. I couldn’t figure out which fabric she used for her skirt, so I went with the silky faille. It was very expensive so I only got two yards (another mistake– due to the shape of the skirt panels they ate yardage, so one of the panels in the back has the design running upside down because i had to flip the pattern piece to make it fit on the fabric). Eventually I did a neat little rolled hem on my serger. I was also trying on my contacts, which ended up being absolutely perfect. They’re the Vassen Lollipop Violet– I can’t recommend the line highly enough, they’re super vibrant and very comfortable!
These were the weird chiffon arm ruffle thingies. They’re just 9″ strips of white poly chiffon, roll hemmed on each edge and then gathered with my new baby, the ruffler foot (it actually pleats, not ruffles, but it looks nice anyways!) They were glued directly onto the bicep armor.
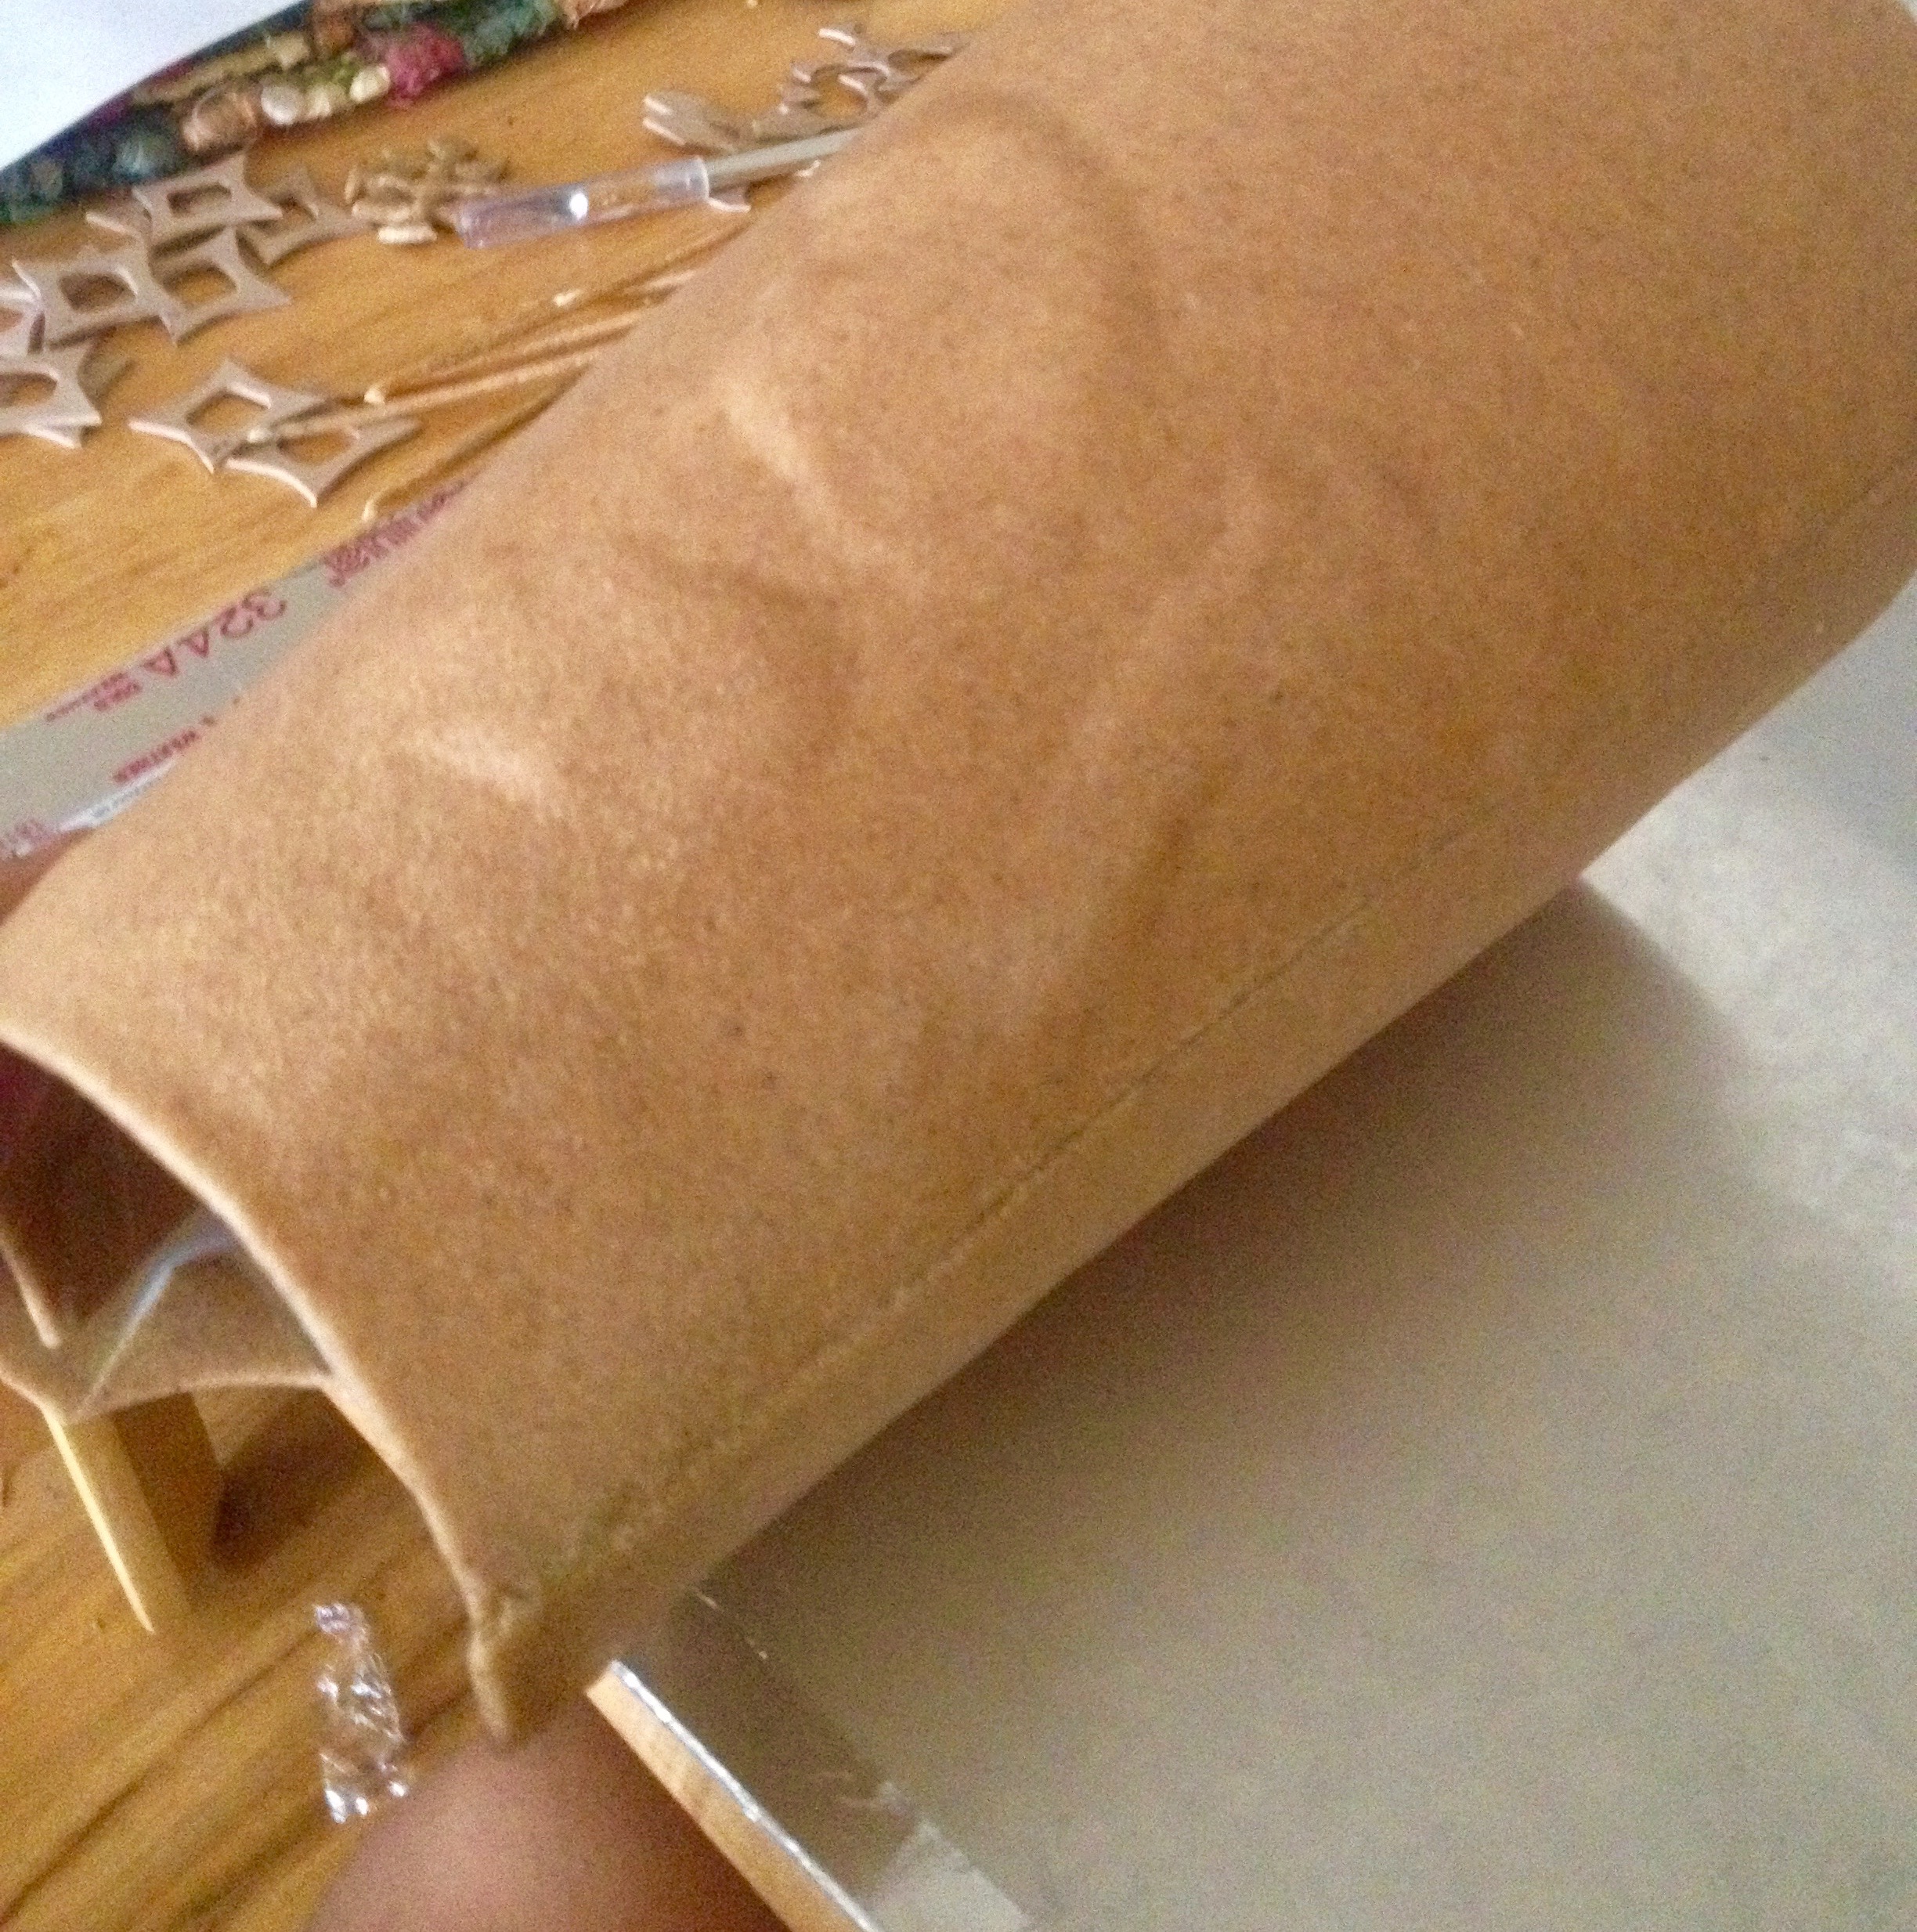
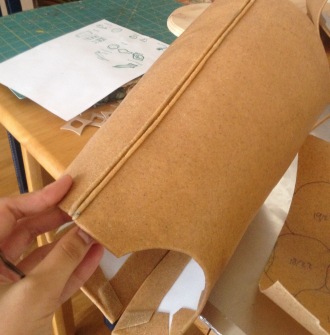
Here’s how I patterned all of my armor! It’s the standard method, but maybe this will help someone~ Shown here is my process for the thigh armor. First I wrapped my leg in plastic wrap, and then layered masking tape over it, and then I drew the desired shapes on with sharpie.
Then I cut the whole thing off of me and cut around the lines that I had drawn on. Here i had to use clear packing tape instead of masking tape halfway through, so don’t be confused by the fact that it’s transparent! Three’s thigh armor has seams on the sides and looks like it curves up in the back, so I did it in two pieces, with a curve in the back.
Then I cut those pieces out of craft foam and laid each of the craft foam pieces over a slightly larger piece of Worbla (shiny side facing toward the foam), and notched the corners/clipped the curved edges. When I heated up each edge and folded it over, they lay nice and flat! It’s kind of like clipping a curved seam when you’re sewing.
Hideous from the back, but very clean from the front! I like this method better than the sandwich method– it’s not as durable, but it uses much less Worbla and you have to deal with far fewer air bubbles.
Then I heated the outside seams up and pressed them together! They don’t stick very well, so I reinforced the inside with extra Worbla patches from my scraps.
Then I heated up the whole thing and formed it around my leg, and then let it cool on my leg so it set in the proper shape. Be careful!!! Worbla gets hot. It helps to have an extra set of hands to ensure it is shaped evenly. Of course, air bubbles will inevitably rear their ugly heads. Just heat each one up individually (to avoid warping the beautiful shape you’ve just set!) and pierce them with pins, and then flatten the bubble until it’s all pretty and smooth again.
Enter a caption
Next comes the masochistic fun part! :’D Details. I used Worbla scraps for most of the details– for example, all of the “piping” on the armor was made from said scraps. I placed them in a little pile, heated them up until they were super hot and squishy, and then rolled them out with my fingers to the desired length/thickness. In retrospect, a metal ruler probably would have been a much better decision! (Yes, I blistered my fingers. No, it wasn’t fun).
For all the little buckle details, I first eyeballed and drew out patterns on cardstock (it was actually the packaging from the tights that I bought for Three! Nothing fancy here). Then I used an exacto knife to cut each little buckle out of foam. The crosses and the star thingies behind them were separate. I believe I needed twelve of these, three for each side of the thigh armor. Forgive my messy board! I spilled glue on it a long time ago, and it’s collected a lot of thread and lint around my sewing machine.
I laid each foam piece over a scrap of worbla, then I heated up another piece until it was extremely malleable and placed it over the first piece and the foam. Using my fingers and fingernails, I traced around the outline of the foam so the hot Worbla on top contoured to the shape underneath. I’m terrible at explaining this step so hopefully the photo speaks for itself! Also, don’t use your fingers. It hurts. A small knitting needle would be perfect for this job. Then I cut the whole thing out with small, sharp scissors (because the two sides were hot, they were glued together by the pressure of the blades).
Then, because I am an incurable masochist (and because I hated how dull and flat they looked), I sculpted even more tiny details to go on top. Please note that this was the night before I was supposed to leave for Fanime and my armor was unfinished and unpainted, but I chose to spend five hours sculpting unnecessary details. Sometimes I could really use a smack upside the head.
Last bit of detailing– rivets. Shown above is about seventy rivets, but I used far more in this armor. Each one was hand-sculpted, a tiny piece of Worbla that was formed into a flat-bottomed dome– i.e., fiddly and extremely time-consuming (it forced us to leave for the con 3 hours late). It would have been waaay smarter to glue on miniature googly eyes.
This is the finished thigh armor! As far as attachments went, I stuck D rings to the inside of the armor with little scraps of Worbla. I was going to hand-stitch elastic to the D rings, but ended up hot-gluing it in the hotel room. What can I say? I really need to work on my time planning skills.
For those of you masochists that intend to attempt this costume in the future, I’d advise making her thigh/shin armor only wrap ¾ of the way around instead of all the way! That last ¼ won’t really show, with the black velcro or elastic over black tights, and it will really help the armor fit well and be adjustable. I may alter my own armor in order to do this, because mine ended up too big ; _ ;
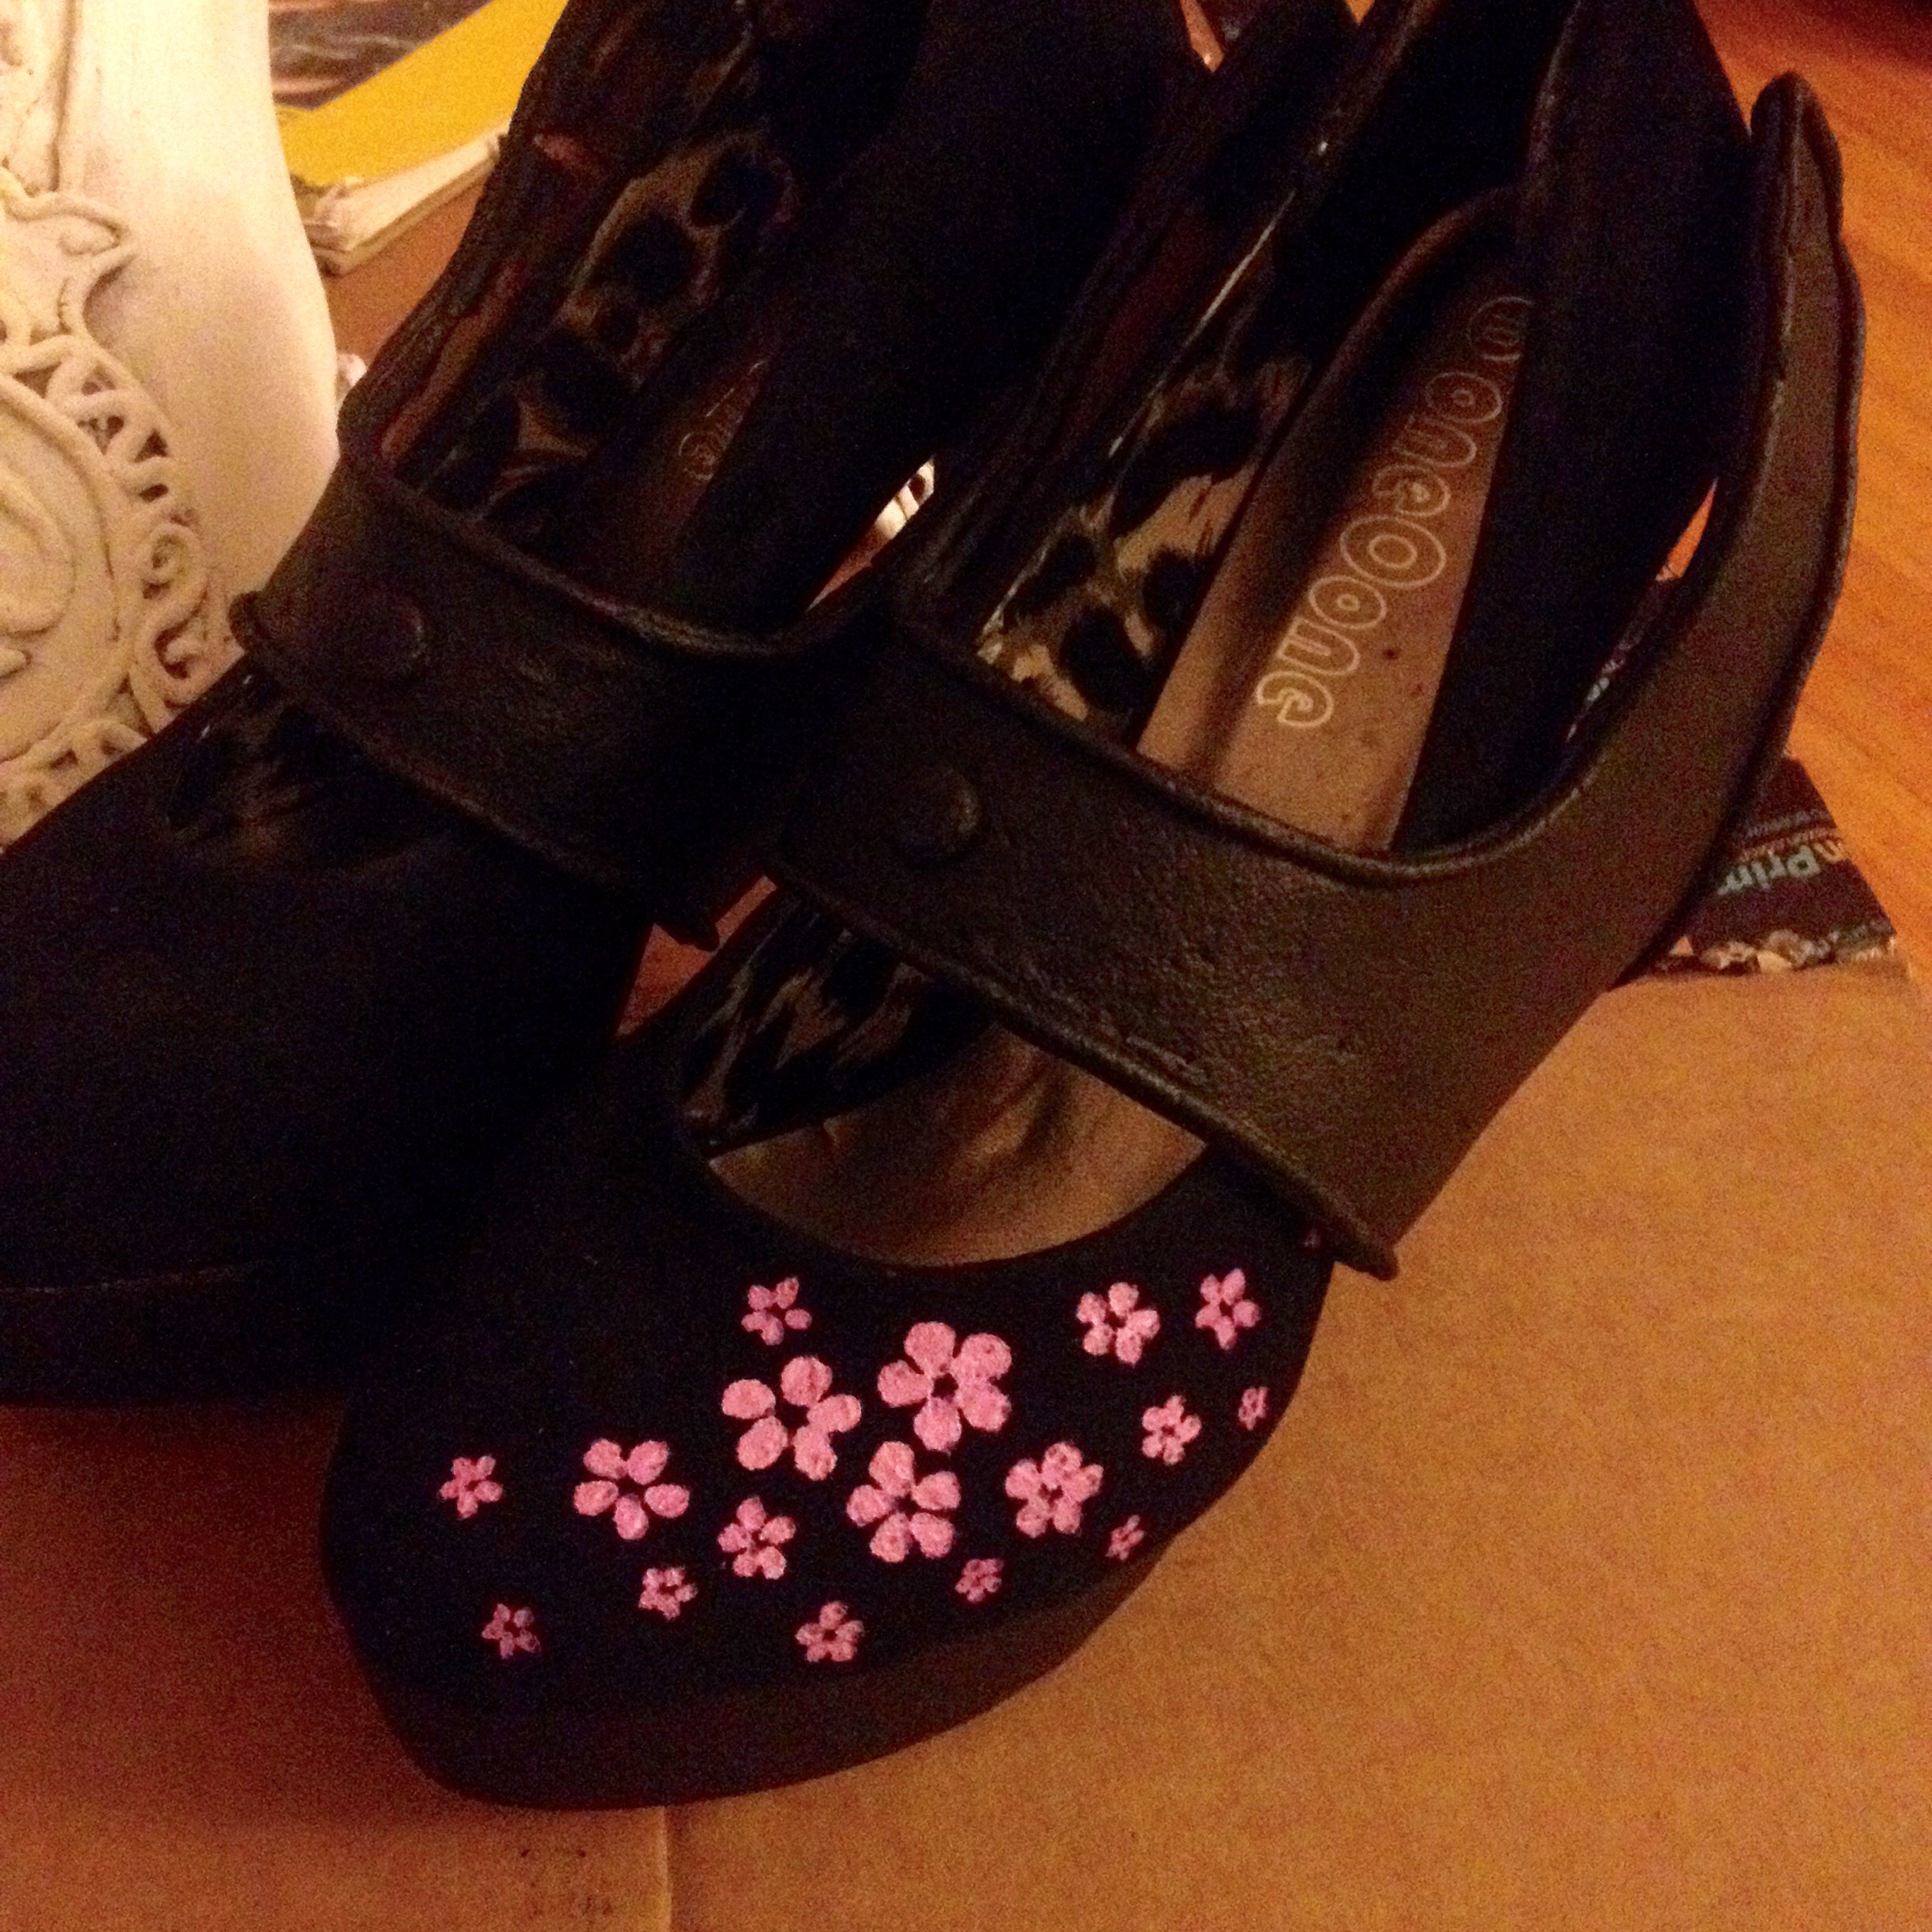
The shoes were cheap eBay heels that initially had a cheetah print platform and heel, which I covered with a single layer of Worbla. Then I made foot armor– it was slightly different than the reference photo, but practical, since I could slide it down to get my foot into the heel and then pull it back up and tie it behind my ankle to ensure extra stability and security in my heels. I covered the seam on the bottom of the foot armor with an extra detail (why did I feel the need to add detail to the bottom of my shoe?! Don’t even ask) and, as pictured below, attached little Worbla snakes along each edge.
Then the left shoe was painted with acrylic paint. My little sister helped me with this part! It was the night before the convention and I was running veeery short on time so she was kind enough to do this part for me. It came out beautifully! Oddly, it’s only Three’s left shoe that’s painted in the game, which bugs me a lot, but obviously at that point I was willing to sacrifice symmetry for time and accuracy!
Here’s my finished forearm armor. Instead of using D rings and elastic it just stays in place by itself (it wraps all the way around my arm with a slight gap). It’s just flexible enough for me to get my arm into, since it’s only one layer of craft foam over Worbla. Something like this would have been impossible with the sandwich method! I added the 3D detail strip thingy (whatever it is!), which is made from the usual layer of craft foam with Worbla folded over it. I then sculpted and attached the crosses on each side, a process which was oddly difficult and annoying. 3D crosses are quite fiddly.
My little detail thingies were too big to fit two of them onto the gauntlets, so I tossed accuracy for the sake of appearance.
Then of course I had to make more of them for the shin armor. For the little spikes that stick out of the “buckles”, I covered a piece of craft foam with Worbla on both sides and added details and edging with tiny Worbla piping. It was extremely time consuming, but oddly fun. To keep them all (mostly) symmetrical I drew the design onto each of them with sharpie and molded the piping along the lines.
There had to be three buckles on each side, so twelve in total– not to mention all the snakes and rivets! It took much longer than you might think to finish these. I used the same method of attachment, D rings and elastic, and it failed just as much. Seriously, I need velcro. @panicstrawberry on Instagram suggested velcroing the armor to tights, which I think is actually genius! It would probably stick much better and not slide/twist as much.
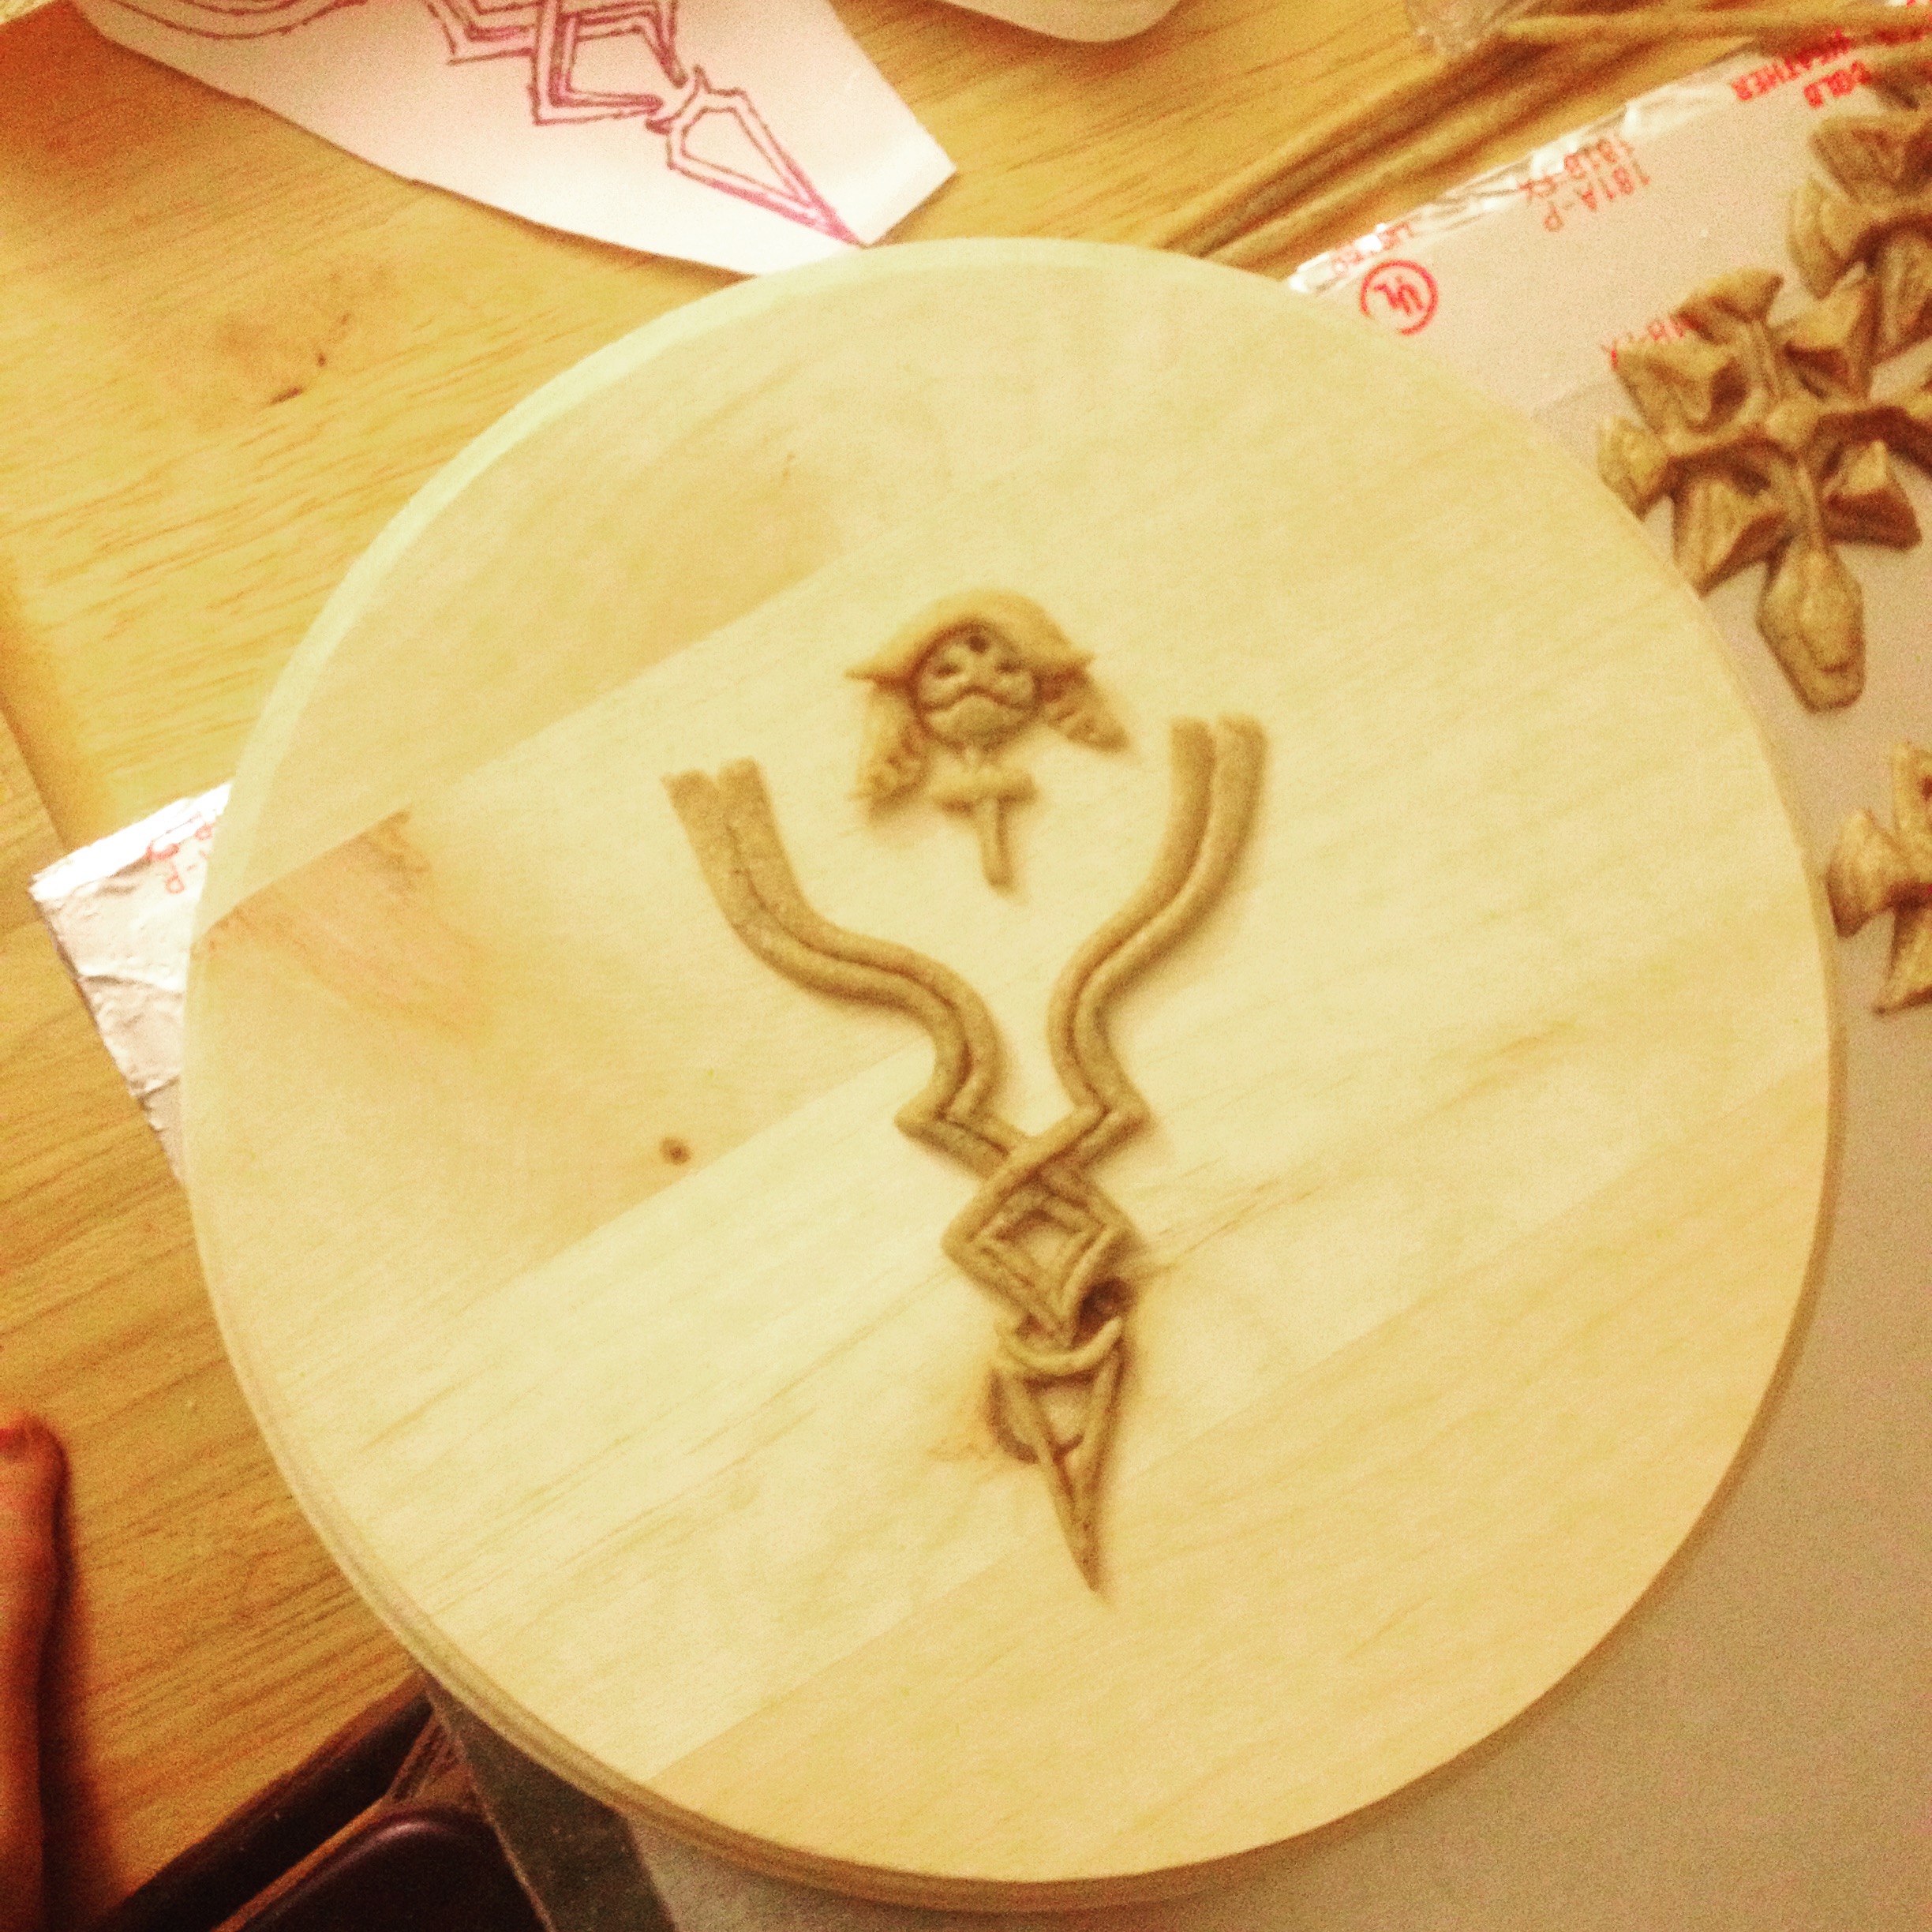
For the shield I found a nice pine plaque at work! I was originally going to build it up to get that domed effect that Three’s shield has– I was thinking of dremeling EVA foam– but I ran out of time. I also didn’t have time to add rivets along the edge. For the detail in the middle, I quickly drew out a pattern on paper, eyeballing it based on the reference photos. My past in illustration definitely came in handy for that! Then I sculpted/molded the Worbla, comparing it to and occasionally forming it on the paper pattern to make sure it was the right size. It ended up looking pretty cool!
The finished Worbla design was glued onto the plaque with E6000. To get it to stay onto my arm I cut a piece of elastic, glued each end to the back of the plaque with a generous amount of hot glue, and had my dad drill a couple of tiny screws through said ends. Surprisingly, it made a very sturdy strap! It lasted all con and still doesn’t show any signs of fraying or giving up. The elastic also made it easy to pull on over those weird 3D straps at the end of each gauntlet.
Hotel room painting. You can see my scissors! I sketched the pattern for one side on paper until I was happy with the shape. The finished blades were cut out of two layers of masonite with a scroll saw, filed and sanded to the right shape, and then glued together. Next time I’ll try screwing them together so they’ll actually open/close, and they are very fragile and definitely need to be remade.
Since I had pulled an all nighter the day before the con to finish my armor, I felt quite horrible the next day. Alas, most of my armor was still unpainted! So my friend and I did a super quick paint job with cheap acrylic. The worbla was unprimed so the paint did chip and rub off a good deal during the con, and absolutely needs to be redone whenever I’m brave enough to dig the costume out again. But the silver parts were done with Rub n Buff so they stayed shiny and beautiful. That stuff is magical.
My wig is this wig from Lucaille, a nice Fate/stay Night one. Though the shipping took aaaaages, the wig is silky, soft, and doesn’t tangle easily. Unfortunately, it is a much brighter grape-y purple and not the lovely grey-purple that was shown in the stock photo. I borrowed my dad’s clippers to trim it, and you can see I had to cut an awful lot off (I’m 5’9″/175 cm, and it came down well past my rear). I would have purchased a shorter one, but the color seemed so perfect! Alas, all lies.
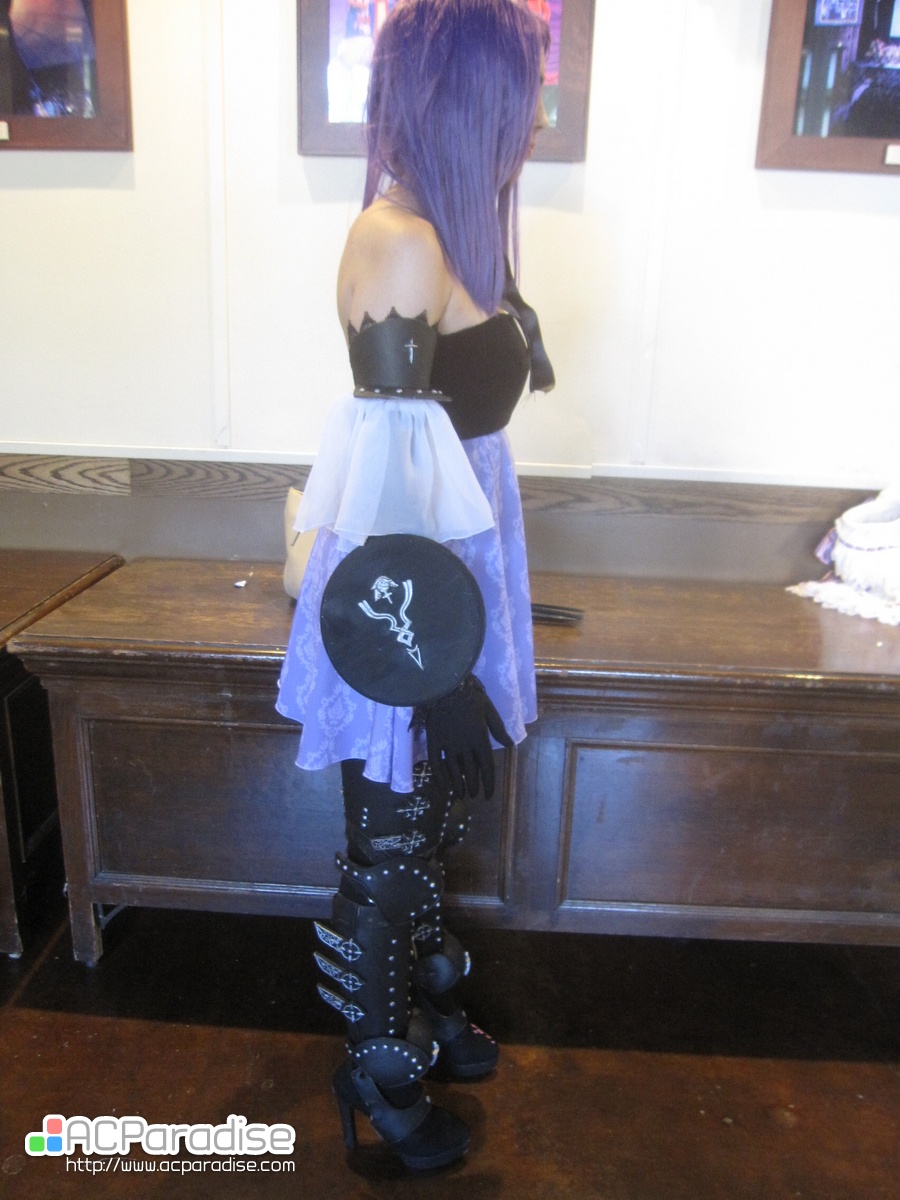
These photos were taken by Wayne of ACParadise during the craftsmanship judging! Please forgive my apparently mismatched eyes, one of my false lashes was actually drooping a bit. I fixed it later!
A side view, and thus far the best photo I have of my leg armor! You can see how my thigh armor is rotating inward in an incredibly irritating fashion. It was also too big (I lost some weight due to stress before and during the con), so it was drooping and supported only by my knee armor, which in turn made me walk like an awkward marionette– which explains a lot about Three!
Also, my feet hurt so badly I wanted to die. PSA– please take care of your feet. The gel pads that were saving my feet from the hard sole of the shoe were also cramming my toes in the toe box until they felt like they were burning. I had numbness for weeks afterwards and I feel like I came off as rude or apathetic to some people because my feet hurt so much! Sorry everyone ; _ ; However, I am very pleased with the way the armor and shoes look in photographs, so I suppose they were worth it after all!
And here’s a photo, taken by the incredible Toshi Studios, of the Drakengard 3 group I met up with after the masquerade! Dito and Lady Zero are Bacon-Flavored Cosplay, and Lady Two is Nutmeg Cosplay, and Lady Five is Mayhem Cosplay! They were incredibly sweet and everyone’s costumes were absolutely gorgeous. Five and Dito were awesomely in character and made me laugh way too often during photos.
Speaking of the masquerade…
I won Novice Craftsmanship! The judges apparently liked my embroidery, which I had actually forgotten about in my armor angst. I was so surprised and pleased– but more than winning, I was super happy to meet everyone backstage! It was my first masquerade experience, and my entire group had pulled out the morning of, so I didn’t really know what I was doing, but people like @_anna_greenwood and @identivitycosplay (on Instagram) were incredibly sweet and friendly, even though I was sort of in awe of their costumes and didn’t really know what to say at first. But the masquerade organizers got me a music clip, helped me choreograph a walk on, and did the lighting, so I ended up having a blast! It was also an amazing opportunity to creep on all of the amazing costumes backstage and ask people about techniques and such. I’m definitely planning to do more masquerades in the future– I’ve been bitten by the competition bug.
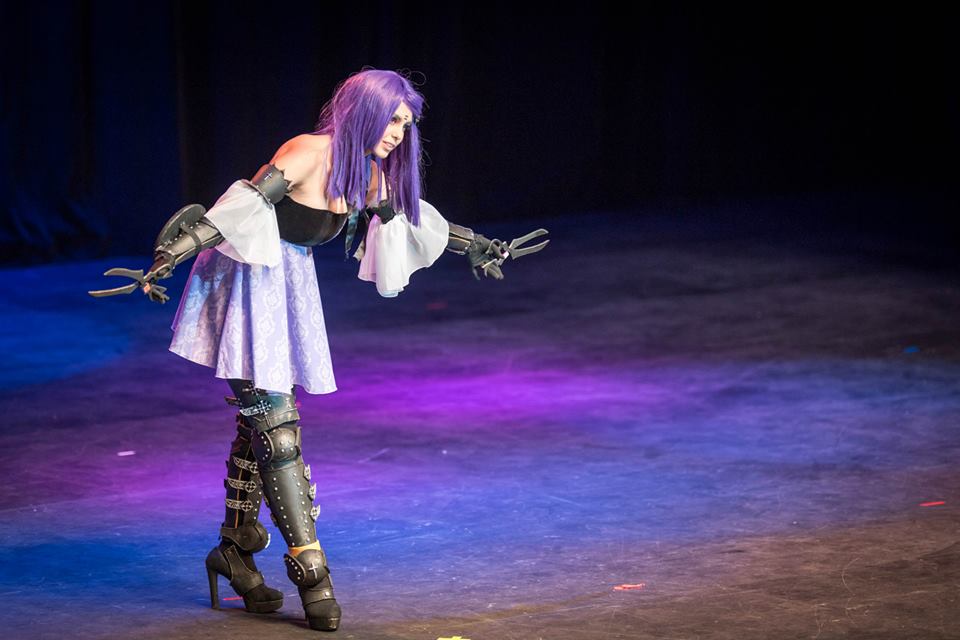
Here’s a video of my walk on, filmed by ACParadise!
And, as proof that my feet were actually completely dead…
Photo by Chad Cosplay
… I accepted my award entirely without footwear. I am a terrible train wreck of a cosplayer. 8D
Well, after over 3.5k words (as of the end of this post) I think I’ve said everything that needs to be said about this costume! It was my baby for months– but I’m ready to let it go and start something new. I’m excited to revamp it, of course, and Three will be making another appearance at SacAnime 2015, but I’m definitely looking forward to applying all the skills I’ve learned– and learn even more. Currently, my cosplay partner and I are working on 1860s inspired ballgowns and secret cosplays for the SacAnime masquerade (which require silk painting), so hopefully we’ll only improve from here on out! I still need to learn more about planning, both financially and temporally, for larger costumes, but this was a very solid beginning, and really taught me a lot. For those of you who want to make Three, I hope this was helpful! Feel free to ask me any questions you might have!


